Porcelain Laminate Veneers Case: Six E.max Press Veneers from Prescription to Seating
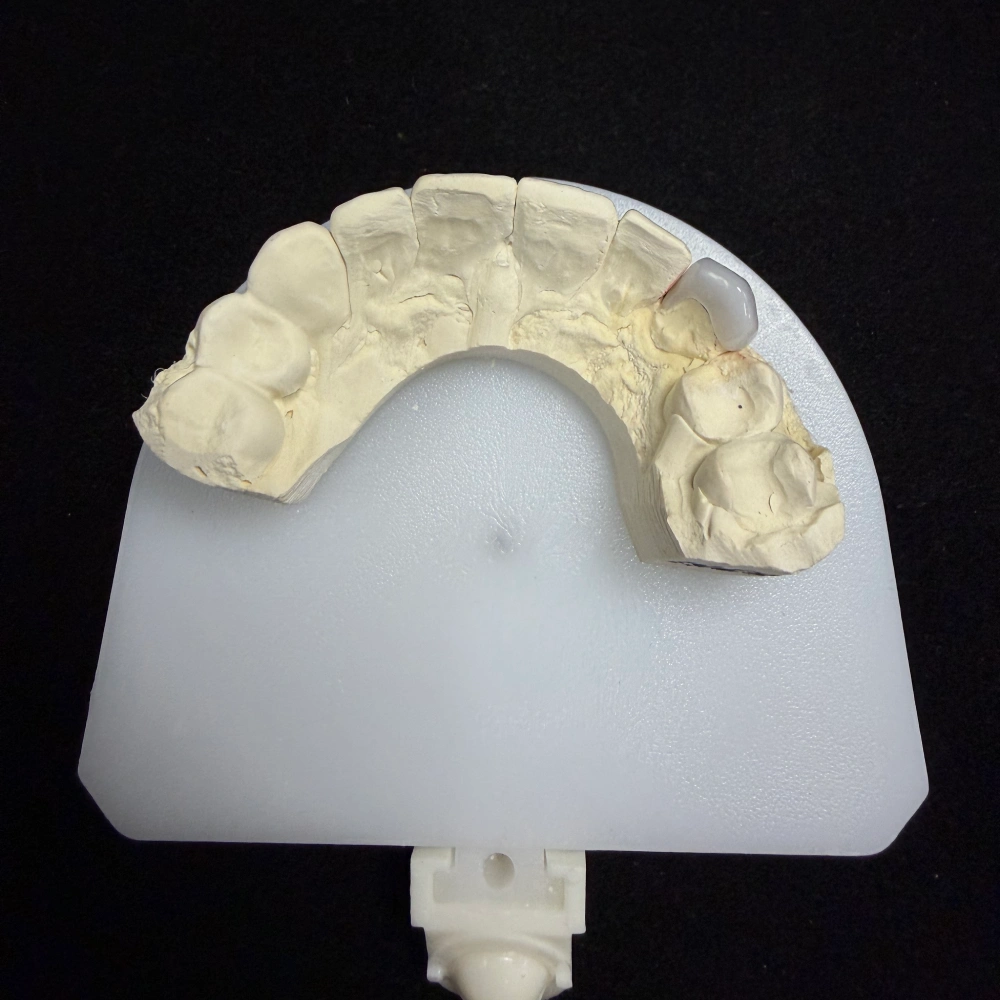
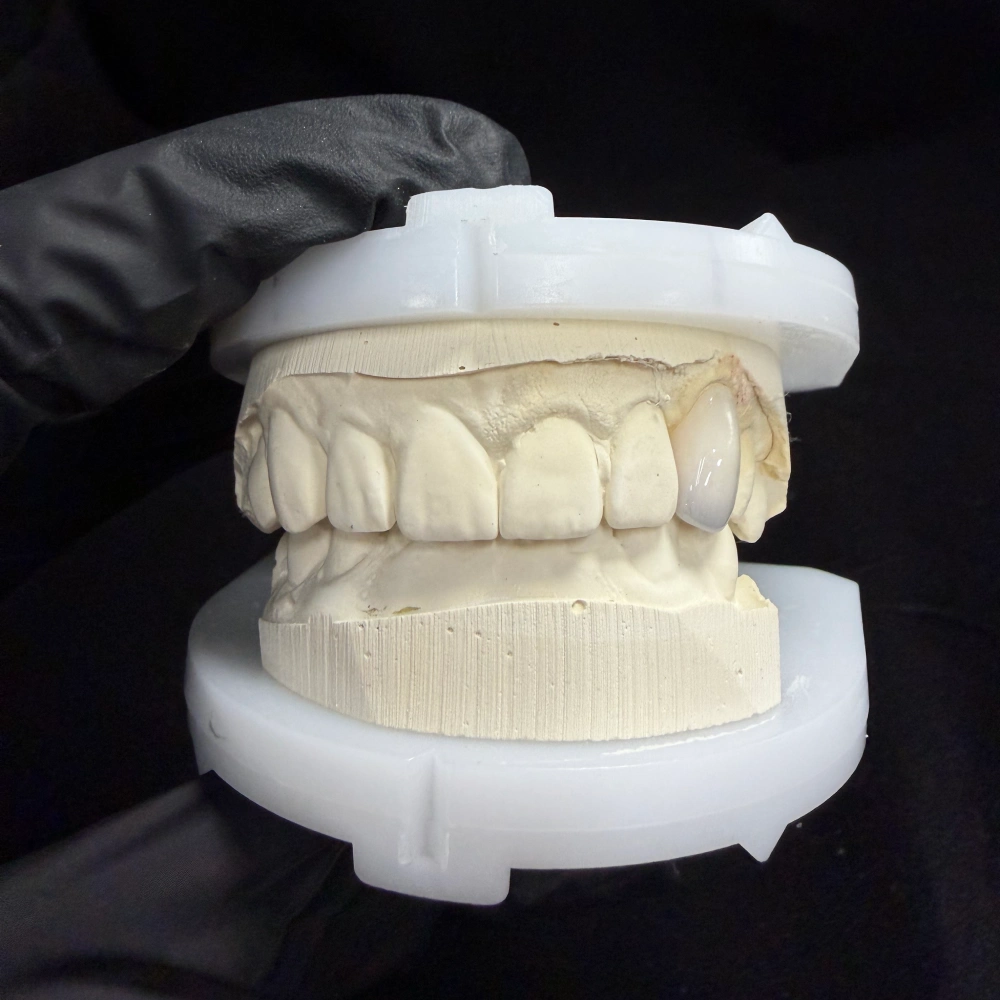
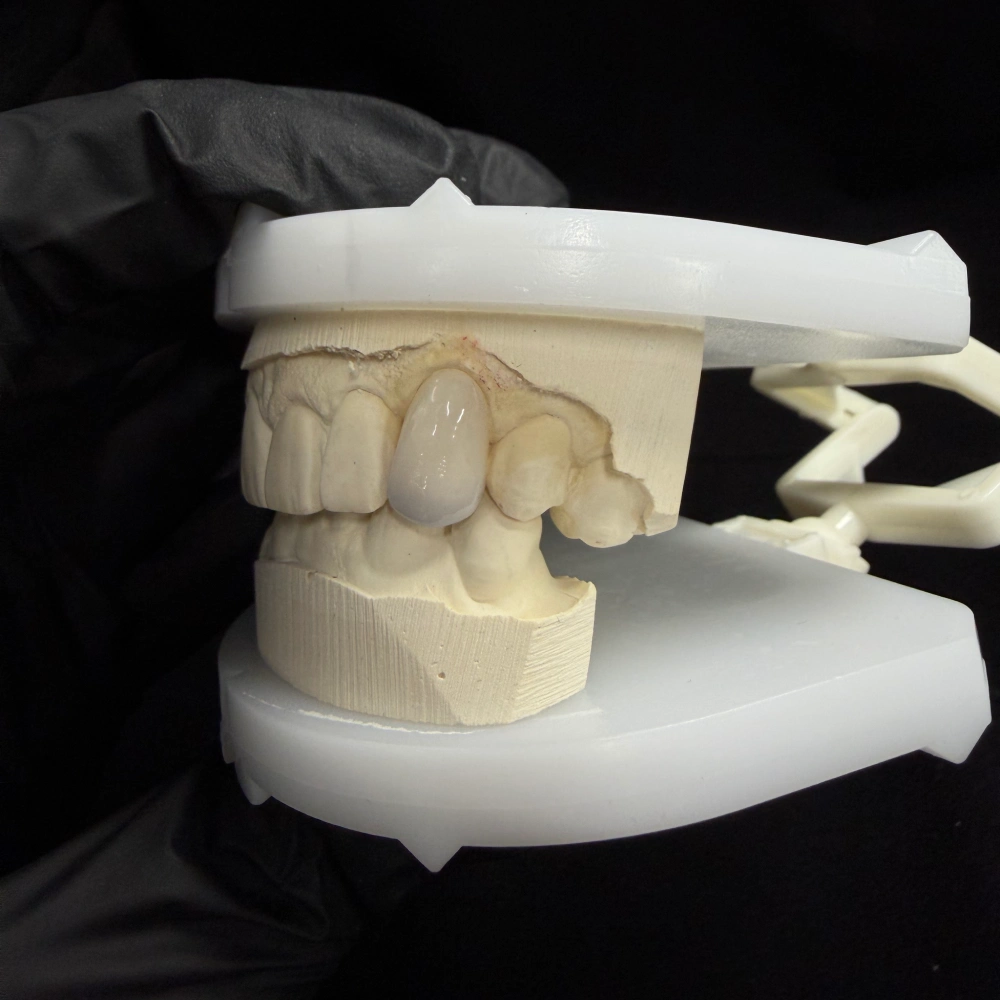
This porcelain laminate veneers case covers six upper front teeth, from the dentist’s prescription to the day they were seated. The patient had gray-yellow staining that whitening only partly lightened, worn incisal edges and a small gap between the centrals.
Below you’ll find what the dentist asked for, where the case got tricky, and the calls our technicians made along the way. The tricky part with thin ceramic veneers is rarely “make it white”. It’s hiding a dark tooth under very little porcelain without the result looking chalky.
Case at a Glance
Here are the key facts of this porcelain veneers case in one place.
| Item | Detail |
|---|---|
| Teeth | #6–#11 (FDI 13–23), 6 units |
| Indications | Tetracycline-type gray-yellow staining, incisal wear, 0.8 mm gap between #8 and #9 |
| Stump shade | C3 on the centrals, C2 on the laterals and canines |
| Target shade | A1, with translucency in the incisal third |
| Preparation | Minimal labial reduction, kept in enamel where possible; butt-joint incisal edge, no palatal wrap |
| Material | IPS e.max Press (lithium disilicate), incisal cut-back and layering |
| Design approval | 2 versions before pressing |
| Lab time | 7 working days, including design approval |
| Try-in | Shade and shape approved; seated without a remake |
Patient Background
The patient is an adult with gray-yellow banding on the upper front teeth, the pattern you typically see with tetracycline staining. In-office and take-home whitening had already been tried. The teeth got a little lighter, but the gray bands stayed.
There were two more complaints. The central incisors looked short because their edges had worn flat, and a 0.8 mm gap sat between #8 and #9. None of the six teeth had old fillings or restorations on the labial surface.
The dentist checked the bite before planning. Overbite and overjet were normal, there was no sign of night grinding, and the patient didn’t report clenching. That mattered, because it kept thin glass-ceramic veneers on the table.
Since the teeth were sound, the dentist chose porcelain laminate veneers instead of crowns. Veneers suit discolored teeth, small gaps under 3 mm and mildly worn or undersized teeth, as long as most of the tooth structure is intact.
What the Dentist Asked For
The prescription came with intraoral scans of the preparations, the pre-op teeth and the opposing arch, a bite scan in maximum intercuspation, and color PLY files. The dentist also sent a full photo set, with the shade tab in the same frame as the stump of each prepared tooth.
Here’s the prescription, broken into the points we worked to:
- Shade A1, but not flat white. Keep visible translucency in the incisal third.
- Hide the gray bands without a chalky, opaque look.
- Lengthen #8 and #9 by about 1 mm to restore the worn edges.
- Close the 0.8 mm gap, split evenly: 0.4 mm on each central.
- Keep the laterals a bit shorter than the centrals, with open incisal embrasures.
- Minimal prep. Labial reduction stays in enamel where possible; butt-joint incisal edge, no palatal wrap.
- Show me the design before you press.
The prep design was the dentist’s call. Our job was to build porcelain veneers that fit that prep, not to ask for a different one unless the numbers forced it.
The Technical Problem: A Dark Stump Under Very Thin Porcelain
Put points 1, 2 and 6 side by side and you get the whole difficulty of this case. A C3 stump, an A1 target and very little room.
When we measured the prep scans, labial reduction was about 0.5 mm in the middle third. At the cervical third of the canines, #6 and #11, it came down to about 0.3 mm. That’s very little room for ceramic veneers over a gray tooth.
Every obvious fix has a cost:
- More opacity blocks the gray but kills translucency. That’s where the chalky look comes from.
- More thickness without more reduction pushes the veneers out, so the teeth look bulky and the cervical contour traps plaque.
- More reduction means going into dentin, which is darker and a weaker bonding surface.
That last point is why the dentist kept the prep in enamel, and why we didn’t simply ask for more reduction everywhere. A systematic review of 6,500 porcelain laminate veneers found that fractures and debonds cluster in the first two years after bonding. Bonding to enamel is more reliable than bonding to dentin, so the masking had to come from how we built the ceramic, not from extra depth.
How We Met the Dentist’s Requirements
Step 1: Data Check and Stump Shade Reading
Before any design work, our team checked the scans and photos. The margins were clear, the bite scan was complete, and the PLY color data held up against the photos.
For veneers, the stump shade drives the whole plan. A veneer is thin, so the color of the prepared tooth shows through. Our technicians use the stump photo to decide how much masking each tooth needs. Here that meant two masking levels: heavier on the C3 centrals, lighter on the C2 laterals and canines.
Step 2: Digital Wax-Up and Two Rounds of Design Approval
Anterior veneer cases are designed and approved before production at ASD. We built a digital wax-up from the pre-op scan, the photos and the dentist’s notes on length, gap and proportions.
Version 1 lengthened #8 and #9 by 1 mm and closed the gap at 0.4 mm per side. The dentist marked two changes right on the design image:
- The laterals looked too long against the new centrals. Shorten them by about 0.5 mm.
- The central edges were too straight. Round the distal corners slightly.
Version 2 made both changes, and the dentist approved it the same day. We talked it through in a WhatsApp group with a case manager on our side. Design approval added one working day to this case; it usually adds 1 to 2.
Step 3: Choosing the Ceramic Veneers Material and Route
The dentist prescribed lithium disilicate, and we pressed the veneers in IPS e.max Press. Pressing is our route for E.max veneers. E.max is our first choice for anterior veneers when there’s enough thickness for it, and we’re careful with it on bruxers.
Lithium disilicate ceramic veneers are etched and bonded with resin cement, such as Variolink or RelyX Ultimate. That bonded interface is part of why this material works at veneer thickness.
For context on glass-ceramic veneers in general, a meta-analysis of feldspathic and glass-ceramic laminate veneers reported 94% survival for glass-ceramic versus 87% for feldspathic at a median of about nine years. That’s population data from clinical studies, not a prediction for this or any single patient.
The material call we did own was the ingot. With a C3 stump and about 0.5 mm of room, a highly translucent ingot would have let the gray through. We pressed the cores in a more opaque ingot for masking, then cut back the incisal third to rebuild translucency by hand.
Step 4: The Layering Plan
The shade plan always starts from the stump. Then we set the target and plan the layers: internal, dentin, enamel and opalescent. Here’s how that played out on this case:
| Layer | Job on this case | Where it sits |
|---|---|---|
| Pressed core (opaque ingot) | Blocks the gray bands and sets the body shade | Full labial surface, thickest on #8 and #9 |
| Dentin layer | Brings the body to A1 and adds warmth at the cervical | Cervical and middle thirds |
| Incisal translucent layer | Gives back the translucency the core removed | Incisal third, after cut-back |
| Opalescent layer | Adds a light halo at the incisal edge | Thin band along the edge |
| Internal stains | Faint mamelon hints so the centrals don’t look flat | Inside the incisal third of #8 and #9 |
Each layer’s porcelain, placement, thickness and firing settings went on the case record. If one of these veneers ever needs to be remade, the technician starts from that record instead of guessing.
The canine problem. At about 0.3 mm on the cervical third of #6 and #11, there was no room for both a masking core and a dentin layer. When space is that short, strength comes first: we cut back the veneering, accept some loss of translucency, and tell the dentist.
We sent the dentist a note with the measured thickness. Since the canines’ stump was C2, not C3, we agreed to keep the prep as it was and accept a slightly more opaque cervical third on those two teeth.
Step 5: Keeping Six Units Consistent
Six porcelain veneers in one smile have to read as one set. We pressed all six from one ingot batch, fired them on the same program, and kept them with one technician team. Every unit was checked against the approved shade reference and design file, then against the others, for color, translucency and form.
Step 6: Quality Checks Before Shipping
Every case passes three QC checkpoints, and esthetic cases get an extra review. On this case:
- Shade checked under standardized light, before and after firing
- Contacts, margins and occlusion rechecked after glazing
- Finished porcelain laminate veneers compared with approved version 2 using a digital overlay of the design
Prescription vs Lab Decisions
This table sums up how the prescription turned into lab decisions on these porcelain laminate veneers: what the dentist asked for, what we did, and the option we passed on.
| Dentist asked for | What we did | What we didn’t do, and why |
|---|---|---|
| A1, not flat white | Opaque pressed core, then incisal cut-back and translucent layering | Didn’t use one translucent ingot: the C3 stump would show through |
| Hide the gray bands | Two masking levels, set by each tooth’s stump shade | Didn’t add bulk: the veneers would look over-contoured |
| Lengthen #8 and #9 by 1 mm | Built into the wax-up and approved in version 2 | Didn’t guess length after pressing: changes are made at design stage |
| Close the 0.8 mm gap | 0.4 mm added on the mesial of each central | Didn’t put it all on one tooth: the centrals would end up different widths |
| Laterals shorter than centrals | Shortened about 0.5 mm in version 2 after the dentist’s mark-up | — |
| Minimal prep in enamel | Worked within the prep; flagged the 0.3 mm canine cervical | Didn’t ask for deeper prep everywhere: more dentin, darker base |
| See the design first | Two design versions; pressing started after approval | — |
The Finished Porcelain Veneers: Design Goals and Result
Here’s how the finished porcelain veneers lined up with the prescription:
- Gap: the 0.8 mm diastema between #8 and #9 is closed, and the two centrals match in width.
- Length: #8 and #9 are about 1 mm longer than before, and the laterals sit shorter than the centrals, as approved in version 2.
- Shade: A1 body with visible translucency and a light halo at the incisal edge.
- Masking: at try-in, the gray bands didn’t show through on any of the six teeth.
The dentist tried the veneers in with try-in paste before bonding and approved shade and shape at that visit. The six porcelain veneers were then bonded, with a routine bite check chairside. No unit came back for a remake.
The canines’ cervical third is a touch more opaque than the centrals, as agreed during production. In the dentist’s photos it blends at normal speaking distance.
What We’d Flag on a Case Like This
- A darker stump changes the plan. If the centrals had been darker than C3 with the same 0.5 mm of room, we’d raise it before production. Options would be more reduction or a different approach, and that decision belongs to the dentist.
- A grinder changes the material. This patient didn’t grind. With heavy bite forces or bruxism, we’d talk about zirconia veneers and a night guard.
- The stump photo matters most. Thin ceramic veneers pick up the stump color, and phone photos distort color. Use a 5500 K ring or twin flash, with the shade tab in the same frame as the target and adjacent teeth.
Turnaround, Warranty and Shipping
These porcelain veneers spent 7 working days in our lab: 2 days on the digital wax-up, 1 day on the design revision, and 4 days to press, layer, fire and check. A layered final restoration usually takes 3 to 5 working days, and design approval adds 1 to 2.
Our ceramic veneers come with a 3-year warranty. We pay return shipping on finished work, remakes included. If a veneer chips but the fit was good, we can remake it from the data on file.
Send Us a Similar Porcelain Laminate Veneers Case
If you have a veneer case with a dark stump, limited room or a gap to close, here’s what helps us most:
- Photos: full smile, rest position, profile, intraoral, and shade photos with the tab in frame
- The stump shade of each prepared tooth
- Scans: preparations, opposing arch, pre-op, and a bite in maximum intercuspation; PLY with color for esthetic cases
- Notes on shade, translucency, incisal effects, proportions, midline and smile line
Want to see how we’d handle yours? Send us a trial case, or request our price list. You can find more on E.max Veneer page, Zirconia Veneer page, and digital workflow page.
ASD Dental Lab is an FDA-registered establishment, Registration Number 3039441248. You can verify our registration in the FDA database. Case details describe this restoration only and aren’t a prediction of clinical outcomes for other patients.