PFM Preparation and Lab Workflow: A Complete Guide for Dental Professionals
The prep is where a PFM crown is won or lost. Get the reduction right and the lab has everything it needs. Get it wrong by half a millimeter and no amount of skill on our end will save the case.
This walks through both halves of the job: how much tooth structure to take off, how to confirm you actually took it off, and then what happens to the case after it leaves your office.
Table of Contents
Why PFM Still Matters in 2026
You get told “nobody does PFM anymore.” Somebody says that every few months, usually a dentist who hasn’t seen a fractured zirconia connector.
It’s not true. PFM holds onto specific jobs:
- Long-span posterior bridges past about three units. A cast metal framework gives you connectors that hold. Zirconia connectors are the weak point, and labs I’ve talked to will tell you that’s where they see failures.
- Second molars with tight clearance. Drop to a metal occlusal and you can work with 1.0–1.5 mm instead of 2.0 mm. On a short clinical crown that 0.5 mm is the whole ballgame.
- Deep subgingival margins. Cast metal edges seal better than milled ceramic. If a margin is going subgingival, that’s worth thinking about.
- The metal-to-porcelain bond. It’s genuinely stronger than zirconia-to-porcelain. That difference shows up as chipping rates, and it’s a big part of why layered zirconia disappoints people.
A national survey of U.S. dentists found 66% still choose 2.0 mm reduction for PFM and 25% choose 1.5 mm. Whatever the material fashion, clinicians aren’t abandoning this prep.
Part 1: Tooth Preparation
Occlusal Reduction
Four numbers do most of the work:
| Location | Clearance | Notes |
| Functional cusp (max lingual / mand buccal) | 1.5–2.0 mm | The one that matters. Under-prep here is where porcelain chips off |
| Nonfunctional cusp | 1.0–1.5 mm | Can go a bit thinner |
| Metal occlusal | 1.0–1.5 mm | Your escape hatch when space is tight |
| Porcelain occlusal | 1.5–2.0 mm | Full thickness, no shortcuts |
The functional cusp definition trips people up. It’s the lingual cusps on upper posteriors and the buccal cusps on lower posteriors — the ones taking the principal load in centric. Those need more room than the others.
As for where the space goes, a PFM crown stacks roughly like this: metal coping at 0.3 mm minimum for a single crown (0.5 mm for a bridge abutment), opaque porcelain around 0.2 mm, then body and incisal porcelain making up the rest. That ceramic layer wants 0.7–1.0 mm minimum to survive function.
Add it up and the theoretical floor is about 1.0–1.3 mm. But nobody preps to the theoretical floor. The 1.5–2.0 mm range is where you get working room instead of a coin flip.
Anterior
| Surface | Reduction |
| Incisal edge | 2.0 mm |
| Labial (two-plane) | 1.2–1.5 mm |
| Lingual/palatal | 1.0 mm (metal) / 1.5 mm (porcelain) |
Anterior PFM usually gets a porcelain butt margin labially, which means a shoulder about 0.8–1.2 mm wide. Its job is hiding the metal collar so you don’t get a grey line at the gumline.
On the lingual side you go chamfer, around 0.5–0.8 mm. Metal back there, so no need to reserve porcelain thickness.
Axial reduction runs 1.0–1.5 mm with 5–10° total convergence. Round every internal line angle. Sharp angles concentrate stress inside the porcelain and that’s where cracks start.
Verification: Confirming You Actually Got There
Under-prepped cases are the leading cause of remakes. The frustrating part is that you often can’t tell until the crown is back in your hand.
A few things that work:
Depth-cutting burs are the fastest check. Use 2.0 mm for the cusps and step up to 2.5 mm for central grooves, since that’s where the bur tends to ride up. Cut your depth grooves, reduce to the bottom of them, and stop when the groove disappears.
Ball burnishers in 1.2 mm and 2.0 mm. Rock one gently across the prepped surface with the patient closed. No contact means you’ve got clearance. This takes about five seconds.
A silicone index is more work but it’s the real measurement. Take a putty matrix before you touch the tooth, seat it after, cut a section through it, and measure with a caliper. Under 1.5 mm anywhere is a problem.
PrepCheck gauges if your office has them. Slide it on and read the color bands.
Your temporary crown is an underrated check. If the temp is tissue-paper thin, or has worn a hole through the occlusal before cementation, you didn’t reduce enough. That’s free information and most people throw it away.
The Centric Relation Trap
This one catches experienced clinicians, which is why it’s worth knowing.
You check the bite, everything looks good. Case goes out. Crown comes back and it either doesn’t seat or chips in function. What happened: the mandible was sitting slightly forward while you checked. Real centric relation gives you 0.5–1.0 mm less room than what you saw.
Check in CR, not just maximum intercuspation. Guide the mandible back gently, or have the patient open and close naturally without clenching hard.
Common Prep Failures
| Problem | Root Cause | Fix |
| Porcelain chips off the metal | Functional cusp under-reduced | Add 0.5 mm to the functional cusps |
| Crown looks bulky | Over-tapered or under-reduced axial walls | Bring taper to 6–8°, add 0.2–0.3 mm axial |
| Won’t seat | Sharp line angles or undercuts | Round internal angles, check draw with an explorer |
| Marginal gap | Chamfer too shallow, shoulder inconsistent | Re-prep with a defined finish line bur |
| Second molar won’t fit | Short clinical crown | Metal occlusal PFM saves ~0.5 mm; gold crown is another option |
One analysis of predoctoral preps found that functional cusps come up short far more often than nonfunctional cusps. That tracks with clinical intuition — you’re working blind-ish on a far wall while the near wall is in plain view.
Send-a-Case Checklist
Run through this before the impression leaves the office. Any “no” gets fixed first.
- Occlusal clearance verified (index, depth bur, or burnisher)
- Checked in CR, not just MIP
- Margin clearly defined, no feathered edges
- Internal line angles rounded
- Taper 5–10°
- Temporary crown still has some thickness to it
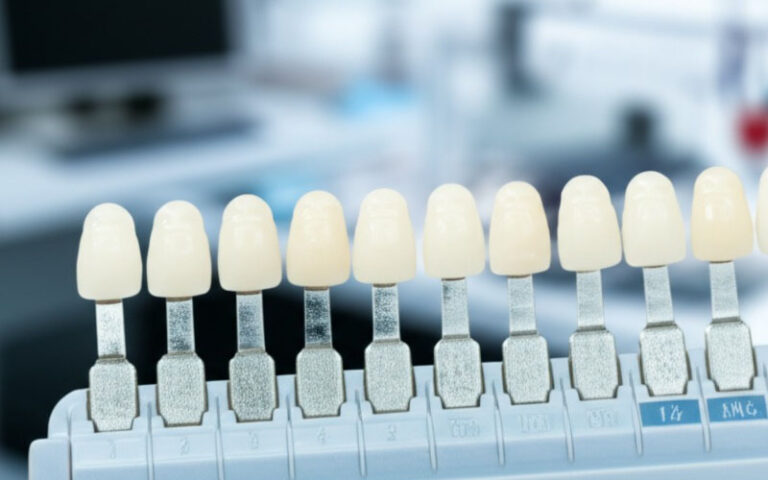
- Shade picked under natural light
- Opposing model or scan included
- Material noted (metal occlusal vs. full porcelain)
Part 2: Inside the Lab
Everything below happens in our own facility. Nothing gets outsourced to a third-party shop.
Receiving and QC (Day 0)
Your scan or impression arrives and a case coordinator goes through it before anyone starts production. They’re checking margin definition, opposing occlusion, and whether the prep clears the minimums we need.
The thresholds: 0.3 mm metal coping clearance, 0.7 mm ceramic over the coping. If a case comes in under that, you’ll get a call and a photo from us before we start — usually we suggest either a metal occlusal surface or coming back for a bit more reduction.
Model and Mounting (Day 0–1)
Digital cases get 3D-printed in resin. Physical impressions get poured in stone. Either way it goes on an articulator with the opposing arch and bite registration.
This is also where we verify the CR you recorded. If the jaw closes differently than you indicated, we contact you rather than guess.
Wax-Up and Metal Framework (Day 1–2)
A technician waxes to ideal anatomy, then it goes one of two routes: lost-wax casting for the metal coping, or CAD/CAM milling if you’re in a zirconia-based restoration instead of PFM.
Coping thickness gets measured with a gauge. Anything under 0.3 mm gets re-cast. A thin coping flexes under load and the porcelain on top of it doesn’t survive that.
Porcelain Layering (Day 2–3)
Opaque first to mask the metal, then dentin porcelain for body color, then incisal porcelain for translucency, then stain and glaze. Each firing has its own temperature curve.
This is where prep problems turn into real choices. If the functional cusp came in 0.3 mm short, the technician can thin the porcelain past spec and hope it holds, or build the crown bulky and deal with the consequences. Neither is good, and both are your prep decision, not theirs.
Our ceramic department runs about 70 technicians who do porcelain and nothing else. They’ve seen every shade problem there is.
Fit Check (Day 3)
Crown goes back on the model. Margin adaptation under magnification, contacts firm but not binding, occlusion hitting evenly in centric and excursions. Anything off goes back to the bench.
We don’t ship a crown that doesn’t fit the model.
Final Polish and QC (Day 3–4)
High gloss for porcelain, satin for a metal occlusal. Then the QC checklist: shade match, anatomy and embrasures, margin integrity, occlusion, no voids or cracks or discoloration anywhere.
Packaging and Shipment (Day 4–5)
Standard turnaround runs 5–7 business days from receipt. Rush is 3–4 days if there’s a slot.
DHL or FedEx with tracking, packed in rigid boxes with foam. Not bubble mailers — those get crushed and everybody has had that surprise.
Why In-House Production Matters
When a single company owns every step, problems get solved in minutes instead of weeks.
If the ceramist spots a prep issue, she walks twenty feet and talks to the wax-up technician directly. Nobody’s sitting on an email to a vendor in another time zone wondering if it got read.
You also get traceability. We control the alloy batch, the porcelain batch, and the firing schedule, so when something does go sideways we can point at a specific furnace cycle. With an outside caster there’s no way to trace it past the shipping label.
Turnaround compresses too. Design, cast, layer, ship happens as one continuous flow instead of waiting on a coping to come back from somewhere else.
Our team is around 460 people — roughly 100 in CAD design, 70 in ceramics, 80 in implant work, 25 in QC. Peak season we push about 15,000 single crowns a month.
Material Decisions
Full porcelain PFM for anterior teeth and anywhere esthetics matter, patients with normal occlusion. Prep requirement: 1.5–2.0 mm occlusal, 2.0 mm incisal.
Metal occlusal PFM for second molars, bruxers, and anything with limited clearance. Prep requirement drops to 1.0–1.5 mm. The tradeoff is visible metal on the chewing surface, so tell the patient before you seat it, not after.
High-noble vs. base metal: high-noble (gold-based) is more biocompatible and easier to adjust, a little softer. Base metal (nickel-chromium, cobalt-chromium) is harder and wears more slowly, costs less. Long-span bridges want a base or semi-precious framework. Single anteriors where you might need to adjust margins are more forgiving in high-noble.
PFM vs. Zirconia
| Factor | PFM | Monolithic Zirconia | Layered Zirconia |
| Minimum occlusal clearance | 1.5–2.0 mm (1.0–1.5 metal occlusal) | 0.5–1.0 mm (high-strength 3Y) | 1.5–2.0 mm |
| Long-span bridges (>3 units) | Strong metal connectors | Can fracture at connectors | Same risk |
| Esthetics | Metal substructure can show through | Fully translucent | Layered, natural look |
| Porcelain chipping | Metal-ceramic bond holds | No porcelain to chip | Weaker zirconia-ceramic bond |
| Cost | $$ | $$ | $$$ |
Zirconia is the right call when you have clearance and want a metal-free result. PFM makes more sense when space is tight, the span is long, or you want the metal-ceramic bond.
Digital Workflow
We take STL files (iTero, CEREC, 3Shape, Medit all export these), PLY files, and physical impressions — we scan those ourselves with a lab scanner.
Digital cases go up through the case portal. Include the opposing arch scan and a bite registration, digital if you have it. Add notes on shade, material, and whether you want a metal occlusal.
For physical impressions: rigid tray, PVS material, pour the model same-day if you can or ship within 24 hours, packed in something that won’t get crushed.
Common Questions
Can I get away with 1.3 mm if the coping is thinner?
You’d be gambling. Metal has trouble staying rigid much below 0.3 mm, and porcelain still needs ~0.7 mm to survive function. Sometimes it works. Don’t build a habit on it.
Heavy grinder — should I skip PFM?
Opposite of it. Metal occlusal PFM handles bruxism better than monolithic zirconia, which can be abrasive to opposing enamel if it isn’t polished.
Second molar with only 1.2 mm clearance?
Three ways out: metal occlusal PFM (works down to 1.0–1.2 mm), high-translucency zirconia at 0.8–1.0 mm for 3Y or 4Y, or a full gold crown if the patient doesn’t care about how it looks back there.
Do you remake if the crown doesn’t fit?
Yes, no charge, when the problem is our fabrication error. When the prep itself won’t support the restoration, that’s a different conversation and we’ll work through the options with you. Sometimes that means coming back for more reduction. Sometimes it means switching material. We’d rather talk it through than just send it back.
What’s your reject rate?
Under 3%. Most of those are shade changes and patient preference calls, not fit problems.
Resources
- NDPBRN National Survey on Crown Prep Techniques — where the 66%/25% figure comes from
- Porcelain Fused to Metal: Tooth Preparation and Coping Design — the classic 0.3 mm coping and 0.7 mm porcelain reference
- Analysis of Occlusal Clearance in a Predoctoral Clinic — on why functional cusps come up short
- University of Toronto: PFM Preparation on a Posterior Tooth — step-by-step teaching guide
- A Novel Chairside Technique to Assess Interocclusal Clearance — newer verification methods
Want a Second Set of Eyes?
If you’re mid-case and want someone to look at a prep before you commit, send us a photo of the tooth or a screenshot of your scan. We tell you what we see. No charge, no obligation.
Cases: upload through the case portal or email [email protected]
Turnaround: standard 5–7 days, rush 3–4 days if there’s room
Questions: case coordinators are on 9 AM – 6 PM EST, Monday through Friday