Metal Dentures for Front Teeth: Cast Framework Case Study


This case shows how we approached metal dentures for front teeth when the design had to balance retention, smile-zone visibility, hygiene clearance and future adjustability.
The Patient
The patient was in her late fifties. Three upper front teeth were missing — the left central incisor, the right central incisor, and the right lateral incisor. That puts the gap squarely across the midline, which under the Kennedy classification is Class IV: one single anterior span, edentulous space on both sides of the centre line, no other gaps to modify around.
The rest of the dentition was stable. Posterior teeth on both sides — usable as abutments, not mobile, no active gum disease. That matters, because a cast framework depends entirely on having sound tooth structure to grip.
What had been there before. The gap had been filled years earlier with three single-tooth interim acrylic replacements, bonded adhesively. Retention had depended entirely on the bonding surface, and over time the bond had failed unevenly — one tooth would lift, get re-cemented, lift again. The gum contour had become irregular. When she came in, one of the three interim teeth was loose enough that she avoided biting with it.
What she could not live with. The missing front teeth changed how she spoke. Labiodental sounds — /f/, v — were affected, and she was conscious of it in every conversation. The gap showed when she smiled, when she ate in company, when she laughed. Front teeth are not only about esthetics; they sit in the sound pathway and the social display zone at once.
She had looked into fixed options and implant-based routes, but cost and time ruled them out. That left a removable partial denture as the only route to a long-term solution rather than another round of interim bonding.
What the Referring Doctor Asked For
The prescription came in with five obstacles already identified. Each one had turned into a specific design instruction.
| # | Obstacle | If it had been ignored |
| 1 | Clasp visibility — any direct retainer on a front abutment sits inside the smile line | The most common reason this kind of case gets pushed toward flexible plastic by default |
| 2 | The interim had already failed once — adhesive-dependent retention, uneven gum contours | A new appliance built the same way would just repeat the failure |
| 3 | Budget — fixed or implant solutions were not fundable | Removable became the only route to a long-term result |
| 4 | One single path of insertion — a Class IV gap allows no modification space, so every component has to seat along one direction | Retention that looks fine on the model will not seat predictably in the mouth |
| 5 | Low expectation of “metal” — the assumption that any metal framework will be visible | Unaddressed, it becomes the reason the case does not get prescribed at all |
The anatomical and mechanical limits of the Class IV situation drive these constraints, not preference.
The instructions
| Linked obstacle | What the prescription said |
| 1 / 5 | Keep direct retention out of the smile zone. Put the retentive components on the posterior segments. Where a front abutment cannot be avoided, use an I-bar or a tooth-coloured cosmetic clasp, not a circumferential clasp. |
| 4 | Design to one single path of insertion. Send the surveyed path with the undercut markings so the framework seats predictably. |
| 4 | Rest seats on the designated abutments, with three clasps in tripod distribution, including one stress-releasing component. |
| 3 | Cast cobalt-chromium framework. Titanium where nickel sensitivity is a factor. Declare conformity to the metallic materials standard, and declare nickel content where required. |
| 2 | Match tooth and gum shade to the adjacent teeth. Keep the gum contour continuous and avoid heavy gum coverage — hold a 3 mm clearance between connectors and wings and the gum margin. |
| 2 | Leave room for later changes. Keep an acrylic field over any abutment whose long-term outlook is uncertain, so a tooth can be added, or a clasp converted, without soldering work later. |
Component dimensions and clearance figures come from the applicable metallic materials standard and standard partial-denture design references, so the framework is built to a specification rather than to a look.
Metal Front Partial Dentures: Design and Fabrication
Material choice — why cast metal
The first question any referring clinician asks: why not PEEK or a flexible plastic?
For an anterior Class IV gap the esthetic argument for the alternatives is genuinely strong. A PEEK framework rates highest on esthetics in the material set, and its stated indication is exactly the Kennedy III/IV esthetic zone. Flexible thermoplastics show no metal at all. The properties of partial denture framework materials set out that trade-off in detail.
What pushed this case toward a cast framework was rigidity and service life:
| Point | Why it pointed to cast cobalt-chromium |
| Long-term, not interim | The restoration had to keep working for years. PEEK’s stated role includes transitional partials, and its wear data past five years is still limited. |
| Repairable later | A cast framework can take an added clasp, an added tooth, or conversion toward a full denture. Flexible thermoplastics are hard to repair or modify. |
| Load spread | The framework shares load across the remaining teeth instead of concentrating it. |
| Predictable seating | A rigid framework seats along the surveyed path. A flexible base depends on mucosal fit. |
Our material menu for framework work covers cobalt-chromium, Vitallium, titanium, and PEEK, so the decision is made on the case rather than on what happens to be in stock.
Getting retention out of the smile zone
| Option | What it does | Trade-off |
| Retention moved to the posterior | Takes the direct retainer out of the smile zone altogether | Needs sound posterior abutments — satisfied here |
| I-bar instead of a circumferential clasp | Removes the visible buccal arm | Demands a more precise survey |
| R2D2 clasp | Built for upper anterior and canine abutments, removes labial metal display | High technical sensitivity |
| Tooth-coloured cosmetic clasp | A flexible retainer in a pink or translucent shade | Lower strength than metal |
The esthetic clasp options for upper anterior and canine abutments are set out in this overview of alternative clasp designs.
For this case, direct retention was moved to the posterior segments entirely. No clasp arm crossed the smile line.
Hygiene design — the 3 mm clearance rule
All connectors and wings were held 3 mm clear of the gum margin. Broad gum coverage causes inflammation and decay, and older patients carry the highest risk. It is one of very few variables in partial-denture design that materially affects how long the remaining teeth survive. The known limitations of partial dentures address the maintenance side of this design choice directly.
Component placement
| Component | Where it sits | Shows from the front? |
| Direct retainers | On the posterior abutments, outside the smile zone | No |
| Front abutments | Carry rest seats and support; no direct retention | Minimal |
| Rest seats | On the designated abutments in tripod distribution, one of them stress-releasing | Hidden inside the rest preparations |
| Minor connectors and wings | Held 3 mm clear of the gum margin | Do not encroach on the gum display |
| Acrylic field | Over the abutment whose long-term outlook is uncertain | Pink, matched to the adjacent gum |
| Saddle and denture teeth | Replacing the three-unit front span, continuous with the gum contour | Yes — the only portion that must read as the patient’s own teeth |
Fabrication sequence
- Impression and model, with the occlusal relationship recorded
- Survey — path of insertion, undercuts, blockout
- Framework design — rest seat points, clasp type and position, major and minor connector routing
- Design sent for review before any metal is cut — confirmed with the clinician first
- Casting and finishing — investment, burn-out, casting, electrolytic polishing, spot grinding to the surveyed contacts
- Framework try-in — seating, path of insertion, rest seat adaptation confirmed
- Tooth arrangement — shade matched to the adjacent teeth; wax try-in
- Acrylic processing, finishing, delivery, with documentation
Quality control
A partial denture passes through four separate inspection gates, each with its own checklist:
| Gate | What gets checked |
| Model | Framework seats on the model without rocking; castings checked for porosity, cracks and distortion |
| Wax | Tooth position, shade, gum contour, and the design matching what was confirmed |
| Tooth arrangement | Centering, arch form, overjet and overbite, gum line |
| Final | Centric, protrusive and lateral contacts checked, early contacts removed; clasps verified for fit, retention and no occlusal interference; overall polish checked for scratches and burrs; then compared back against the confirmed prescription and design |
The resin and metal are joined mechanically, not chemically. The framework carries a retention mesh, beads or undercuts, the bonding area is sandblasted and cleared of polishing wax, and the acrylic is packed so it flows fully into that structure.
Try-In and Feedback
Framework try-in
The cast cobalt-chromium framework was tried in first, without the acrylic saddle or denture teeth attached. The clinician checked seating along the surveyed path, rest seat adaptation, and clasp retention. The framework seated without rocking, and all three clasps engaged predictably.
Wax try-in
The tooth arrangement was tried in wax. The patient saw the shape, position, and shade of the replacement teeth for the first time. She could speak, smile, and assess the gum line and tooth display before anything was finished in acrylic.
What the patient said. She had expected the framework to be visible when she smiled. When she saw that nothing metal showed from the front, and that the replacement teeth matched the adjacent natural teeth in shade and contour, she said it looked “like my own teeth, not like a denture.” She also said the labiodental sounds felt normal again — she could make f and v sounds without compensating, which had not been the case before.
What the doctor said. The clinician confirmed the occlusion, the gum clearance, and the path of insertion. The design had been reviewed before casting, so there were no surprises at try-in. The one adjustment made was a minor reduction on one clasp arm to reduce retention slightly — the clasp was gripping harder than the patient could comfortably manage during insertion and removal. That adjustment was made at the bench in about two minutes.
Delivery
The finished appliance was delivered with documentation: the design review record, the alloy declaration, and the quality control checklist. The patient was instructed on insertion, removal, and cleaning. She was told to expect an adjustment period — speech would feel slightly different for the first few days, and the appliance would feel bulkier than it actually was until she got used to it.
What happened after delivery. The patient came back once, two weeks later, for a minor occlusal adjustment. This is normal with a new anterior partial denture — the muscles adapt to the new tooth positions over the first couple of weeks, and the bite settles slightly. One early contact in lateral excursion was ground off, and she reported no further issues at the follow-up check three months later.
Metal Partial Dentures for Front Teeth: Final Result
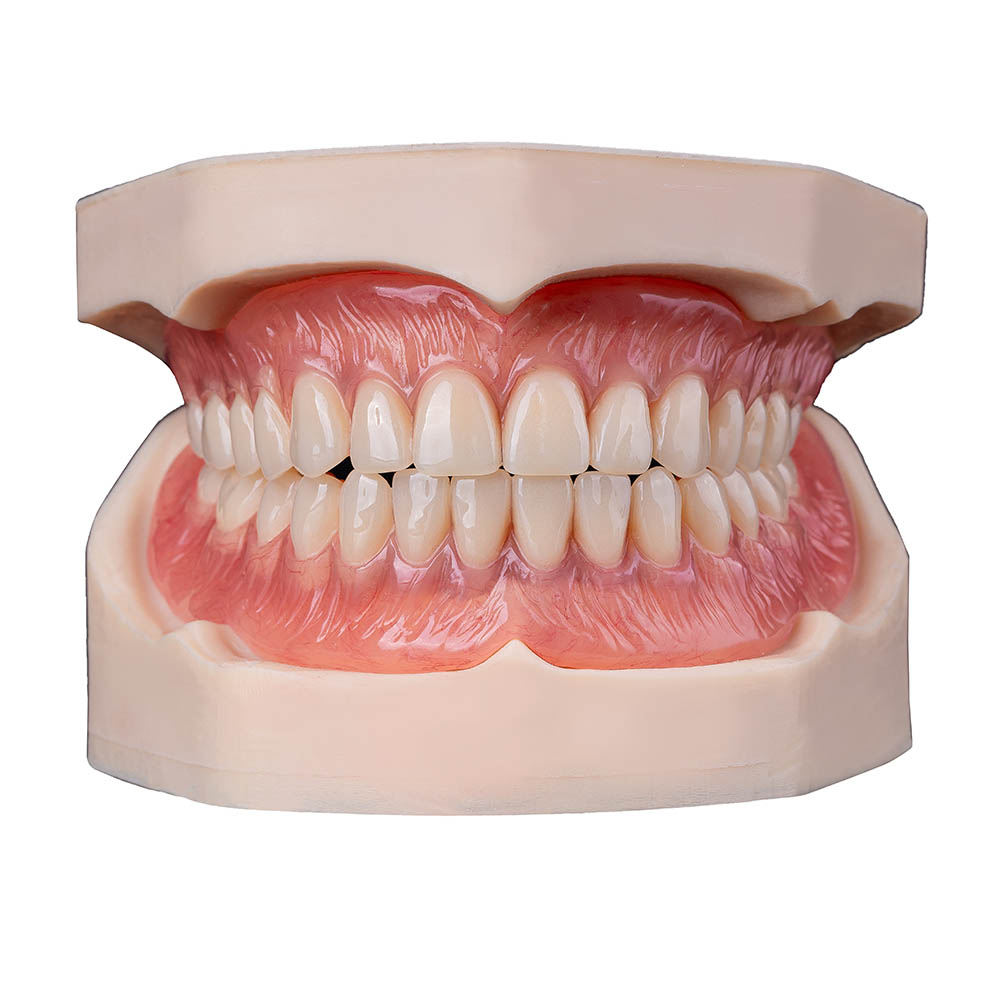
What the patient gets back. A cast cobalt-chromium framework carrying a shade-matched acrylic saddle and denture teeth, replacing the three-unit front span. Nothing metal reads from the front: retention lives on the posterior segments, and only shade-matched material sits inside the smile zone.
What the doctor gets back. A framework that seats along one surveyed path, with rest seats and three clasps in tripod distribution, one of them stress-releasing. Connectors and wings held 3 mm off the gum line. Design documentation, alloy declaration, and the design review record — so a later addition or conversion can be planned rather than guessed at.
Known limits, stated plainly. Clasps fatigue and retention does drop over time, plaque collects around clasps, and metal conducts heat. Restorations like this can be repaired and modified, but a repaired part is necessarily weaker than the original, and repeated fracture at the same spot means the case wants remaking rather than another repair.
What we need from you to start. A framework can only be designed to the prescription it arrives with. For a Class IV anterior case these are the inputs that decide the outcome more than any material choice:
| Input | Why it changes the design |
| Surveyed path of insertion, or a note that we should determine it | A Class IV gap allows one path; the design follows from it |
| Abutment selection and any intended rest seat preparation | Positions the support and the tripod distribution |
| Occlusion record and the opposing arch | Governs connector dimensions and rigidity |
| Any abutment whose long-term outlook is uncertain | Decides where the modifiable acrylic field goes |
| Shade references for teeth and gum, plus a smile-line photo | The single most decisive input for a front case — smile-line height governs how much of the design is visible |
| Nickel sensitivity status | Switches the alloy from cobalt-chromium to titanium |
| Interim or definitive? | The dividing line between PEEK/flexible and a cast framework |
Our Metal Partial Denture Manufacturing Capabilities
Founded in 2012, ASD Dental Lab is a full-service dental laboratory and direct manufacturing facility. Manufacturing runs in Shenzhen and Huizhou, China.
Everything happens in our own buildings. A case does not leave our facility part-finished. The removable denture department of roughly 55 technicians is a department of its own, not a shared bench. Roughly 50 trained backup technicians stand by for peak periods. Removable denture output runs at about 4,000 cases a month in normal season and about 6,500 a month at peak.
Materials we actually stock. Metal frameworks in cobalt-chromium, Vitallium, titanium and PEEK, PMMA and acrylics, and denture teeth from VITA, Ivoclar and Shofu.
Front teeth cases go to senior technicians. Anterior cases are handled by technicians with 10 years of experience or more, and shade selection runs under standardised light.
Quality control has teeth of its own. A dedicated QC department of about 25 people works alongside production, and partial dentures pass through model, wax, tooth-arrangement and final inspection before anything ships.
Material and standards. Framework work runs in cobalt-chromium, Vitallium, titanium or PEEK, decided by the case. Every framework is declared against the applicable dental metallic-materials standard, with alloy grade and composition supplied on the case paperwork, and nickel content declared where the standard requires it. The ADA reference on indirect restorative materials covers the composition context.
Who we work with. More than 50 dental laboratories, more than 100 dental clinics, and over 400 dentists. Main markets are the United States, the Netherlands, Germany, France, Belgium, Austria, the United Kingdom, Luxembourg and Switzerland.
Verification available. Factory visits, production-line tours, video factory inspections and capability discussions can all be arranged on request.
Get in touch. Send the prescription with the case: clinic and practitioner details, patient details, what is being made, and the date you need it. We will come back with questions if anything is unclear.
References
- Kennedy classification of removable partial dentures
- Removable partial denture clinical guide
- Removable partial dentures — StatPearls (NCBI Bookshelf)
- Partial denture framework materials — NCBI Bookshelf
- EN ISO 22674:2022 — Dentistry, metallic materials for fixed and removable restorations and appliances
- ADA — Materials for indirect restorations
- Alternative esthetic clasp for removable partial dentures on maxillary incisors or canines
- Precision and semi-precision attachments
- Partial dentures and their limitations
- Dentures — Cleveland Clinic