Dentures for Seniors: An Upper Denture Case Study


Case summary: A 70-year-old patient had been wearing a complete upper denture for over eight years. She was taking multiple medications daily, which reduced her saliva flow. Her existing denture no longer stayed in place during meals or conversations—it would lift, shift, or drop, especially when she spoke or smiled. She contacted our lab (via her dentist) requesting a new denture that would actually stay put without relying on adhesive paste all the time.
Patient Background & Challenges
Age & Medication Profile
She had been completely edentulous in the upper arch since her early 60s. Her current medications included an antidepressant, two antihypertensives, a diuretic, and an antihistamine for seasonal symptoms—five daily prescriptions in total. According to the National Institutes of Health, polypharmacy (typically defined as five or more medications) is associated with significantly increased odds of dry mouth—in one meta-analysis, the odds ratio was around 2.05. For context, CDC surveillance data shows that roughly 11%–20% of U.S. adults aged 65 and older have lost all their teeth, so complete dentures remain common in this age group.
The Core Problem: Loss of Upper-Denture Retention
Upper dentures usually rely on three things:
- Atmospheric pressure and surface tension between the denture base and the palatal tissues—basically, a thin layer of saliva creates suction.
- Border seal: the denture’s peripheral borders contact the vestibular mucosa and soft palate to form a continuous seal. The posterior palatal seal (the slightly thickened posterior border that contacts the soft palate) is particularly critical for maxillary retention; research consistently identifies accurate posterior-seal design as a major factor distinguishing stable versus loose upper dentures.
- Muscle control and tongue positioning to keep the denture stable during function.
In her case, two factors were working against retention:
- Reduced saliva: dry mucosa meant the saliva film that normally lubricates and helps create suction was thin or patchy. According to the American College of Prosthodontists, xerostomia can significantly compromise denture comfort, adhesion, and tissue health.
- Her old denture’s posterior border had been relined twice over eight years. Each reline added material, but the posterior-seal area wasn’t re-established each time—over the years the border became too short, or the seal line ended up anterior to where it should have been. When the posterior seal is inadequate, air breaks through, suction is lost, and the denture drops or tilts, especially when the patient opens wide, swallows, or talks.
She reported that by the end of the day, especially when she was tired or her mouth felt particularly dry, the denture would shift forward or lift at the back. She had tried denture adhesive paste (a common workaround), which helped temporarily—but adhesive is compensatory, not corrective. It can’t replace an accurate border seal, and when saliva is scarce, adhesive performance also drops. She wanted a new denture with a proper fit so she wouldn’t depend on adhesive daily.
What the Dentist Requested & What We Needed to Check
Dentist’s Clinical Records & Prescription
The dentist sent us:
- Final impression in a custom tray with border molding—this captured the functional extension of the upper vestibule, frenal attachments, and the post-dam area. The impression was taken after ensuring the tissues had recovered from the old denture’s pressure areas.
- Jaw-relation record (wax rims) documenting vertical dimension, centric relation, midline, smile line, and lip support.
- Bite registration and articulator mounting so we could set the teeth in balanced occlusion.
- Photos (frontal smile, profile, and old denture in place) for reference on tooth size, shade, and arrangement.
- Written notes specifying:
- Acrylic resin base (patient declined metal frameworks or implant options due to cost and surgery).
- Balanced occlusion for better stability.
- Standard tooth mold and shade based on the old denture, but adjusted for better esthetics at the incisal edge.
- Emphasis on accurate posterior palatal seal and proper border extension to maximize retention without adhesive.
What We Checked Before Starting
Before design, our case coordinator reviewed:
- Impression quality: were the borders and post-dam area clearly recorded, or were there voids, bubbles, or distortion? In this case the impression was clean—no voids in the critical seal zone.
- Undercuts and frena: were any frena overextended in the old denture? The dentist’s notes mentioned that the labial frenum notch needed slight deepening compared to the old denture, which we flagged in the design file.
- Vertical dimension and occlusal plane: did the wax-rim record show balanced face height and a reasonable occlusal plane? Everything looked appropriate; no major corrections needed.
- Material preference: she requested our standard heat-cured PMMA base. We also offer premium options , but the dentist indicated standard PMMA was acceptable for this patient’s budget.
We confirmed all records matched, then moved into design and fabrication.
How We Fabricated Dentures for Seniors with Dry Mouth
1. Digital Scanning & Model Preparation
The dentist’s final impression was scanned using our intraoral scanner system. We created a digital cast and a physical stone model. The stone model is poured in Type III or IV dental stone (depending on the case) and used for try-in, final articulator mounting, and finishing checks.
For this patient, we poured the model carefully to avoid:
- Air bubbles in the post-dam region (which would create a false ridge contour).
- Excess stone flash that would interfere with border accuracy.
- Distortion during setting (the model was allowed to bench-set for 24 hours before any major work began).
2. CAD Design: Tooth Arrangement & Occlusal Scheme
Using the jaw-relation record and the dentist’s articulator mounting, our CAD designer:
- Positioned the artificial teeth (we used VITA acrylic denture teeth, mold and shade per prescription) to match the midline, smile line, and incisal display from the photos.
- Set balanced occlusion: bilateral posterior contacts in centric, and smooth excursive movements (protrusive and lateral) with no single-tooth interference. Balanced occlusion distributes force more evenly across the denture base, reducing tipping and improving stability—especially important when retention is already challenged by dry mouth.
- Adjusted tooth angulation slightly compared to the old denture: the old setup had the upper anteriors too upright, which created a “denture look.” We angled them slightly labially and refined the incisal edge contour for a more natural appearance, per the dentist’s esthetic note.
After digital approval, the design was locked and we moved to wax try-in.
3. Wax Try-In & Dentist Approval
We fabricated a wax try-in denture with the teeth set in pink wax on the cast. This was sent to the dentist for the patient to evaluate:
- Esthetics: tooth size, shade, midline, smile line, lip support.
- Vertical dimension: was her face height appropriate? Did she have adequate freeway space?
- Occlusion: did the posterior teeth contact evenly in centric? Was there any premature contact or imbalance during lateral or protrusive movements?
- Phonetics: could she pronounce “s,” “f,” and “v” sounds clearly? These are classic tests for anterior tooth position and vertical dimension.
- Comfort & border extension: did the wax base feel stable, or were there any pressure spots at the borders?
The dentist reported the patient was happy with the tooth arrangement and vertical dimension. One small adjustment was made: the right canine was rotated 2–3° mesially to better match the midline flow. After that correction, final approval was given, and we proceeded to processing.
4. The Critical Step: Establishing the Posterior Palatal Seal
This is where the case gets technical—and where many dentures fail.
The posterior palatal seal (post-dam or postdam) is a slightly raised or thickened area at the posterior border of a maxillary denture. It contacts the junction between the hard palate and soft palate. When done right, it:
- Completes the peripheral seal, preventing air from breaking suction.
- Compensates for minor distortions during processing (acrylic shrinks slightly as it polymerizes).
- Maintains retention during function (swallowing, speaking, wide opening).
Anatomically, the seal must be placed at or just slightly posterior to the vibrating line —the flexion line where the soft palate begins to move during swallowing or phonation. If the seal is too far forward, you lose the flexion-zone advantage and the denture won’t seal well. If it’s too far back, it can trigger gagging or the denture will drop when the patient opens wide.
In her old denture, the post-dam had been compromised by repeated relines. Each reline session added acrylic to the tissue surface, but the laboratory doing those relines didn’t re-cut or re-establish the post-dam groove each time—so over eight years, the seal line drifted forward and became shallow. That’s a common reason for gradual loss of retention in long-term denture wearers.
Our protocol for this case:
- On the master cast, we marked the vibrating line based on the dentist’s clinical markings (the dentist had palpated and marked the flexion zone on the impression).
- We carved a shallow groove (approximately 0.5–1.0 mm deep, 2–3 mm wide) along that line using a #7 wax spatula and lab blade. The groove shape is slightly curved to follow the arch contour.
- During flasking (when we invest the wax denture in the flask before packing acrylic), we ensured the stone investment didn’t fill or distort that groove.
- After packing and processing, the posterior border of the denture base ended up with a slight bead or raised area that would contact the soft palate—this is the post-dam seal.
The key principle: the seal must be located correctly and have the right contour. Too aggressive, and it causes discomfort or gagging. Too shallow, and air leaks through. We verified the seal’s position and contour by:
- Checking the finished denture on the articulated cast.
- Visual inspection under magnification (looking for smooth transitions, no undercuts, no sharp posterior edges).
- Trial fit on the model: does the denture seat completely with gentle finger pressure? If you push down on one side, does the other side lift (indicating rocking), or does the whole denture stay stable?
In this patient’s case, the post-dam was set correctly, and the denture exhibited good suction retention on the model—a promising sign that it would work clinically.
5. Flasking, Packing, & Heat-Curing the Acrylic Base
After wax try-in approval and post-dam finalization, we proceeded with the traditional flasking and polymerization process:
- Flasking: The wax denture (with teeth already set) was invested in a two-part metal or石膏 flask. The flask separates at the midline of the denture. Stone or investment plaster surrounds the wax, creating a mold.
- Wax elimination: Once the investment sets, the flask is opened, and the wax is boiled out, leaving a space (the “mold cavity”) that will be filled with acrylic resin.
- Packing acrylic: We mixed heat-cure PMMA powder and liquid (polymer and monomer) according to the manufacturer’s ratio. When the mix reached the “dough stage” (no longer sticky, pliable like dough), we packed it into the mold cavity. The artificial teeth remain in place; the acrylic flows around them and bonds to them.
- Flask closure & curing: The flask halves are pressed together under controlled pressure (either with a hydraulic press or a spring-loaded clamp). This compresses the acrylic into all the细节 (borders, palate contour, teeth sockets). The flask is then placed in a water bath for heat-curing:
- Temperature protocol: We use a slow-rise cycle—8–9 hours at 74°C (165°F), then 1 hour at 100°C (212°F)—to minimize porosity, reduce residual monomer, and limit polymerization shrinkage. Rapid boiling can cause internal voids or warping.
- Cooling & deflasking: After curing, the flask is allowed to cool slowly (急速冷却 would cause internal stress and distortion). Once cool, we open the flask and carefully remove the finished denture. At this stage, it’s hard, pink, and shiny, with the teeth locked in.
6. Finishing, Polishing, & Quality Checks
Even after processing, the denture isn’t ready for delivery. We perform multiple finishing and QC steps:
Trimming excess flash: Any acrylic that seeped beyond the borders during packing is trimmed with carbide burs and stones.
Border refinement: The labial, buccal, and posterior borders are smoothed and rounded. We’re careful not to over-trim the posterior seal—removing too much material there would compromise retention. The frenal notches (especially the labial frenum) are deepened as needed to match the dentist’s prescription.
Tissue surface inspection: The tissue-facing (intaglio) surface is checked for:
- Sharp spots, beads, or irregularities that could cause sore spots.
- Voids or air bubbles (if found, the denture may need to be remade—we don’t fill bubbles, as that weakens the base).
- Proper adaptation to the cast: does it seat fully without rocking?
Occlusal verification: We remount the finished denture on the articulator (using the original jaw-relation record) and check that the teeth still contact evenly. Processing shrinkage can sometimes introduce small occlusal errors; if we find premature contacts or high spots, we selectively adjust them with articulating paper and fine stones, then re-polish.
Polishing: The external (polished) surfaces are finished in stages:
- Coarse pumice slurry on a rag wheel to remove scratches.
- Fine pumice for smoothing.
- Final high-gloss polish with a soft buff wheel and polishing compound.
The result is a smooth, glossy finish with no pits, scratches, or rough areas that would harbor plaque or stain.
Final QC checklist (performed by a dedicated quality-control technician, separate from the technician who made the denture):
| Check item | Pass/fail criterion | This case |
| Posterior seal present & correct position | Seal must contact soft palate without gagging; no visible gap when denture is seated on cast | ✓ Pass |
| Border extension | Borders reach functional depth without overextension; frenal notches adequate | ✓ Pass |
| Occlusion | Balanced contacts in centric; smooth excursions without interference | ✓ Pass |
| Tissue surface | No voids, sharp edges, or bubbles | ✓ Pass |
| Tooth position | Midline, smile line, and vertical dimension match approved wax try-in | ✓ Pass |
| Polish | High gloss, no scratches or pits | ✓ Pass |
| Base integrity | No cracks, fracture lines, or visible porosity | ✓ Pass |
Only after passing all checks is the denture packaged and shipped back to the dentist.
The Result & Delivery
What Changed After Delivery
The dentist inserted the new denture and made the chairside adjustments that always follow delivery (relieving pressure spots, verifying centric and excursive contacts). The patient reported the following within the first few weeks:
- Retention was dramatically better. She no longer needed adhesive for everyday use. She could eat and speak without the denture shifting.
- Comfort improved significantly. No sore spots developed. The borders felt smooth—no rubbing or tender areas.
- The “denture look” was reduced. The slightly labially inclined anteriors and the refined incisal edge gave her a more natural look; she said she smiled more in photos.
- Speech improved slightly. The phonetics check (“s,” “f,” “v”) at try-in had confirmed the tooth position; post-delivery she noted clearer speech.
She still uses adhesive occasionally—mainly on very dry days when her saliva production drops further. But it’s now a supplement, not a crutch.
Delivery Timeline & Packaging
Turnaround Time
For a complete upper denture of this complexity (border molding + post-dam work + balanced occlusion setup), the standard lab fabrication time is 5–7 working days from receipt of complete records (impression, jaw-relation record, photos). This timeline is for lab work only—the clinical appointment schedule (impression, try-in, delivery) is managed by the dentist.
For simpler cases, the standard turnaround is 2–3 working days. Complex cases involving implants, attachments, or full-arch reconstructions typically run 7–10 working days.
Packaging & Shipping
- The denture is placed in a foam-lined rigid box with a fitted insert to prevent any movement or pressure on the borders during transit.
- A care instruction card and a maintenance note are included in the package.
- For international shipments, the case is double-boxed with moisture-absorbing material and temperature-appropriate insulation if needed.
- Each case ships with a case number visible on the packaging for easy reference.
Aftercare & Adjustment Support
The First 30 Days
New dentures almost always need chairside adjustments in the days following delivery. Common early issues:
- Sore spots at pressure areas (usually the buccal shelf or the palate along the median raphe). These are relieved with acrylic burs at the chairside.
- Increased salivation for the first few days to weeks—the mouth is adjusting to a new object.
- Mild speech or chewing adjustment as the patient adapts.
We ask the dentist to schedule a follow-up within 48–72 hours of insertion, and again at 2–4 weeks if needed. We are available for chairside adjustments guidance if needed (e.g., “the left border feels tight here—reduce by about half a millimeter”).
Our Lab-Side Support After Delivery
If a chairside adjustment doesn’t resolve an issue, and the dentist determines the problem is lab-side (design, fit, or material-related), we handle it at our facility:
| Issue type | Our action |
| Border overextension | Free of charge—resend the case, we refine the borders and reship |
| Posterior seal positioning error | We re-establish the post-dam and reship |
| Occlusal high spots | Free adjustment—we remount and refine the occlusion |
| Tooth position deviates from approved try-in | Free re-arrangement or reset of teeth |
| Base porosity, cracks, or fracture | Remake at no cost to the dentist |
The dentist sends back the denture (or we keep our master cast and remake from it), we make the correction, and return it—usually within 2–3 working days.
Reline, Rebase & Repair
When the ridge changes over time and the denture becomes loose but the teeth and occlusion are still good, a reline (adding new acrylic to the tissue surface) is usually sufficient. A rebase (replacing the entire base) is needed when the base has degraded significantly. We handle both:
- Reline materials: heat-cure PMMA or soft liner (depending on the clinical situation).
- Repair of broken teeth or base: we use the same shade and mold of acrylic teeth, matched to the original, if the master cast and tooth mold are on file. If not, the dentist can send a photo and we select the closest match.
We keep master casts and design files on file for at least two years so we can reproduce a case quickly if a remake is needed.
Why Dentists Choose ASD Dental Lab for Senior Dentures
We’re not a clinic—we don’t diagnose, extract, or fit. We’re a full-service dental laboratory with manufacturing facilities in Shenzhen and Huizhou, China, and a dedicated removable denture department. Some reasons clinicians partner with us:
In-House Manufacturing, No Outsourcing to Third-Party Labs
Every step—from data receiving and digital design through 3D printing, milling, processing, finishing, quality inspection, and packaging—happens in our own facilities. When you send a case to us, the same technicians follow it through every stage. This matters because:
- Reproducibility: if a reline or remake is needed a year later, the border positions and tooth setup can be reproduced from the same records and the same technicians, rather than reinvented.
- No surprises about who’s actually doing the work: you know the lab that took your case is the lab making it.
Quality Control With 3 Stages of Inspection
Every case goes through three inspection points:
- Pre-production check: records, impressions, and prescriptions verified before production starts.
- In-process inspection: intermediate checks at key steps (e.g., after tooth arrangement, after processing).
- Final inspection: performed by a dedicated QC technician separate from the making technician—a quality gate that’s independent from the person who made the denture.
Complex cases (implants, full-arch, high-esthetic cases) get additional technical-supervisor review.
Capacity for Volume If You Need It
Our removable denture department handles approximately 4,000 cases per month in normal season and up to 6,500 cases per month in peak season. About 55 technicians work in this department. If you’re a DSO or a multi-office group, we can absorb significant volume.
Digital Workflow Capability
We offer traditional, digital, and hybrid workflows for removable dentures. Digital scanning allows the case to be reproduced accurately later (scan data is retained), and can shorten turnaround by 1–2 days compared to traditional workflows (no physical model shipping, no re-pouring, and no risk of model loss). Traditional workflows have the advantage of working with the impression directly.
Materials We Use
For removable dentures:
- Artificial teeth: VITA, Ivoclar Ivoclar , Shu Feng , and Plastic Steel .
- Denture base resins: Lucitone 199 (Dentsply Sirona, imported premium heat-cure PMMA with higher impact strength and lower monomer release) and standard heat-cure PMMA bases.
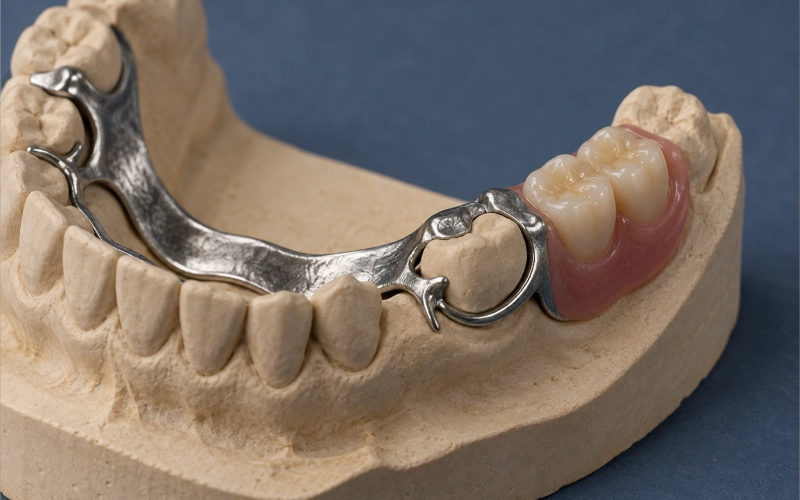
- For metal frameworks (if you need a cast partial): cobalt-chromium, Vitallium, pure titanium, and PEEK.
We use the material you specify in your prescription. If you’re not sure which material fits a case, we can advise you based on the clinical situation and the patient’s priorities.
Compliance & Documentation
- FDA registration and device listing for all custom restorations shipped to the United States (covering complete and partial dentures, among other categories).
- EU MDR custom-device notification for shipments to Europe, with a custom-device statement and technical file.
- Invoice documentation: case numbers, patient or clinic reference numbers, and purchase order numbers can be included on invoices as needed.
Communication & Case Coordination
- Case coordination team of about 40 staff handles communication between you and the production floor.
- Design approval step: we send you the digital design for your review and approval before processing. For removable cases, we send the wax try-in before final processing too.
- Issue communication: if a technician notices something on a case (e.g., a questionable margin, a mismatched shade, an ambiguous prescription), a coordinator contacts you by email or work chat within the same day—before we proceed.
Experience faster turnaround times with our cutting-edge technology
Recommended