Front Tooth Inlay: Lithium Disilicate Case Study
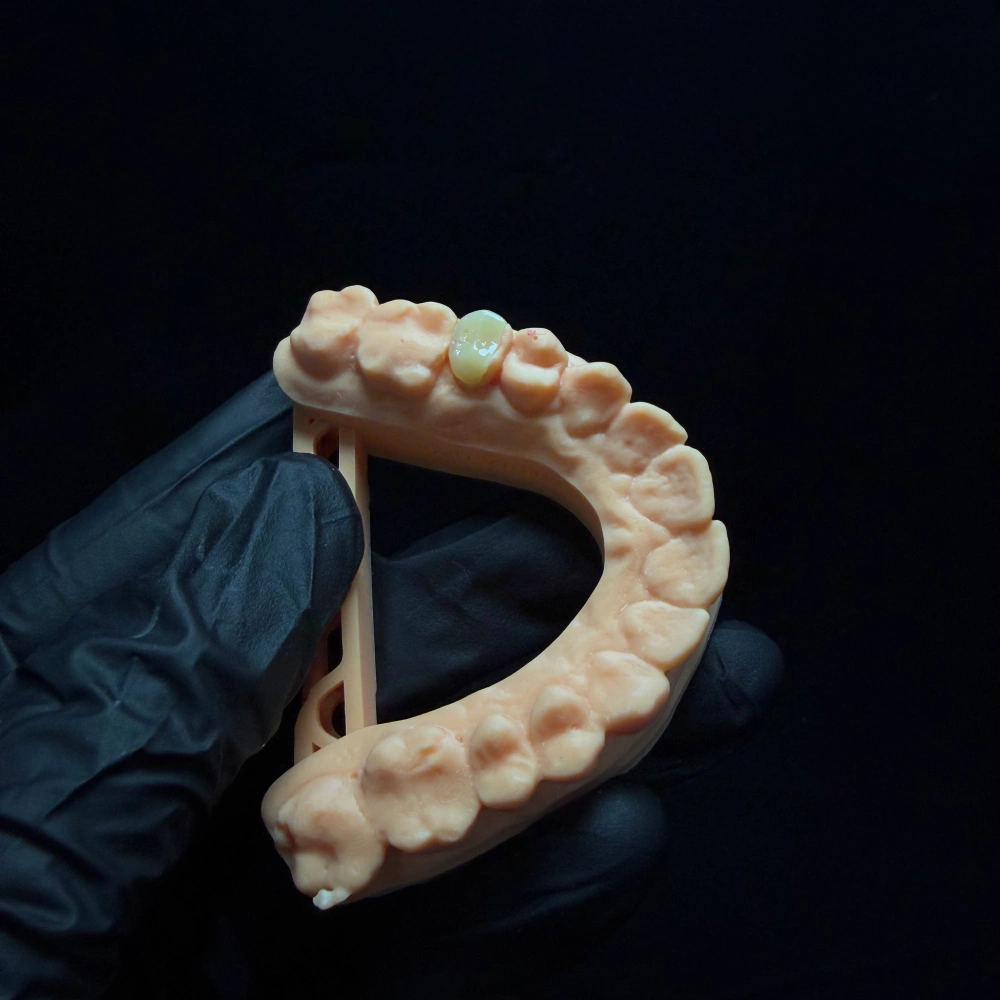
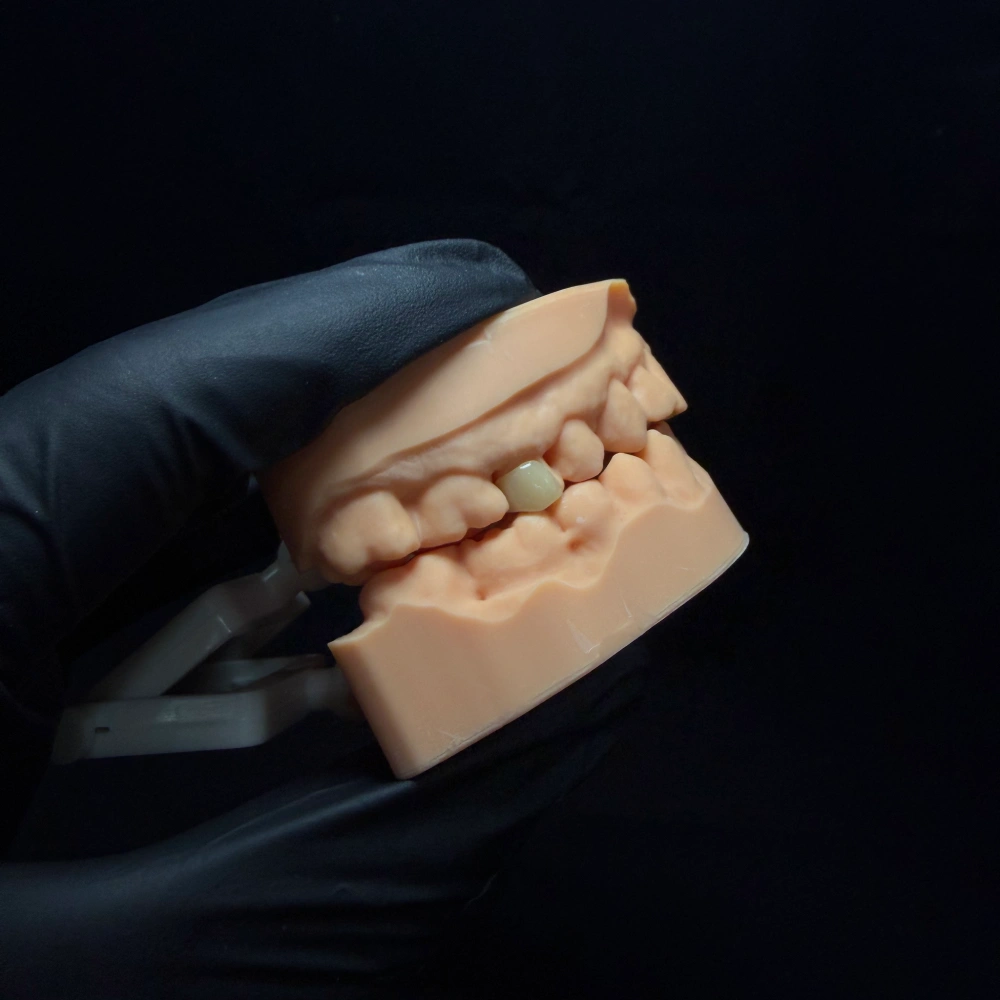
- Case ref: ANT-INLAY-07-ML
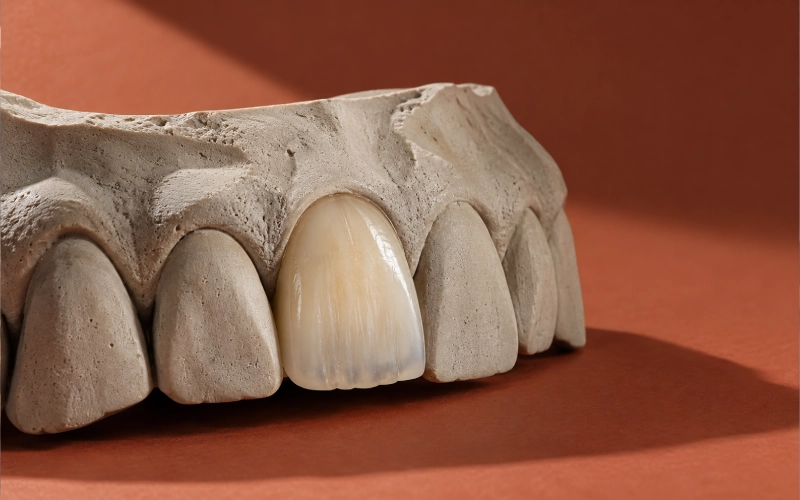
- Tooth: #7 (upper right lateral incisor)
- Surfaces: mesial + lingual
- Material: monolithic lithium disilicate (E.max press)
- In-lab working time: 3-5 days
- Status: delivered
The patient’s situation
Here’s what the record told us about the tooth:
- Tooth #7 — the upper right lateral incisor. When the patient smiled, nothing looked wrong. The labial face was intact, the shade matched its neighbour, the incisal edge was its full length.
- The lesion sat on the mesial and lingual surfaces. You could see it from the inside of the mouth, not from the outside. The dentist probed the margin and it ran from the mesial contact onto the lingual wall, stopping short of the incisal edge.
- Caries risk was active, not historical. The chart that day listed several lesions across the mouth, not an isolated one. This one just happened to be the aesthetically visible one.
- The incisal edge was intact. No chipping, no wear facet, no crack line visible under transillumination.
The dentist’s instinct was right. A direct composite had become the obvious no — too much structure to rebuild and the mesial contact was going to be hard to hold. A full crown felt wrong the other way — the labial enamel is sound, and the patient would see what came off the day it was prepared. That left a smaller category in the middle, and the dentist asked for it by name: a front tooth inlay on #7, mesial and lingual, incisal edge excluded.
What the dentist asked us for
Four requests came in with the slip. They weren’t all written in the same sentence, but together they shaped how we handled this case:
- Confirm the category before anything was made. Was this really an inlay — intracoronal, incisal edge not touched? Or did the preparation we were about to see actually need onlay-level cuspal coverage? Say so before you start.
- Design the preparation path if the current preparation wasn’t quite right. No in-house scanner, no mill, no CAD station. If something had to change at the chair, the dentist wanted it on paper first, not discovered mid-case.
- Match the shade of #7 to #10. Not generically. Match the contralateral lateral — the one across the arch. Patient’s natural teeth, no previous restoration on either side.
- Keep the occlusal brief tight. The patient had worn facets on the lower incisors — the dentist wasn’t sure if that was parafunction or just age-related wear. Either way, no contact on the restoration margin, no change to the incisal length, nothing new introduced on the lingual.
Anterior Tooth Inlay Design and Fabrication
Intake — the moment we opened the box
The slip said inlay, mesial-lingual, #7. The impression came as a physical PVS, with the opposing arch and a wax bite. We scanned the impression, generated the die, and did three things before we touched anything else:
- Walked the margin on screen. The mesial margin was clear. The lingual margin was readable on about 80% of its length. Where it swept toward the cingulum, it was fading into the soft tissue impression — not unreadable, but close.
- Compared the preparation to the written category. The axial walls were nearly parallel, the cavity was fully contained inside the tooth, the incisal edge was untouched. This was an inlay. Not an onlay. We wrote that on the first line of the return paperwork.
- Flagged the one thing we weren’t going to guess at. We sent a WhatsApp message to the dentist: “Lingual margin by the cingulum — one spot where the impression is thin. Can you check the clinical margin and either re-scan that corner or send a close-up photo?” Twenty minutes later, a photo came back showing the margin ran a hair below the gingival crest in that spot. Readable, intentional, confirmed.
We don’t fill in a margin we can’t read. We ask. G110
Shade — one tooth, three sources of information
For a single front tooth, color isn’t a one-number job. We work from three sources side by side and let a senior aesthetic technician — ten-plus years on anterior cases — read them as a layered picture, not a single Vita number.
Three pieces of information came with this case:
- A stump shade photograph (prepared #7 next to a shade tab, taken under the dentist’s chair light).
- A natural tooth shade photograph (intact #10 next to the same tab, same light).
- A preoperative close-up of #7 before anything was removed, showing the mesial contact area and the color near the lingual cingulum.
What the technician read off those three photos:
- #10’s cervical third sat half a shade warmer than the body, the typical pattern for an untouched natural lateral.
- #10’s incisal edge carried a thin band of blue-grey translucency and a hint of mamelon ghost — classic for a lateral in this age bracket.
- #7’s stump had taken on a faint grey cast at the preparation floor, likely from the lesion depth. Not deep enough to need a true opaquer, but enough that we wouldn’t rely on raw lithium disilicate translucency to hide it.
So the color plan ran: body shade matched to #10 at the mid-third, cervical warmth lifted half a step, incisal translucency and a soft mamelon ghost added by surface staining before the final glaze. We locked all of this to the shade tab the dentist had actually photographed with — not a different one — so there was nothing to re-translate at the chair.
Design — four lines the file didn’t normally carry
A single-unit anterior inlay design file for this case had four lines in it that most of our fixed-restoration files don’t:
- No contact at any point along the restoration margin. The design marked the functional contact points on the lingual of #7 (in centric and protrusive) and the margin was routed clear of all of them.
- The incisal edge is not part of the restoration. The design confirmed it. The return paperwork would confirm it. This wasn’t an onlay. Not an incisal overlay. An inlay.
- Opposing wear facets reproduced from the bite record, not idealised. The patient’s lower incisor wear pattern was in the scan. We matched the lingual contour to it rather than imposing an “average” anterior guidance.
- Butt-joint, approximately 90° cavosurface, no bevel. Rounded internal line angles, smooth-flowing margins. For a bonded glass-ceramic, a thin bevel produces a fragile edge — the published ceramic-inlay preparation guidance is in PMC — Considerations for ceramic inlays.
Path of insertion and undercuts were checked at the CAD stage, before anything was pressed. We flagged a tiny undercut on the mesial-lingual line angle (probably a bur mark on the preparation) and asked the dentist on WhatsApp whether to design around it or whether they’d prefer to clean it up at delivery. They said design around it. Fine — we did.
Material — why monolithic lithium disilicate, by press
E.max for anterior aesthetic work is where our material defaults sit. The reasons, line by line:
- Strength under adhesive bonding. Lithium disilicate carries its load when it’s bonded to enamel, and this preparation gave us enamel on three of four cavosurfaces. The comparative picture across lithium disilicate and zirconia is in PMC — Lithium disilicate and zirconia: a narrative review.
- Monolithic, not layered. For an inlay this size and shape, layering adds nothing — it adds a bond interface inside the restoration itself. The restoration is small enough that the color story is handled by surface staining and glaze, not by a layered dentine-enamel structure.
- Pressed, not milled. For this geometry — a small intracoronal unit with a convoluted mesio-lingual margin — pressing gives us a cleaner marginal edge than our mill does on the same ingot. P122
Material lot was recorded on the return paperwork alongside the shade and the design file.
Manufacturing — the eight stages
What ran on this one, in order, follows our standard anterior fixed-restoration path. G121
| Stage | What happened on this case |
| 1 · Order & record review | Slip, scan, impression, photos and bite record cross-checked against the written category. |
| 2 · Scanning | Physical PVS impression scanned; die generated; opposing arch loaded. |
| 3 · CAD design review | Path of insertion verified; undercuts flagged; margins routed clear of contacts. |
| 4 · CAM / Press | E.max pressed to the design geometry (not milled, see above). |
| 5 · Finishing | Hand-finish of the pressed surface by the aesthetic technician; marginal edge checked under magnification. |
| 6 · Characterisation & glaze | Cervical warmth, incisal translucency and the mamelon ghost added by surface staining; glaze cycle run to the manufacturer’s instructions. |
| 7 · Multi-pass QC | Three independent checks (see below). |
| 8 · Final release & pack | Independent QC technician signed off; packaged with foam-cushioned transit protection. |
Quality control — three independent passes
Our fixed restorations go through three checks before they leave the lab. On this case: [G138, P241, P242]
Pass 1 — in-process (after press, before glaze):
- Marginal edge under magnification. Any chipping, any ragged section → back to the technician.
- Internal fit on the printed die. The restoration had to seat without finger pressure, with no rock.
- Approximate color read under correction lighting before characterisation.
Pass 2 — in-process (after glaze, before packing):
- Margin inspected again (glaze cycles can shift things).
- Proximal contact verified on the die — not loose, not tight enough to seat with force.
- Color read side by side with the shade tab the dentist had photographed with.
Pass 3 — final release by an independent QC technician:
- The QC technician who signed off didn’t make the unit. Different person, same written criteria. G139
- Everything on the written criteria passed, including: margin density, no cracks under transillumination, color read matched the dentist’s reference photo under correction light, intaglio clean.
Any check that would have failed would have routed the unit back to the point of failure, not forward. On this one, nothing had to go back.
What left the lab
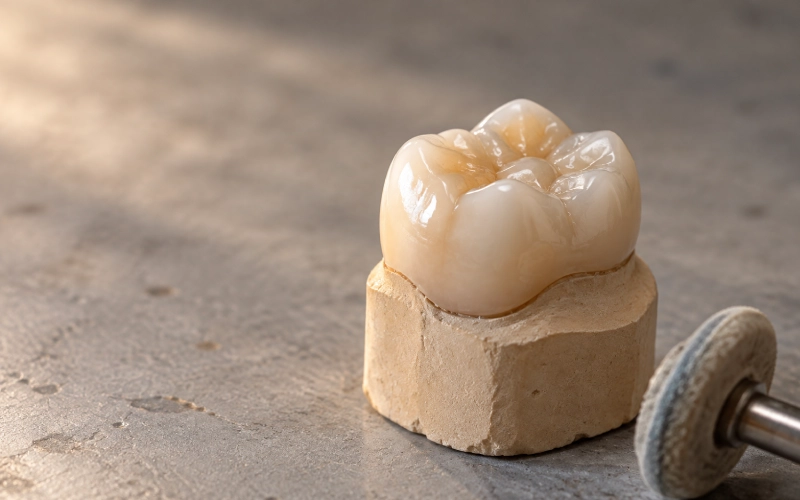
- One monolithic lithium disilicate inlay, pressed, intracoronal, mesial-lingual on #7, incisal edge excluded.
- Return paperwork that put the category in writing on the first line, the material and lot on the second, and the shade sources on the third.
- Four photographs showing: the pressed unit before glaze, the glazed unit next to the shade tab the dentist had used, the unit seated on the printed die, and a close-up of the mesial margin under magnification.
- Chairside notes — short — covering what the dentist had asked us to confirm: rubber dam isolation, separate conditioning for the ceramic intaglio surface and for the prepared enamel, no adjustment of the intaglio surface, any occlusal refinement to be made on the restoration itself and not inside it. The adhesive protocol references that back this up are collected in AEGIS — Current Adhesive Protocols for Indirect Ceramic Restorations.
- A short note on what the published survival data for this class of restoration says, and what it doesn’t (see the FAQ below).
The timing: in-lab working time was 3-5 days, from the day we received the complete case to the day the unit shipped. Shipping was quoted separately.
The dentist’s follow-up came back a week after the unit was seated: a photograph of the restoration in place, mesial contact tight on floss, lingual margin invisible, incisal edge unchanged. The patient had asked which tooth it was. The dentist, as a check, had let the patient point. The patient had pointed at the wrong one.
A note on what we don’t claim
We described the fit, the margins and the final form. We don’t describe outcomes for individual restorations. The published survival picture for this class — resin and ceramic inlays, onlays and overlays — is in PubMed — Survival rate of resin and ceramic inlays, onlays and overlays: a systematic review and meta-analysis. The numbers in that review are pooled across glass-ceramic restorations and do not separate anterior from posterior teeth, so they describe the class, not any one unit. Longevity for an individual restoration depends on the preparation, the bonding protocol at the chair, and the patient’s own habits — none of which a lab controls.
Why Choose ASD Dental Lab for Front Tooth Inlays
Three things, pulled from how this case actually ran:
- Category gets adjudicated before anything is pressed. If the preparation and the written category disagree, you hear about it before manufacture starts. That’s where the first line on the return paperwork comes from.
- The digital chain sits with the lab. For a practice without a scanner or mill, our workflow is the digital chain — send a scan or an impression, get back a design confirmation and the finished unit.
- The shade story is written down, not improvised. We work from the stump shade, the natural tooth photograph and the preoperative close-up as three sources side by side, and we lock the plan to the shade tab you photographed with. Nothing gets re-translated at the chair.
Front Tooth Inlay Case Submission Requirements
A complete submission for a front tooth inlay:
- Prescription with tooth number (FDI or UNS, say which).
- The category written explicitly: inlay (intracoronal), onlay (one or more cusps or incisal edge covered), overlay (all cusps covered), palatal / incisal partial veneer, or crown. Say so even if you aren’t sure between two.
- Preparation scan or physical impression.
- Opposing arch covering the full dental arch, with 2–3 adjacent teeth of #7 on each side and the soft tissue. G101
- Bite record (centric), plus protrusive if parafunction is suspected.
- Material and translucency / opacity selection — or a note telling us to recommend one.
- Final tooth shade (Vita Classical, Vita 3D-Master, or your preferred system).
- Stump / preparation shade — this is the one most often missing.
- One photograph with a shade tab adjacent to the prepared tooth, under chair light.
- Preoperative photograph of the tooth before preparation — same framing.
- For a single-tooth anterior aesthetic case: a photograph of the contralateral tooth next to a shade tab under the same light. E031, E032
- Occlusal and functional notes — parafunction, canine guidance, protrusive contacts.
- Any wax-up, mock-up, digital smile design, or the agreed provisional, where morphology matters.
If any of these is missing, we ask. The single most common reason a case runs long is incomplete shade or design information.
Send a case
If a prescription of yours sits in this category — a front tooth inlay, or an anterior restoration you aren’t sure how to categorise — send the preparation scan or impression together with the items above and write the category exactly as you intend it, including the uncertainty if there is any. If the written category and the preparation disagree, you’ll hear about it before fabrication starts.
Front Tooth Inlay: Frequently Asked Questions
Is a front tooth inlay a real category, or should this really be an onlay or a veneer?
It depends on how far the defect reaches. If the lesion stays inside the tooth and the incisal edge is intact — as on the case above — it is an inlay (intracoronal). If it reaches the incisal edge or a cusp, it becomes an onlay. If the labial surface is involved, veneer-category options enter the picture. We confirm the category on the return slip after we see the preparation, so the clinic doesn’t have to pick blind.
What material do you use for a front tooth inlay?
Monolithic lithium disilicate — E.max — is our default for anterior intracoronal work, bonded to enamel-supported walls, with the aesthetic range to sit next to natural tooth structure. The comparative picture across lithium disilicate and zirconia is in PMC — Lithium disilicate and zirconia: a narrative review. Other materials — feldspathic ceramic, hybrid ceramic — are on the table when the preparation and the loading call for them. The ceramic family map is in ScienceDirect — Feldspathic Ceramic.
What preparation does a front tooth inlay need?
Butt-joint, approximately 90° cavosurface margin, no bevel, rounded internal line angles, margins kept clear of heavy functional contacts and in enamel wherever the preparation allows. For the published ceramic-inlay preparation rationale, see PMC — Considerations for ceramic inlays.
My practice has no scanner and no mill. Can you still handle a front tooth inlay like the case above?
Yes — that case ran from a physical PVS impression. We scanned it, generated the die, designed from the scan and pressed the unit on our side. The practice did not need a scanner, a CAD station or a mill.
How is the lead time calculated?
From the day we receive a complete case to the day the unit leaves the lab, in working days. The clock pauses when we’re waiting on an answer from the clinic — a shade query, a re-scan, a design approval — and restarts when the information lands. Weekends and Chinese public holidays don’t count. Shipping is quoted separately. [G155–G161]
What does the published survival data say about front tooth inlays specifically?
It says very little. The pooled meta-analysis for resin and ceramic inlays, onlays and overlays is PubMed — Survival rate of resin and ceramic inlays, onlays and overlays, and the numbers in it are pooled across the class and do not separate anterior from posterior teeth. The honest answer is: the class has a well-described failure profile, but the anterior-specific evidence base is thin, and the service life of any one restoration cannot be stated in advance.
How is coding handled on the paperwork?
Material identity, lot and country of origin are on the return slip; category is on the return slip; the restoration is covered by the lab’s FDA facility registration and product listing (which covers custom-made crowns, bridges, inlays, onlays, veneers, abutments, dentures and temporaries, not the implant body itself). For the applicable CDT coding categories, see Dental Economics — Coding and considerations for crowns, veneers, inlays, onlays and CAD/CAM restorations.
Experience faster turnaround times with our cutting-edge technology
Recommended