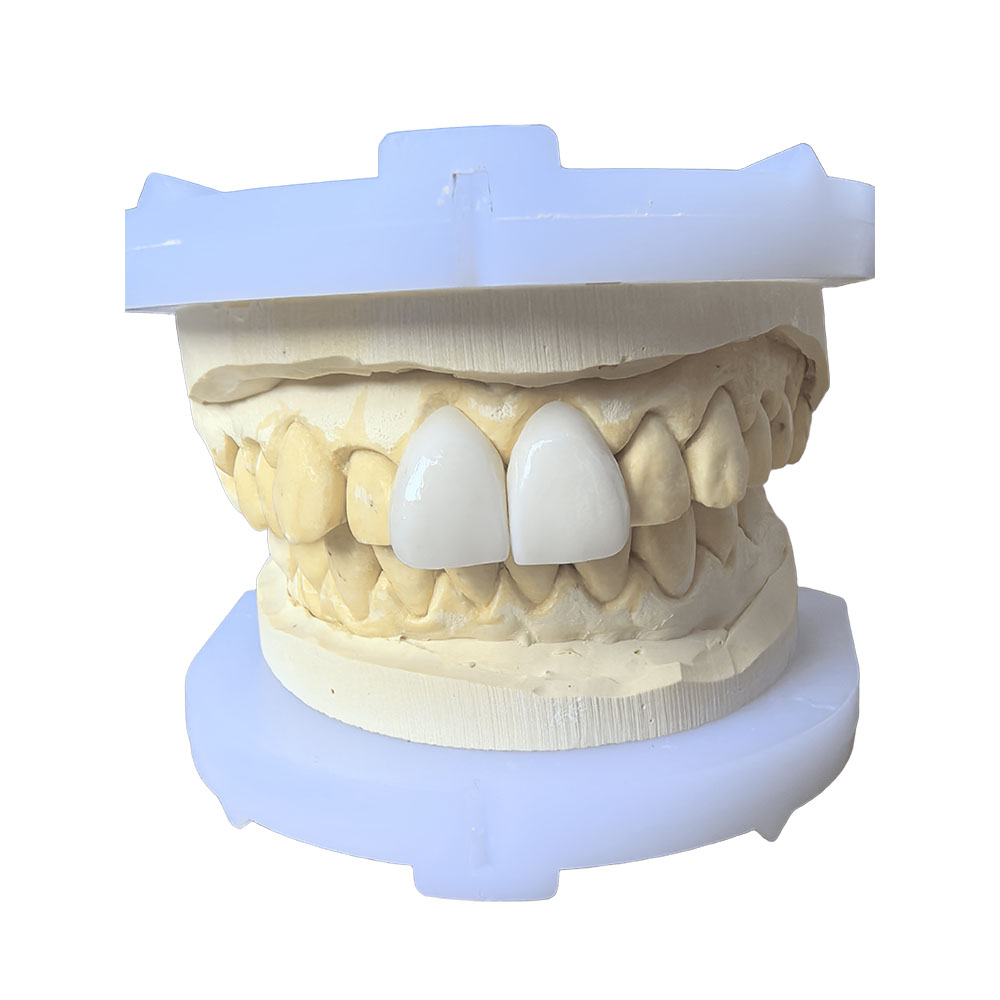
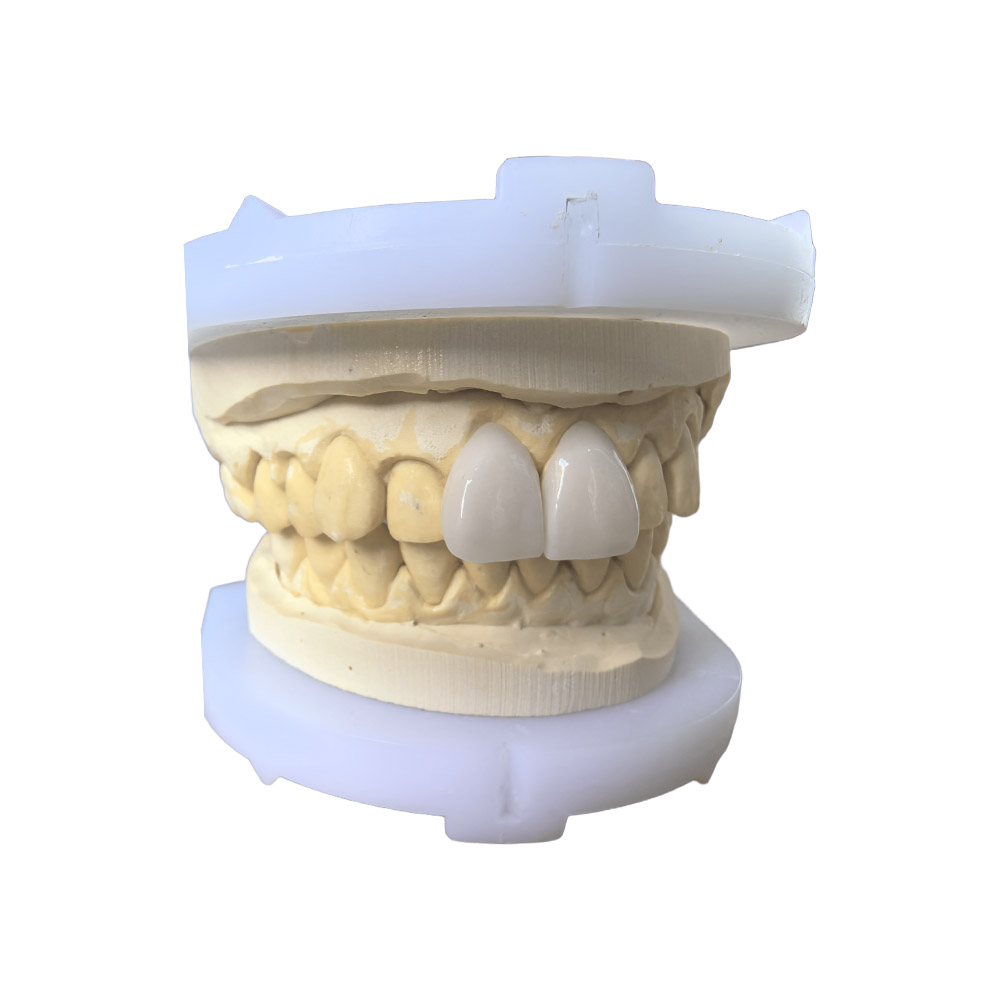
2 Front Teeth Veneers – Anterior Aesthetics Case
🕢 [ Remplissez le formulaire et nous vous répondrons dans les 30 minutes ! ]
ASD Dental Lab is a full-service dental laboratory founded in 2012, with manufacturing facilities in Shenzhen and Huizhou, China. This page documents one delivered 2 front teeth veneers case so that ordering dentists, clinics and laboratories can see the technical decisions made in our lab and the inputs we need from them. Individual results vary.
Case summary at a glance
| Field | Valeur |
| Case ID | 1F2V-2026-04 (anonymized) |
| Teeth | #8, #9 (maxillary central incisors) |
| Restoration type | Two layered lithium disilicate veneers |
| Matériau | Pressed lithium disilicate (e.max Press), layered with porcelain enamel |
| Prescription driver | Stump shade C3 on #8, B1 target shade, normal occlusion, no parafunction |
| Lab phase duration | 7 working days from approved digital impression to finished restoration |
| Delivery form | Individual packaging, intraoral try-in at clinic before final cementation |
Patient situation
The patient is an adult in stable periodontal condition with no active caries. The chief complaint recorded on the prescription form is visible discoloration of the two upper central incisors after endodontic treatment and an old composite core on tooth #8. The patient asked for a solution that matches the neighbouring dentition and does not alter the contour of the smile line.
Pre-operative findings from the referring dentist:
- Tooth #8: discoloured after root canal therapy, large composite core, stump shade C3
- Tooth #9: intact enamel, stump shade A2
- Occlusion: canine guidance, no signs of parafunction, no mobility, probing depths within normal limits
- Lip line: medium, full cervical display of the central incisors during speech
- Soft tissue: healthy, no recession at the buccal margin
Photographs shared by the clinic before preparation:
- Full-face smile photo
- Repose lip photo
- Lateral photo, right and left
- Intra-oral frontal, lateral and occlusal views
- Shade-tab photo with target tooth, adjacent teeth and shade guide in the same frame
- Intra-oral photo of the stump shade on #8 (requested specifically for this case)
Doctor’s prescription
The referring clinic sent the case with a written prescription.
Rx – Case 1F2V-2026-04
- Two veneers on #8 and #9. Target shade B1.
- #8 has an old composite core (C3 stump shade) — masking required.
- Minimum-prep design. Preserve buccal enamel wherever possible.
- Use pressed lithium disilicate; layered porcelain where it helps the incisal halo.
- Stump-shade photo attached; please plan opacity accordingly.
- Send digital wax-up for approval before pressing.
- Incisal-edge position to remain within 0.5 mm of current incisal edge.
- Try-in paste: try-in only at the appointment, do not bond.
- Photographs required for shade matching: target tooth + adjacent + tab together.
- Cement recommendation: light-cure resin cement, shade Translucent.
The ordering dentist’s stated requirements cover six working decisions — material, masking, prep envelope, aesthetic parameters, try-in protocol, and cement selection. The lab-side translation of each line is given in the next section.
How we met those requirements
The processing of this case followed the lab’s internal workflow, which keeps CAD design, milling, pressing, layering, finishing and quality control under one roof. Lab personnel assigned to this case include a senior CAD designer from the anterior team, a press-room technician, a layering ceramist and a quality-control technician; the assembly extends across the CAD Department (~100 staff), the Ceramic and Metal Department (~70 staff) and the Quality Control Department (~25 staff).
Material selection and masking strategy
The prescription called for pressed lithium disilicate with porcelain layering. Pressed lithium disilicate was selected because it allows thin sections while accepting porcelain layering in the incisal third for the halo effect. For the masking requirement on #8, the lab planned two opaque dentin layers plus a thin translucent enamel cap; the layering order is configured to neutralize the C3 stump shade. The stump-shade photograph received from the clinic was the key input for selecting the opacity level. Lithium-disilicate ceramics have been described in the literature as a clinical option for anterior veneers [10].
Preparation envelope
The minimum-prep requirement was preserved by working within a controlled reduction. Published anatomic references describe central-incisor enamel thickness of approximately 0.28 mm at the cervical margin, 0.50 mm at 3 mm above the cementoenamel junction, and 0.73 mm at 5 mm above [4]. Working inside that envelope keeps the bond on enamel, which improves clinical survival [5]. The published preparation-design evidence indicates that preserving enamel at the bond interface is a key determinant of clinical longevity [13].
Wax-up approval before pressing
The lab sent a digital wax-up with the prescribed reduction overlaid on the scan for approval before any pressing took place. The wax-up was shared through the lab’s case-coordination channel. A second iteration was made to bring the incisal-edge position within the 0.5 mm tolerance requested by the clinic. The lab treats approval of a digital wax-up as a workflow gate and does not move to pressing before the prescribing dentist signs off on it.
Pressing and layering
After approval, the lab pressed the two copings in lithium disilicate using the standard pressing protocol for e.max Press. The pressing schedule and cooling rate are recorded in the batch sheet. After divesting and finishing, the layering ceramist built the incisal halo in porcelain enamel, following the stump-shade-driven opacity map. The layered build-up was fired in the standard porcelain furnace.
Finishing, contour and quality control
The final contour was adjusted on the master cast and checked against the digital wax-up. Marginal adaptation was verified under 10× stereomicroscope; any failing contour receives attention before sign-off [23]. Surface gloss was adjusted to match the adjacent teeth. Each restoration was packaged individually in a foam-lined box designed to prevent in-transit fracture.
Try-in protocol
Per the prescription, try-in was done at the clinic only, with try-in paste, not bonded. The lab’s standard try-in pack contains both restorations, a shade tab of the material used, and the lab’s internal shade-matching notes for the prescribing dentist to consult during evaluation.
Final result
After try-in and final cementation by the referring clinic, the two veneers on #8 and #9 were photographed under standardized conditions: full-face smile, repose, right-lateral, intra-oral frontal and occlusal, plus a shade-tab post-op image. The case file in the lab records the following observations from the post-operative photographs:
- Shade: B1 matches the lateral incisor and the canine reference at conversational distance.
- Surface texture: micro-texture follows the lateral incisor pattern, reducing the visual difference between restored and unrestored teeth.
- Marginal adaptation: no visible gap on the buccal cervical margin in the post-operative intra-oral photo.
- Soft-tissue response: gingival margin at the restorative interface is at the same level as the adjacent teeth, no erythema in the 2-week follow-up.
- Phonetics and lip support: the patient reported no change in speech.
What makes this case reproducible
The same clinical result on a different patient requires the following inputs to be in the lab’s hands before the case starts:
- Pre-operative photos. Full-face smile, repose, lateral, intra-oral frontal, intra-oral occlusal, shade-tab photo with target tooth + adjacent + tab in the same frame, stump-shade photo for endodontically treated teeth.
- Pre-operative scan or impression. Digital intra-oral scan of the upper arch, lower arch, and bite registration; alternatively, a conventional PVS impression with a separate bite.
- Written prescription. Restoration type, target shade, material request, prep design, cement recommendation, try-in protocol, deadline.
- Approved digital wax-up. The lab sends the wax-up before pressing and waits for the prescribing dentist’s sign-off.
- Working room between the two appointments that fits the lab’s 7-working-day standard turnaround.
Without the pre-operative photos and the stump-shade image in particular, the lab cannot plan the masking opacity with the precision the case demands. The internal case-submission checklist the lab uses is shared with the prescribing clinic at onboarding.
Indications and contraindications from this case
Indications consistent with this workflow:
- Anterior aesthetic demand on two maxillary central incisors
- Stump-shade or endodontic discoloration that requires masking
- Healthy periodontal condition
- Stable occlusion with no parafunction
- Patient able to maintain oral hygiene around the restorative margin
Situations where the same workflow is pas the default and the case should be re-discussed:
- Extensive caries or large existing restorations on the same teeth, where a crown may be more appropriate [18]
- Active parafunction or reduced interocclusal distance [20]
- Untreated periodontal disease
- Severe malposition or skeletal discrepancy that orthodontic movement would resolve
- Patient expectation that the result will not be reviewed at follow-up
A full case-selection framework for prosthetic articulation is described in the clinical literature [20].
About ASD Dental Lab
ASD Dental Lab is a full-service dental laboratory and direct manufacturing facility founded in 2012. The lab’s facilities are located in Shenzhen and Huizhou, China, and the lab completes the entire production process in-house without outsourcing cases to third-party laboratories. The team is approximately 460 professional employees across CAD design, milling, implant, ceramic and metal, removable denture, quality control, administration, sales and customer-service teams.
The lab has provided dental restoration services to more than 50 dental laboratories, more than 100 dental clinics and over 400 dentists across the United States, the Netherlands, Germany, France, Belgium, Austria, the United Kingdom, Luxembourg, Switzerland and other European markets. Anterior aesthetic cases are routed to senior technicians with deep experience in that workflow.
Références
[1] AAE clinical guide on anterior single-tooth restorations.
[2] Cleveland Clinic: dental bonding overview.
[3] Vital vs. non-vital teeth: a retrospective on porcelain veneers.
[4] Geographic distribution of porcelain veneer preparation depth.
[5] Clinical survival and complication rate of ceramic veneers.
[6] Cleveland Clinic: tooth preparation and bonding.
[7] Periodontal outcomes by preparation and cementation technique: a systematic review.
[8] Real Dental Costs: 2026 US veneer price guide.
[9] Veneers Authority: 2026 price guide by material.
[10] Advanced Smile Design: porcelain & e.max cost 2026.
[11] Survival and complications of feldspathic / leucite-reinforced veneers.
[12] Same systematic review (PMC mirror).
[13] Clinical survival rate and laboratory failure of dental veneers.
[14] Survival and complication rates of resin composite laminate veneers.
[15] 10-year practice-based evaluation of ceramic and direct composite veneers.
[16] Long-term outcomes of ceramic veneers: a comprehensive review.
[17] Porcelain laminate veneer management for a discolored central incisor.
[18] CDA clinical article on anterior veneers (2009).
[19] Veneer crowns in anterior endodontically-treated teeth.
[20] Advances in dental veneers: materials, applications, and techniques.
[21] Predictors of patient dissatisfaction with ceramic veneers.
[22] Influence of resin cement shade on esthetic outcomes.
[23] Marginal adaptation of veneers: a systematic review.