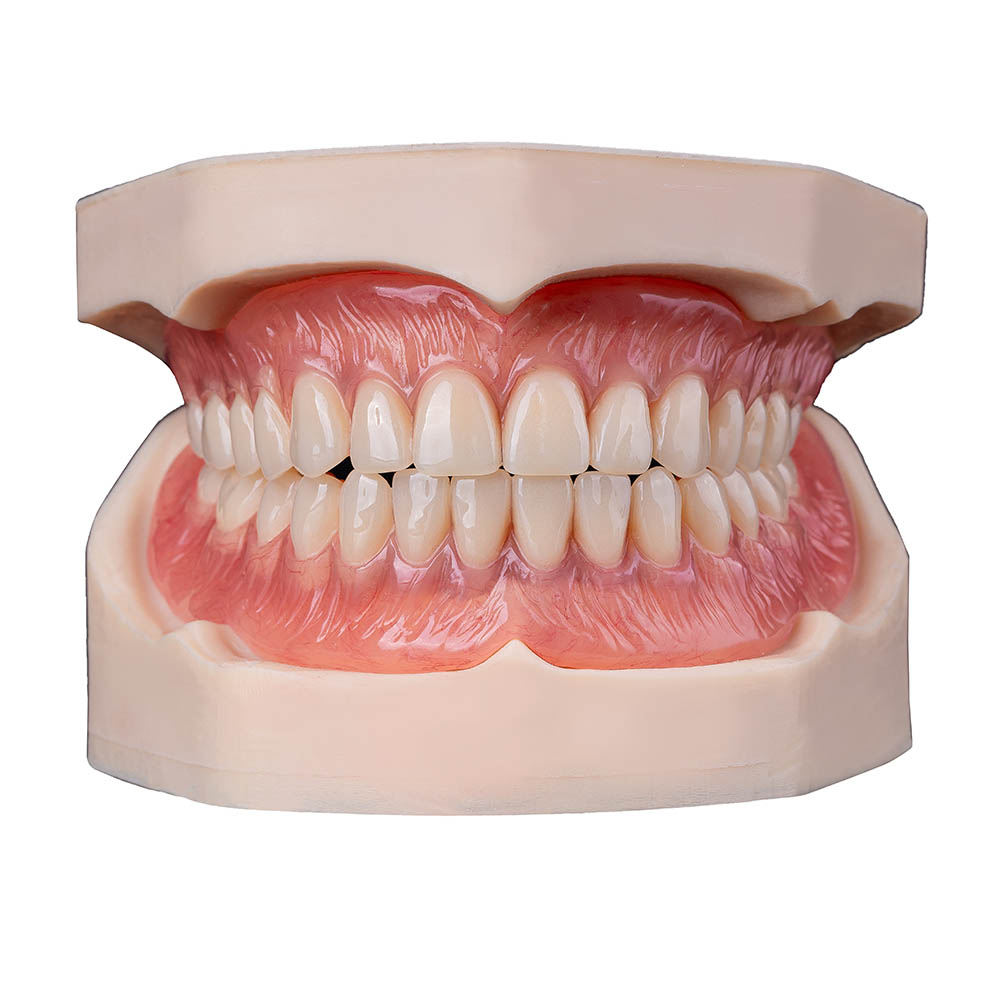
Full Upper Dental Implants Case Study: What We Built, How, and Why It Seats


🕢 [ Remplissez le formulaire et nous vous répondrons dans les 30 minutes ! ]
Most full arch cases that reach our bench arrive with a scan, a CBCT and a box of components — and then stop. The clinical plan is set, the implants are planned, and everything downstream gets decided by whoever moves fastest.
Case at a Glance
| Case type | Full upper arch (maxillary), implant-supported fixed restoration |
| Restoration | Milled titanium bar + monolithic zirconia superstructure |
| Restoration scope | One arch. Lower arch and all clinical work done by the treating doctor |
| Design review | Digital design reviewed and approved by the doctor avant milling |
| Verification step | Verification jig confirmed implant positions in the mouth before the framework was made |
| Vérification de l'ajustement | Passive fit checked on the master model before release |
| Laboratory lead time | 5–7 working days for this case type |
Patient Situation
The patient presented to the treating doctor with an edentulous (toothless) upper arch and a long history of trying to manage with a conventional upper denture.
Three things shaped how this case had to be built:
- An upper arch is a harder build than a lower one. Edentulous upper bone tends to be lower in density, and the maxillary sinuses limit how long and where posterior implants can sit. That constrains the restorative space long before a technician touches a file.
- The existing denture was doing too much work. It carried lip support and facial fullness on its own. Take it away before you have a fixed design, and the patient loses a lot — which is why the design stage cannot start from a blank canvas.
- Hygiene access had to be designed in, not hoped for. A fixed full arch is not maintenance-free. The shape of the pontics and the emergence profile determine whether the patient can actually clean under and around the restoration.
What the Doctor Asked For
The doctor’s prescription came with clear intent. Every item below is a request we received in writing, not an inference.
1. Restore one full upper arch on the existing implants — no change to the implant positions. The implant positions were already fixed by the surgical plan. Our design had to work within them, which ruled out simply “moving things until it fits.”
2. Keep a removable path. Although the outcome is a screw-retained fixed restoration, the doctor asked that the design be fully removable by the clinician without destructive work. Screw retention is the preferred approach for exactly this reason — it permits management of both biological and mechanical complications, per the American College of Prosthodontists’ position statement on maintenance of full-arch implant restorations.
3. Verify cross-arch accuracy before the framework was made. This was the most important instruction in the whole case, and we will explain why in the next section.
4. Approve the design digitally before anything was milled. No cutting until the doctor had seen and signed off the digital design.
5. Report what we found, including anything we could not resolve. Where a request was not achievable as written, we document the constraint and propose an alternative rather than quietly working around it.
How We Handled the Cross-Arch Accuracy Problem
Full arch scanning is where full arch cases quietly go wrong, and it is worth being blunt about why.
The technical problem. A full upper arch scan is almost always stitched together from multiple segments. Error accumulates across the span. The edentulous ridge has no natural teeth to register against, so the software is matching soft tissue, saliva and reflections — all of which move. The result is that the left and right sides of the arch can drift out of true relationship with each other. On a single tooth this never matters. Across a full arch, it decides whether the framework seats.
Our response. When implants are numerous, widely spaced or the arch spans a long distance, we ask the doctor to fabricate a verification jig (also called a verification model) and seat it in the mouth before sending us the data. Once the doctor confirms the relative positions of the implants in the mouth, we work from that confirmed dataset rather than from the scan alone.
What that bought us. By the time the framework existed, we were not hoping it would fit. We had a confirmed reference for where each implant actually sits, relative to the others. This is standard practice in full arch work, and it is the reason we ask for it up front rather than after a framework arrives and refuses to seat.
Full Upper Dental Implants Case: How We Met Each Requirement
Confirming cross-arch accuracy and passive fit
Cross-arch accuracy was checked against the confirmed verification data: midline, arch width, bilateral occlusal height and symmetry were reviewed to confirm the arch was continuous and undistorted.
Passive fit was verified on the master model. The framework was placed without external force — it had to seat naturally, with no rocking and no spring-back, and without being pressed into position. A framework that only seats when you push it is not fitting, and we do not release it on that basis.
Where the restoration was segmented, the interfaces between segments were checked for a close, gap-free join.
Designing for cleanability
Cleanability is a design requirement, not a nice-to-have. The ACP position statement recommends hygienic emergence profiles and self-cleansable pontic spaces, alongside baseline probing and risk-based recall. We designed the emergence profile and pontic spacing with those points in mind, and the fit of the emergence at the gum line was checked as part of the fit verification.
Fixing the occlusion, not guessing it
Vertical dimension, midline, lip support and tooth position were set in the digital design from the doctor’s records — jaw relation records, facebow transfer, and photographs — and locked before milling.
Occlusion was then verified in three dimensions: centric, protrusive and lateral. We checked for and eliminated early contacts, and confirmed tooth position, arch curvature, overjet and overbite.
Why we spend time here. Full arch cases carry well-documented occlusal risks, and the Mayo Clinic’s guidance on dental implant surgery lists an unnatural bite among the recognised risks of the procedure. A bad bite on a full arch is expensive to correct after delivery — so it gets checked before the framework is finished.
Checking the interfaces and screw channels
Interfaces were checked on implant surrogates for a flush fit with no burrs and accurate seating. Screw channels were verified against the design for angle and internal diameter, with the screw threading in smoothly without catching.
Every component was confirmed for model match. Torque values follow the implant system’s own instructions — we may provide a reference value, but the manufacturer’s guidance is always the final word, and we do not substitute our own number for it.
Three-stage quality inspection
Every case passes three inspection gates:
| Gate | What is checked |
| 1. Incoming | Case data and materials checked before production starts |
| 2. Between stages | In-process checks during milling, sintering and finishing |
| 3. Final | Independent QC inspector signs off before the case is released |
For complex implant and full arch cases, this is topped by an additional specialist review — CAD design reviewed by a senior designer, finished work reviewed by a senior QC inspector, and technically demanding cases receiving a further technical supervisor review. The focus at that stage is passive fit, occlusion and overall form. All review records are archived.
Case traceability
Each case carries a unique case number. The operating technician, equipment used, raw material batch and inspection results at each stage are recorded against it, and those records are archived — so any single case can be traced back through the whole process.
Implant components, occlusion records and small parts are bagged separately, labelled with the case reference and bound to that case. Before shipping, screw and accessory counts are checked by two people. That is a small step, and it is the one that stops a case arriving with a missing screw.
The Result
What was delivered: a milled titanium bar with a monolithic zirconia superstructure for one full upper arch, restored on the existing implants, digitally approved before production, with cross-arch accuracy and passive fit both verified.
Combien de temps cela prend-il ?
5–7 working days in the laboratory for a case of this type, covering design review, milling, sintering, finishing and final inspection.
That is the laboratory’s production time. It does not include the clinical phase — examination, imaging, any grafting, surgery, the recovery period and osseointegration, which the Cleveland Clinic describes as a period measured in months, with a broad three-to-nine-month range given for the bone-to-implant fusion phase alone.
If your schedule is tight, tell us early. Early loading protocols exist for selected cases, but they are a case-selection protocol rather than a guarantee, and the evidence on immediate versus conventional loading in maxillary full arch cases does not show a clear survival advantage for loading immediately.
What We Need to Start a Full Upper Dental Implants Case
A clean full arch case starts with complete data. Here is what we ask for, and why each item matters.
| What we need | Why it matters |
| Full arch scan with scan posts/abutments | The primary dataset. Accuracy here decides everything downstream |
| Verification jig, seated and confirmed in the mouth | Confirms real implant positions instead of assumed ones |
| Precise occlusal record | Vertical dimension and jaw relationship cannot be inferred |
| Jaw relation / facebow transfer | Where applicable, for lip support and tooth position |
| Aesthetic and frontal photographs | Drives midline, lip support and tooth position |
| CT / CBCT data | Where it affects the restorative design |
| Implant system labels | Brand, platform, diameter and connection type — read from the packaging or the scan post |
On implant identification: accuracy here is non-negotiable. We need the brand , platform diameter, connection type and implant diameter/length, taken from the packaging label or the manufacturer’s scan post — plus a photo of the label or the model code. Le FDA’s guidance on dental implants is clear that identification and correct component matching are core safety considerations for custom restorations.
On scan posts: for a full arch, dedicated full-arch scan posts are needed. Where implants are widely spaced, we will ask for the verification jig described above.
On originals vs compatibles: where budget or discontinued systems make an original component unavailable, a verified compatible component can be used — but its machining tolerance, material and warranty differ from the original. That decision belongs to you, in writing, before production.
On torque: we follow the implant system’s own instructions, every time.
Documentation and Compliance
For US-bound cases we hold current FDA registration and device listing. Our FDA listing covers custom crowns, fixed bridges, inlays and onlays, veneers, custom implant abutments, implant superstructures, full and partial dentures, and temporary restorations — it does not cover the dental implant itself.
For EU-bound cases, custom dental restorations are Class IIa devices, but custom-made devices follow the MDR Annex XIII custom device route: a custom device statement is issued and notified to the competent authority, rather than going through a standard notified body certification. We retain the custom device statement and technical documentation.
Where you ship to matters, so destination-specific requirements are confirmed avant the order is accepted, and any conflict is raised with you rather than resolved quietly.
Certificates, registration documents, custom device statements and material certificates are available in English, and can be issued in your name.
Working With Us
We are the factory, not a middleman. Founded in 2012, with manufacturing in Shenzhen and Huizhou. Approx. 460 staff: CAD design ~100, milling ~70, implant department ~80, ceramic and metal ~70, removable ~55, quality control ~25, plus ~40 in customer service and case coordination, and ~50 trained backup workers for peak season. Complex implant and full arch work runs in a dedicated production group.
Every stage is in-house. Data receiving and evaluation → CAD design → 3D printing → CAM milling → zirconia processing → layering and glazing → polishing → inspection → packaging and shipping. No case is passed to another laboratory.
Capacity for full arch work: approximately 20 All-on-X arches per month in normal season, 40 in peak season.
Communication. English-speaking case coordinators. Standard service hours 9:30am–6:00pm, extended for urgent cases. Technical questions are answered within about 1 hour during service hours; outside them, expect up to 7–8 hours depending on time zone, and never more than 12. Every account has a dedicated manager.
Factory visits are welcome. Visit Shenzhen or Huizhou, tour the production line, or arrange a video factory audit. We also complete supplier onboarding questionnaires and annual audits.
Traceability. Material brand, origin, batch number and certificates can be supplied per case.
Talk It Through
Send the scan and the CBCT, or just the scan and the system labels if you want a feasibility read first. We will tell you what we can build, what we cannot, and what we would want to verify in the mouth before we promise anything.
Sources d'information
- American College of Prosthodontists — Maintenance of Full-Arch Implant Restorations
- Mayo Clinic — Dental implant surgery
- Cleveland Clinic — Dental Implants
- Cleveland Clinic — Implant-Supported Dentures
- FDA — Dental implants: what you should know
- Immediate-loaded maxillary full-arch systematic review
- Maxillary four-versus-six systematic review and meta-analysis
- All-on-4 long-term maxillary outcomes
- Patient-reported outcomes: maxillary implant overdenture vs conventional denture
Des délais d'exécution plus courts grâce à notre technologie de pointe
Recommandé