Maximize Your Intraoral Photography: A Comprehensive Guide to Using Dental Intraoral Cameras Better
Table of Contents
Introduction: The Power of Seeing (and Showing) in Modern Dentistry
When I first started using an intraoral camera, I had no idea it would change everything about my dental practice. At first, it seemed like just another tool—one more thing to keep clean and charged. But as I started snapping clear, sharp pictures, I realized the real power of these little cameras was what they could show, not just what they could see.
For years, I’d talk to patients about small cracks or early decay. I’d draw diagrams, wave mirrors around, and hope it all made sense. But once I started showing patients real photos from their mouths, their eyes widened. They nodded. More people agreed to treatment. Suddenly, my words finally clicked. I’m writing this guide because I know the difference a good picture makes—not just for figuring out problems, but for building trust, teaching, keeping yourself covered, and making your practice stronger.
In this article, I’ll share what took me years to figure out—how to use your dental intraoral camera to its fullest. Whether you’re new to cameras or trying to get better, I’ll walk you through every step, from opening the box to using images all day long. I’ll talk about my mistakes, what finally worked, and how to go from “so-so” to “great”—one photo at a time.
Understanding Your Intraoral Camera: Essential Features for Optimal Performance
Camera Parts Explained
Before I could really use my intraoral camera to the max, I had to know what made it work. It’s easy to skip over the tech sheet, but honestly, every little part can make a big difference.
- Lens and Focus: Some cameras auto-focus. Some need you to focus by hand. I learned pretty fast that for super close shots—like when you want to show a tiny crack in a tooth—being able to get up-close and still stay sharp matters a lot. I always check if the lens can keep details crisp, even from very near.
- Built-In Light: Most have built-in tiny lights. I used to think brighter was better, but too much light causes glare and weak pictures. I found cameras with changeable light are way easier, especially when shooting shiny fillings or crowns.
- Picture Quality (Resolution): More pixels means a better image. When I started out, my camera was pretty fuzzy. Small issues in teeth got lost. Upgrading to high-def showed me a whole new world of color and detail.
- Connection: Some days, wireless makes life easy. Other days, you just want a cable. It really depends on your room and your computer.
- Software Matching: I can’t stress it enough—if your pictures don’t flow right into your patient files, it just adds steps. I always make sure my new camera works with my office software. It saves me lots of time and hassle.
Calibrating for Clarity
The first month with my camera, my pictures looked strange. Teeth looked blue, gums glowed, and patients looked like ghosts. That’s when I learned about calibration.
- White Balance: Using the right white balance makes pictures look real. When I finally set this right, my tooth matches got better and patients quit asking, “Are my teeth really that color?”
- Brightness and Exposure: Some cameras let you change the brightness on the camera. If not, you can sometimes fix it later on the computer. The rule is—too dark or too bright and you can’t trust what you see.
A well-kept, set-up-right camera gives you great pictures. Trust me, it’s worth the few extra minutes. The results show.
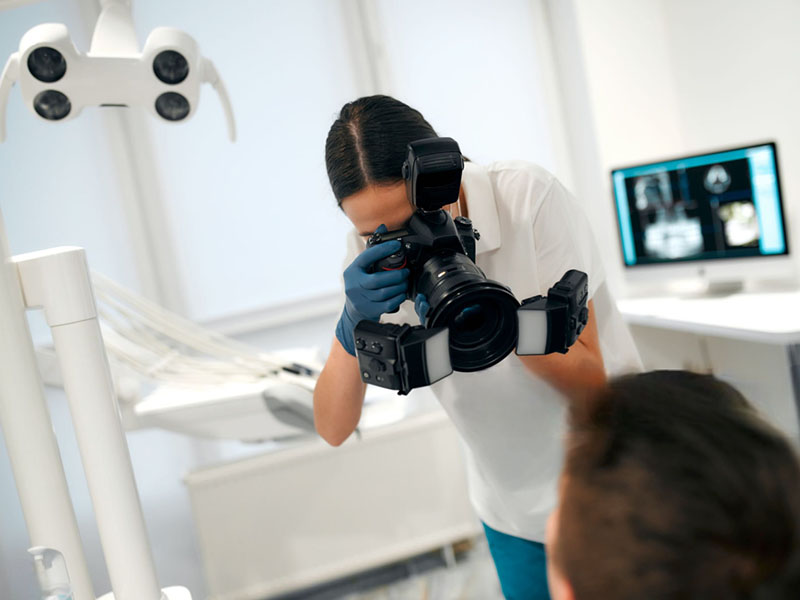
Mastering Intraoral Photography Techniques: Capture Every Detail Clearly
Comfort and Patient Positioning
Let’s talk basics—getting you and your patient comfy. At the start, I used to fumble with how I sat and stood. Sometimes I’d twist myself and feel sore later. Now I always:
- Have the patient sit up or tilt back depending on what I need to see.
- Adjust the chair so I can look straight, not bent or twisted.
- Rest my hand on the cheek, so I don’t end up shaky.
When my assistant helps, I let them handle the retractors to help us both see better.
Camera Handling and Stabilization
Steady hands aren’t just for surgeons. If the camera shakes, you get blurry, useless shots. I learned to rest my pinky on the chin or a tooth. A tiny thing, but big help.
If your camera is heavy, try a wrist strap or a way to keep the cord out of your way. The less you have to fuss, the better your shots.
Must-Have Shots And Angles
I made things simpler by sticking to a routine:
- Full Mouth Shots: Top and bottom. Good for seeing the whole bite. I use mirrors for the top, angling so I catch every tooth.
- Side Shots: Left, right; top, bottom. Handy for problem areas.
- Close Up Single Tooth: For cracks, small spots, or broken work.
- Top View: To see the biting edges—great for checking wear or new fillings.
- Cheek Side/Tongue Side: For braces or watching gum changes.
I take my pictures in order. First the big shot, then zooming into the details. It keeps things clear later.
Getting the Light and Focus Right
Light makes or breaks your photo:
- Cutting out Shadows and Glare: Turn the camera or the light to avoid white spots or shadows. Sometimes, a little mirror helps bounce light to hard spots.
- Sharpness: Pick the right setting or use the best camera you’ve got. I want every tooth in the shot to look sharp, not just the front one.
- Using Tools: Retractors and mirrors aren’t just to stay out of the way. They let you see more, keep cheeks and tongues clear, and makes tricky spots easy to shoot. I always warm mirrors or defog them—nothing’s worse than foggy photos.
Don’t Make These Camera Mistakes
I’ve made every mistake. Now here’s what I watch out for:
- Foggy Lens: Always warm up the lens or mirror, and give it a wipe if fog happens.
- Blurry Shots: Double-check focus before clicking. Autofocus is handy, but for really close shots always check the preview.
- Bad Lighting: Not all shadows fix themselves after. I pause, swap angles, or add light if needed.
- Messy Framing: I tried a ring light with guides. Now my photos look the same each time, which helps show patient progress.
By practicing all this, I hardly ever need to re-take photos.
Seamless Integration: Intraoral Photography in Your Daily Workflow
Making Photos Part of the Routine
The way to make taking mouth photos a habit? Simple—use checklists. Every morning I warm up the camera, check updates, and test the batteries. My assistant gets the retractors and mirrors ready with the rest of the tools.
With the patient in the chair, we run through our “photo list.” It’s fast: get their OK, rinse the mouth, get them in place, and go. Having a team member in charge of photos, especially when it’s busy, lets me focus on checking and treating patients.
Organizing and Saving Images
Once, my pictures were everywhere—laptops, thumb drives, who knows where. Now, every photo goes straight into our management software, linked to the patient. We use easy names—‘Smith_Jane_before_filling_46’—and sort them: diagnosis, before, after.
I back up every day to the cloud and a local backup. Losing photos can mean lost records, not to mention big headaches. And it’s important to follow the rules. Only the right people can see the files and everything is locked tight.
Privacy and Consent
One of my old teachers drilled this in: never snap a photo without asking the patient first. I get forms signed the first visit, so it’s clear what we’ll do with their photos.
I keep privacy tight. This also helps patients feel safe in our care.
Maximizing Impact: Why Superior Intraoral Photography Matters
Better Patient Education and Treatment Acceptance
That saying “seeing is believing” became real for me when I showed a patient their own cavity on the screen. They finally got it—“Oh, that’s why my tooth hurts.”
Showing images builds trust. Patients ask better questions. When you hand them the screen, suddenly dentistry isn’t a mystery—it’s clear, real, and all about them.
Stronger Diagnosis and Treatment
Better pictures mean you spot more. I’ve caught cracks and soft tissue changes the mirror missed. I use the photos to plan, pick tooth shades, and check my work on crowns.
For tricky work or when sending a patient out, good photos help others see exactly what I saw. No more “telephone game”—just the truth.
Protect Yourself and Your Patients
Early in my career, a patient said a problem popped up after my treatment. Good thing I had a before photo—dated and untouched. The record showed it was there all along. Good pictures can keep you out of trouble.
Checking photos year after year also helps track what’s improving or getting worse. It’s great for teaching your patients and learning more yourself.
Show Off Your Work and Get Noticed
Using before-and-after photos (with the right OK) is one of the best ways to get new people to call your office. Real pictures make your work more believable and show you use good tech.
Honestly, my camera paid for itself quick. More patients said “yes,” things moved faster, and everyone walked away impressed.
Advanced Tips and Future Trends in Intraoral Imaging
Using AI for Faster Checks
These days, I’ve tried smart tools that scan photos and look for patterns—like early cavities or mouth sores. I still double-check, but these helpers make exams faster, and they’re great when teaching new team members.
How Intraoral Photos Help with Remote Visits
When seeing people remotely became common, these cameras were a life-saver. You can send sharp images to another dentist or have patients send their healing progress photos. It all works because the cameras can show what needs to be seen, even from far away.
What to Look for When Buying a New Camera
When I shop for a new one:
- Higher picture quality
- Wireless for easy use
- Battery that lasts
- Works with my software
- Easy support and warranty
The tech keeps changing. Keeping up means better care and a smoother day.
Conclusion: Transform Your Practice One Clear Photo at a Time
Looking back, I wish I’d made taking mouth photos a big thing sooner. It’s not just about having a cool tool; it’s about being clear, being faster, having records, and earning trust. When I snap a sharp picture, I know I’m doing my best for my patients and my office.
If you’re just starting, learn the basics—your camera, your stance, your routine. If you’re already good, try new tricks and look for the latest tech. Whatever level you’re at, the main thing is being steady and willing to learn, shot by shot.
So, pick up your camera. Try my tips. Watch your photos—even your whole practice—get better. If you’ve got questions, ask! We’re all learning together, one clear photo at a time.