Aesthetic Zirconia Crown: Dark Stump Case Study


Wypełnij formularz, a my odpowiemy w ciągu 30 minut!
This aesthetic zirconia crown case study explores how ASD Dental Lab fabricated a single anterior restoration for a severely discolored upper central incisor. The case involved a layered zirconia crown, an opaque masking liner, customized ceramic characterization, and shade verification under two lighting conditions to match the adjacent natural teeth.
The case arrived with a deadline and a grey stump
The case came to us on a Wednesday morning, with an email subject line that said simply: “Dark stump, #8, wedding in 8 weeks. Build plan before mill?”
The clinical note attached was unusually complete. The dentist—Dr. R., a general practitioner we have worked with on anterior aesthetic cases for about three years—had documented the patient as a 37-year-old non-smoker, no parafunctional history, generally healthy periodontium. The tooth in question was the upper right central incisor (#8), root-canal treated about six years earlier following a bike accident, with a fibre post still in place. The stump had slowly darkened to a flat, cool grey that sat outside the standard Vita A–D range. The adjacent teeth (#7, #9, #10) were intact and unrestored, reading approximately 2M2 under natural daylight.
The patient’s own words, quoted in the clinical note: “I don’t want veneers on the other teeth. I just want this one to look like it belongs.”
The note ended with a line that shaped the entire workflow: “No margin for remakes. Please send build plan before milling.”
That last line is what makes a case like this run on time. Everything that follows on our side is downstream of getting the planning right before we touch a block of zirconia.
What the dentist sent us
The lab slip was structured as a seven-data-point prescription. This format had evolved between us on previous dark-stump cases; it is the minimum we ask for before we will start a build.
| Data point | What the dentist recorded |
| 1. Facial preparation depth | 1.5 mm, measured mid-facial with a depth-cutting bur and cross-checked against a silicone putty index |
| 2. Stump shade | Vita 3D-Master grey reference tab (3M3 desaturated), reading cooler than C4, with a slight blue-grey cast under D65 daylight |
| 3. Target shade | 2M2, to match the adjacent left central incisor (#7) |
| 4. Cement shade | Neutral translucent resin cement (Variolink Esthetic, shade Neutral, light-cure) |
| 5. Incisal translucency | 1.0 mm from the incisal edge on #7, measured under transillumination |
| 6. Occlusal clearance | 1.8 mm in centric, 2.0 mm in excursions, verified with a Boley gauge |
| 7. Photographs | Three sets: stump under D65 with grey tab in frame; adjacent teeth under D65 with 2M2 tab; full smile under tungsten A light |
Two details in the slip caught our attention before we did anything else.
First, the facial reduction was 1.5 mm. That is deeper than the standard 1.0–1.2 mm most dentists prepare for an anterior zirconia crown, and the reason matters: at less than 1.5 mm, a masking layer underneath the aesthetic porcelain either fails to block the substrate colour or shows through as a chalky, opaque band at the cervical and middle third. The dentist had given us exactly the space we needed to work in.
Second, the stump shade photograph had been taken under D65-calibrated daylight, with the grey reference tab in the same frame. That meant we could compare our future crown shots against the same reference under the same illuminant, instead of guessing from a verbal description.
What we checked before we started
Aesthetic zirconia is more translucent than the materials most dentists are used to from a decade ago, and that translucency cuts both ways. It is what makes a modern layered crown look lifelike at the incisal edge; it is also what allows a dark substrate to travel through the ceramic and shift the final colour if the build is wrong. Our job on the front end is to make sure we are not setting up a build that the substrate will undo at try-in.
Three things we verified on the day the case arrived:
- The stump shade photograph was usable. We opened the D65 image and the grey tab was visibly in the same plane as the prepped tooth, with no specular hot-spot blowing out the colour. That meant we could trust the colour reading.
- The adjacent tooth shade was consistent across photographs. The 2M2 reference tab, the left central incisor (#7), and the laterals (#9, #10) all sat within a quarter shade of each other under D65. We had a narrow target window, but the target itself was clear.
- The impression and bite records were intact. PVS dual-arch, no drags or tears at the margin, retraction cord residue consistent with #00 braided cord placed for about eight minutes. The opposing arch and protrusive bite record were in the same shipment.
We had what we needed.
Aesthetic Zirconia Crown Design and Material Selection
We sent the build plan the same day, by email, about four hours after the case arrived. This is what it covered.
Material route
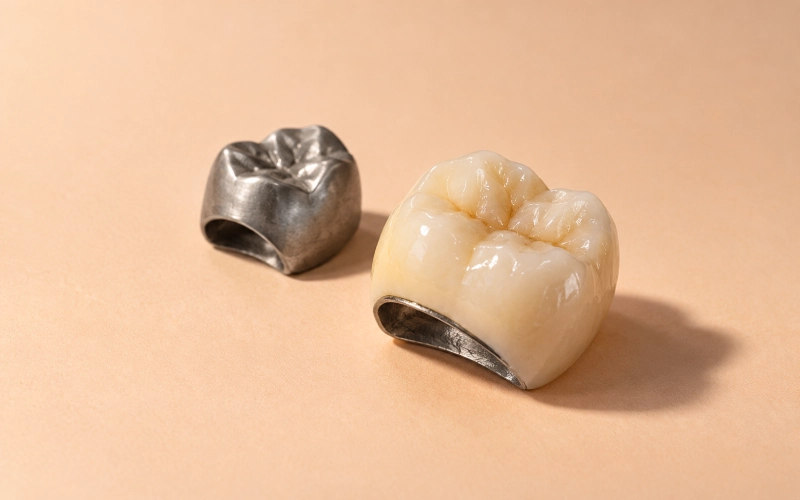
We proposed layered zirconia with a thin masking liner under the dentine layer (what we call internally “Route C”). The masking liner is a thin opaque ceramic wash, fired onto the zirconia coping before the dentine layer is built up. Its job is to block the substrate colour at the cervical and middle third. The dentine layer above it carries the chromatic colour (in this case, the warm 2M2 base). The enamel layer on top carries the surface translucency and the incisal gradient.
The alternative was a monolithic high-translucency crown (“Route B”)—thinner, faster, but at 1.5 mm facial space it would have allowed the grey stump to shift the final colour by up to one full shade tab. With untouched adjacent teeth setting the target, that shift was not acceptable.
Target thickness at five points
| Lokalizacja | Target thickness |
| Cervical margin | 0.8 mm |
| Mid-facial | 1.5 mm |
| Incisal edge | 1.8 mm |
| Mesial contact | 1.2 mm |
| Distal contact | 1.2 mm |
These were design targets, not final measurements. The coping was designed to these dimensions, and the dentine and enamel layers were built on top to a total wall thickness of 1.5 mm at mid-facial.
Cement shade assumption
We assumed neutral translucent resin cement, as the dentist had specified. We added a note: if the cementation cement was changed at the chairside (to a warm-toned translucent, for instance), the try-in would no longer be representative, and a new try-in would be needed.
Zirconia Crown Shade Matching and Quality Checks
Three checks, in this order:
- After firing the dentine layer, we would photograph the crown against the same grey reference tab the dentist had used, under our bench light (D65 equivalent). If the crown read too warm, too cool, or too high in value at that stage, we would re-stain and re-fire before adding the enamel.
- After the final glaze, we would photograph the crown next to a 2M2 reference tab under both D65 daylight and tungsten A incandescent light. If the metamerism (the way a colour match shifts under different illuminants) broke down under either light source, we would either re-stain or flag it in writing to the dentist before shipping.
- Before packing, we would verify marginal fit on the master die under a microscope at 10× magnification. Any marginal gap above 80 µm would be re-contoured or remade.
Responsibility boundary
The dentist’s responsibility: accurate prescription data, stable temporization, proper cementation protocol.
Our responsibility: material route and selection, firing cycles, internal stain map, marginal fit on the master die, verification under two illuminants before shipping.
We wrote that boundary explicitly in the build plan because the most common reason aesthetic cases drag on is that the remake responsibility is unclear after a failed try-in. Spelled out up front, both sides know what they are agreeing to.
The dentist approved the plan the same evening.
Layered Zirconia Crown Fabrication Process
Milling and sintering
We milled the zirconia coping from a pre-shaded block (Y-TZP, 5Y-PSZ blend, batch recorded in our system) two days after approval. Sintering was a standard 1500 °C cycle with a 2-hour hold, ramp rate matched to the block manufacturer’s specifications.
After sintering, the coping measured 1.5 mm at mid-facial against the design target, with no warping detectable at the margin under 10× magnification. The coping fit the master die passively, with no rocking and no marginal lift.
Masking liner
We applied a thin opaque wash (a zirconia-compatible liner ceramic, mixed to a 1:1 powder-to-liquid ratio with the manufacturer’s modelling liquid) and fired it according to the liner manufacturer’s cycle. After firing, the cervical and middle third of the coping read as a uniform, opaque light grey—no dark substrate showing through, no banding.
This was the first checkpoint where we could have failed the case. If the liner had been applied too thin, the grey would have shown through after the dentine layer was added, and we would have been chasing the colour for the rest of the build. If it had been applied too thick, we would not have had enough room for the dentine and enamel layers, and the crown would have ended up over-contoured.
The liner sat at about 0.15 mm after firing, which was within tolerance.
Dentine layer
We built up the dentine layer to match the 2M2 reference tab under D65, using a layered application (darker cervical, lighter body, slight mamelon structure in the middle third). The dentine was fired at the cycle specified by the ceramic manufacturer.
After firing, we held the crown next to the grey reference tab under the bench light. The crown read slightly cooler than the 2M2 target tab at the cervical third—within tolerance, but on the cool side of the target window. We made one round of adjustments: a thin warm-toned stain applied to the cervical third and re-fired.
The second post-fire check read within a quarter shade of the 2M2 tab under D65.
Enamel layer
We applied the enamel layer with a 0.3 mm thickness at the body and a 1.0 mm translucent incisal edge, then fired.
Wykończenie powierzchni
The adjacent teeth in the patient’s smile photographs read as natural gloss rather than high-shine. We adjusted our finishing protocol accordingly: the crown was polished to a medium gloss, then lightly glazed, rather than brought to a full high-shine glaze.
Final verification
Before packing, we ran the two-illuminant check:
- Under D65 daylight: the crown matched the 2M2 reference tab within a quarter shade at the body, with a believable incisal gradient.
- Under tungsten A light: the crown read slightly warmer at the cervical third—within the metamerism tolerance we had quoted in the build plan (ΔE < 1.5 under A illuminant).
Marginal fit on the master die: no gaps detected at 10× magnification. Contact points: tight mesial and distal against the adjacent dies, floss test passed.
The crown was packed with the grey reference tab, the 2M2 reference tab, and the three sets of clinical photographs the dentist had sent.
Try-in and what the dentist reported back
The crown was shipped four days after the build plan was approved. The dentist received it two weeks before the patient’s wedding, with margin for adjustments.
A week after shipping, we received a short note from the dentist:
Try-in this morning. Matched #7 within a quarter shade under operatory light and under north-facing daylight. Patient took a phone photo under her bathroom mirror at home—slightly warmer cast there, but she said it looks like her own tooth. Cemented with Variolink Neutral. No issues at try-in, no issues after bonding. Case closed.
That note is the outcome we work toward on dark-stump cases. The match holds under the operatory light, holds under natural daylight, and degrades gracefully under home lighting rather than breaking down.
What made this case go smoothly, from our side
Three things, all on the planning side rather than the fabrication side:
- The seven-data-point prescription was complete on the first submission. No back-and-forth emails, no requests for additional photographs, no clarification questions about cement shade or incisal translucency. The dentist had sent everything we needed to design the build.
- The pre-mill build plan locked the variables before fabrication started. Once the dentist had approved the material route, the target thicknesses, the verification steps, and the cement shade assumption, there were no decisions left to make during fabrication. The build followed the plan.
- The two-illuminant verification caught the metamerism risk before shipping. The slight warming under tungsten A light we saw on the bench would not have been visible under the operatory light alone. Checking under both light sources is what allowed us to ship the crown with confidence that the match would hold in the patient’s home environment.
Aesthetic Zirconia Crown Shade Matching and Verification
The crown was fabricated from layered zirconia with a 5Y-PSZ coping (the high-translucency formulation suitable for anterior aesthetic work). The masking liner, dentine layer, and enamel layer were each fired separately, with a colour check after the dentine fire and a final two-illuminant check after glazing. All firing cycles followed the ceramic and block manufacturers’ specifications, and the batch numbers for the block, the liner, and the dentine and enamel ceramics are recorded in our internal system and available on request.
This workflow is the same one we use for any anterior aesthetic case over a discoloured stump. The seven-data-point prescription format and the build plan structure are not specific to this dentist—they are the format we have found produces the fewest remakes on cases where the substrate colour is the dominant variable.
Referencje
The links below are to peer-reviewed sources that informed our approach to this build:
- Optical and Mechanical Properties of Highly Translucent Dental Zirconia — PMC
- Translucent Zirconia in Fixed Prosthodontics—An Integrative Review — PMC
- Ceramic Crown Colour Difference by Layer Thickness — ScienceDirect
- Esthetic Rehabilitation of a Discoloured Maxillary Central Incisor — PMC
- Techniques for Enhancing Zirconia Bond Strength — PMC
- Bonding of Composite Cements Containing 10-MDP to Zirconia Ceramics — PMC