Cosmetic Composite Veneers: 4-Unit Anterior Case Study


Wypełnij formularz, a my odpowiemy w ciągu 30 minut!
1. Patient Situation
A patient in her 40s came back to her dentist a decade after having direct composite veneers placed on her upper front teeth.
The original work looked good at the time. Ten years later:
- The composite had stained noticeably, especially near the gum line — most visibly between the two centrals, where the gumline shadow and the material had drifted apart.
- The edges were chipped in two places (the mesial of one central, the incisal of the lateral), the kind of chipping you only catch when a fingernail catches on it.
- The patient wasn’t in pain, but she was tired of the look - “I want them bright again, not whiter, just like the day they went in.”
She’d had orthodontic treatment in her 20s. Her bite was stable. She didn’t grind. She brushed twice a day. There was no decay under the existing composite — it was purely an ageing and wear issue.
She’d already asked about porcelain. Her dentist talked her through both options. She stuck with composite — she’d been happy with composite before, didn’t want healthy enamel removed, and didn’t want to commit to something irreversible at her age.
The patient’s situation, in one line: existing direct composite, ten years old, stained and chipped, stable bite, wants the same material done well a second time.
Why this is a common case for us
Composite veneer re-work after 7–10 years is one of the bread-and-butter cases in our daily queue. Direct composite has well-documented limitations — surface staining and edge chipping show up predictably within the first decade for most patients (10-year practice-based evaluation of ceramic and direct composite laminate veneers, Journal of Dentistry). When the underlying tooth and bite are still healthy, replacing with indirect composite is often the most predictable next step.
2. What the Treating Dentist Required from Us
2.1 What the dentist prescribed for this case
- Zęby: Upper centrals and laterals — four units, no canines.
- Restoration type: Indirect composite veneers, not direct. — a case decision his made because four units in the smile zone is exactly the situation where chairside colour consistency and edge adaptation are hardest to control (survival and complication rates of resin composite laminate veneers, Journal of Dentistry).
- Materiał: A nano-hybrid composite system that pairs with a compatible laboratory resin — chosen because the patient wanted the same look as before, and because we can adjust it chairside if she changes her mind about the shade down the road (nanofilled and nanohybrid resin composite clinical performance, Journal of Dentistry).
- Preparation: Minimal-prep, additive-style on the centrals, light chamfer at the gingival margin, no incisal coverage. The patient’s existing enamel was preserved as the bonding substrate, which is the documented predictor of long-term success (resin bond to indirect composite materials, Journal of Esthetic and Restorative Dentistry).
- Shade protocol: Layered shade — body A2, cervical A3, with a clear incisal window and a touch of opalescent blue at the incisal edge. Not a single shade tab.
- Aesthetic references: Smile and retracted photos from the original 2014 case (the patient had them on her phone), so we could match the characterisation the patient had grown to like — not just the colour.
2.2 What the dentist sent us so we could meet the prescription
This is the part most clinicians don’t think about — but it’s the part the lab notices first.
| Required from clinician | Why the lab needs it |
| Intra-oral scan or final impression (full arch, not just the four units) | Lets us design with the smile line and gingival architecture in mind, not just four crowns floating in space (case-long-span full-arch scan accuracy, Operative Dentistry) |
| Bite scan in MIP (maximum intercuspation) and a photograph of the patient biting on a stiff articulating paper | — so the lab can verify the occlusion before we mill |
| Photos at minimum: full-face at rest, full-face smiling, retracted frontal, retracted left and right, occlusal of upper, shade-tab photograph in the same plane as the teeth, pre-op photo of the existing composite | — the photo set is what lets us see what you’re seeing; without it, we’re guessing (utility of cross-polarized photography in dental shade matching, Decisions in Dentistry) |
| Notes on the patient’s bite history (any parafunction, any history of night-guard use) | — so we can adjust our occlusion scheme and our recommendation to you for follow-up |
| Patient-approved shape — either a mock-up approved in the mouth, or a wax-up photograph signed off by the patient | — so we know what we’re aiming at, not just guessing from the prep |
Our standing offer: if you’d like to review the design before we cut, send us the case with a note saying “design review wanted” — we’ll send the file back for your sign-off, which adds about a day but means you’re never surprised by what comes back. (This is standard at our lab; the cost is a calendar day, the saving is a redo.)
2.3 What we’d the dentist told the patient up front
The dentist was honest with the patient that indirect composite isn’t a forever restoration. It’s expected to need re-polishing or replacement in 7–10 years under normal use, sometimes earlier if the patient is a grinder or heavy coffee drinker. That’s not a flaw of the material — it’s how composite ages, and it’s exactly the kind of conversation we tell our clinician partners to have before any work goes in (longevity of direct composite restorations, Journal of Esthetic and Restorative Dentistry).
3. Indirect Composite Veneer Design and Fabrication
This is the side of the bench the clinician rarely sees. Here’s what we did with this case, end to end.
3.1 Receiving the case (day 1)
The case landed in our queue as a digital file. Our first check is always: do we have everything we need to start? If a bite scan or a photograph is missing, we ping the clinician on the same day — no charges added for a clean intake.
This case had:
- ✓ Upper-arch intra-oral scan
- ✓ Lower-arch scan
- ✓ MIP bite scan
- ✓ Five-view photo set
- ✓ Shade-tab photo with A2/A3 tabs in frame
- ✓ Notes on the patient’s bite history
3.2 Design (day 1–2)
We designed the four veneers digitally. The scan does not do the design — the scan gives us the prep geometry, and a human technician (CAD designer, one of about 100 on our team) shapes the four teeth in the software.
We copied the patient’s pre-op photo into the design software as a reference layer. We matched the incisal edge position, the contact-point placement, and the surface texture — the small perikymata-style ridges that make a tooth look like a tooth, not a piece of plastic. We sent the design back to the clinician for review. He approved it within 24 hours.
This is the part of the workflow that distinguishes a serious lab from a template-driven lab. Templates are a useful starting point, but four teeth that have to match the patient’s face, age, and existing dentition are not a template case (digital workflow of esthetic veneers, Journal of Dentistry).
3.3 CAD/CAM Composite Veneer Fabrication (day 2–3)
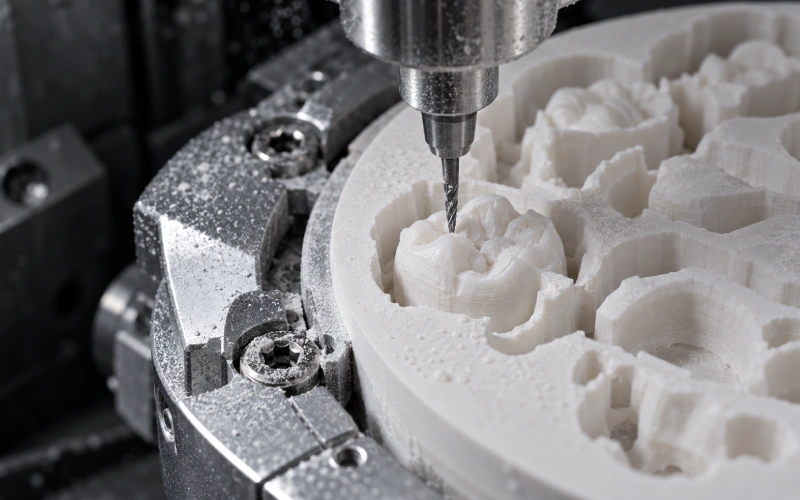
We milled four thin shells from a CAD/CAM nano-hybrid composite block (CAD/CAM resin-based composites for long-term temporary fixed prostheses, Polymers). After milling, we did our standard checks: no chipping at the margins under 10× magnification, no internal voids, full seating on a printed model.
We then characterised each the four by hand — adding the cervical warmth, the incisal translucency, the faint surface texture. This is a manual step. It’s the step that takes the most skilled labour in the lab.
Curing: each the four was post-cured under nitrogen to maximise conversion of the resin — the single biggest controllable variable for stain resistance and long-term colour stability.
3.4 Finishing, polishing, and the edge that doesn’t stain
The polish sequence is where a lab quietly shows its quality. We finish the gingival margin to a convex bevel rather than a feathered or concave edge — the documented recommendation for resin composite margins where the gumline is the visible interface (composite resin veneer clinical techniques and long-term performance, ResearchGate).
The final glaze layer is not optional, and it’s not removable. Once it goes on, the surface polish is sealed. If anyone adjusts the surface later — at try-in, at seating, at any follow-up — they’re cutting into the aesthetic layer and it won’t come back. We document this in our delivery note so the clinician’s team knows not to grind on the surface.
3.5 Infection control and chain of custody
The case travelled through our own in-house workflow — design, mill, characterise, finish, QC, pack, ship. No sub-contracting. We follow OSHA guidelines for machining and finishing cured composite materials: local exhaust ventilation at the mill, gloves and eye protection at every step, SDS retained for every material in the case (OSHA Technical Manual Section III, Chapter 1).
Every case has a unique ID. Material lot numbers and the technician who made each step are recorded against that ID. If anything ever needs to be traced — a shade mismatch, a staining question six months out — we can pull the case file and see what we made and who touched it.
4. Outcome
4.1 Try-in
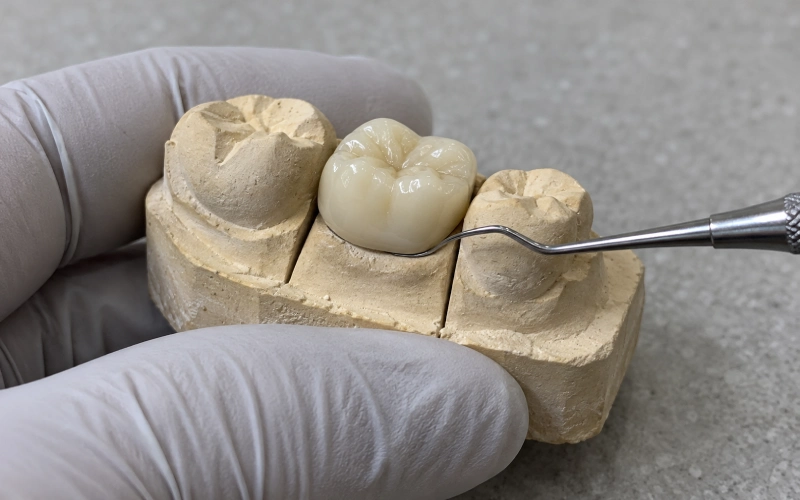
The four the four seated cleanly on the first try. No rotation, no rocking, no tight contact. The contacts were checked with floss before any cement went near the case. The shade check was done under:
- The operatory light light
- A handheld colour-corrected light at the chair
- The patient standing near a window for daylight
The patient approved the try-in. The dentist approved the try-in. Both signed off.
4.2 Seating
We used a total-etch adhesive protocol with a heated composite for the lute. The gingival margins were sealed first, the incisal edges last. Excess was removed with a floss tie before full cure, then a fine flame-finishing bur — used lightly, only to the cement, never to the glaze of the restoration.
Occlusal contacts were checked in MIP and and in protrusive and lateral excursions. The patient was asked to tap and grind on articulating paper before final cure.
4.3 Follow-up
The patient came back at dwa tygodnie for a soft-tissue check and and to let us have a look at the gingival response. The gingivae were healthy. No bleeding on probing. No marginal stain visible. The patient said she liked the look “better than the first time”.
We follow the recommended recall schedule for this kind of work: 6 miesięcy, then annually for the first three years, then on the patient’s regular hygiene recall. At each recall we look at three things in this order: marginal integrity, surface polish, and shade stability. (Composite is repair suitable for anterior restorations? Clinical Oral Investigations).
4.4 What the patient and the dentist both got
- The patient got four front teeth that look like her own teeth, only better preserved. The bite is unchanged. The healthy enamel is unchanged. If she wants them redone in five years — or twenty — she can.
- The dentist got a lab communication trail from day one, a chance to approve the design before any irreversible fabrication step, and a case file he can reference in five years’ time if the patient comes back asking what was done.
5. When Cosmetic Composite Veneers Are Not Suitable
We turn down cases. Not because we’re precious about it, but because we are — and here’s an honest list of when composite veneer isn’t the right material for this case:
- Heavy bruxism with no night-guard plan — composite will chip. The night guard has first, then we talk about veneers.
- Edge-to-edge bite or anterior open bite — composite won’t survive the lateral forces; we’d recommend the patient talk to the orthodontist first.
- Severe wear or erosion that has already eaten the enamel — there’s nothing for the bond to lock into; porcelain onlay or crown is a better long-term call.
- Patient who cannot commit to annual hygiene recall — composite ages, and we want it to age well.
- Single central where the adjacent teeth have full-coverage crowns or veneers — single-shade matching across two material systems is the hardest problem in aesthetic dentistry; we’d want to talk before quoting.
If a case lands on our desk that fits any of these, we flag it back to the clinician with a written note — nie an invoice. (State requirements for dental laboratory work orders, Massachusetts 234 CMR 5.00).
6. Cosmetic Composite Veneer Manufacturing at ASD Dental Lab
- Standard turnaround for an indirect composite veneer case is 2–3 working days from cleared intake.
- Design review is offered as standard on veneer cases. Add one day if you want to see the design before we cut.
- Material disclosure: we name the brand and lot number of every material in your case on the delivery note. No proprietary “we use the good stuff” language.
- Regulatory basis: we work within the FDA 510(k) framework for dental composite resin devices (Dental Composite Resin Devices — Premarket Notification 510(k) Guidance, FDA) and to the ISO 4049:2019 standard for polymer-based restorative materials (ISO 4049:2019 Dentistry — Polymer-based restorative materials).
- In-house only: every step of this case — design, mill, characterise, finish, QC, pack — happened inside our own facilities. No third-party labs, no overseas hand-offs, no surprise origin stories. (ADA policy on direct-to-consumer dental services, American Dental Association).
If you’ve got a case on your desk and you’d like to talk it through before sending it, send us the photos and the situation — we’ll write back the same day with what we can do, what we can’t, and what we’d want to know from you to do the rest.
7. Notes for Clinicians Reading This
- This case walk-through is a teaching example, not a published patient case. Patient, clinician, and clinic are not identified. The case is built from a documented clinician conversation in a public professional forum (composite veneer clinical discussion, r/askdentists) combined with the lab workflow we run every day.
- Lab timing stated (“2–3 working days”) is for a typical four-unit indirect composite veneer case in our standard queue. Complex multi-unit cases, custom characterisation work, or design-review requests will run longer. We confirm the schedule when we accept the case.
- Longevity figures (7–10 years to re-polish or replace) are aggregate outcomes from clinical follow-up studies in the dental literature, not a guarantee on any individual case. Outcomes vary with case selection, occlusion, hygiene, bonding protocol, and maintenance — the same factors the dentist and patient discuss before treatment.
- Brand names are not used in the workflow narrative because we don’t pick one brand as a single “right answer”. We use a small set of CAD/CAM nano-hybrid composite systems that meet ISO 4049 and the FDA 510(k) framework, and we tell you exactly which one was used for your case on the delivery note.