Temporary and Permanent Veneers: A Lab-Side Guide for Dentists
If you prescribe veneers chairside, you’ve lived through this loop a hundred times: prep, temporize, send to the lab, wait, seat, redo — sometimes twice. Most chairside resources explain the patient-facing “what to expect.” This one doesn’t. It walks the temporary → permanent chain the way a dental lab actually experiences it: what we need from you, what we send back, where the case quietly falls apart, and how to keep temporaries in the mouth long enough for the finals to look the way the patient signed off on.
Both halves of the chain — provisional and definitive — are covered below, with the material logic that holds them together. Everything in here is built around how we, as a full-service lab, actually move a case from consult to seat.
Índice
1. What a temporary veneer really is (and why it matters for the final one)
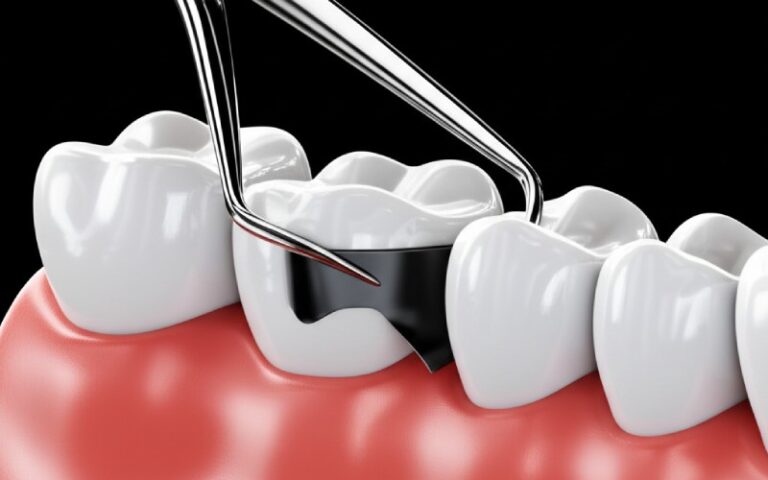
A temporary veneer is a provisional restoration, not a “trial smile.” In clinical terms it is a bonded — or more often frictionally retained — shell placed over a prepared tooth while the lab fabricates the definitive piece. Two facts matter as much as the word “temporary.”
- The prep is irreversible. Once enamel is removed (typically 0.3–0.7 mm for conventional veneers, less for minimal-prep, occasionally close to 1 mm at the margin), it doesn’t grow back. This is true whether you prep for a no-prep, minimal-prep, or conventional design — only the volume of removal changes. A systematic review confirms that temporary veneer retention is inversely related to how conservative the prep is. The more enamel you save, the harder the temp is to hold.
- The restoration isn’t permanent either. Porcelain veneers last roughly 10–15 years on average; feldspathic and premium lithium disilicate restorations reach 15–20+. Composite lasts 5-7 años. A large clinical study reports 95.5% 10-year survival for porcelain laminate veneers. Even an excellent case will need at least one replacement cycle in the patient’s lifetime.
So the chairside storyline is: an irreversible procedure that hosts a long-lasting but ultimately replaceable restoration, separated by a 2–3 week provisional phase that quietly dictates the shape, occlusion, and lab communication for everything that follows.
2. Why the temporary phase is the most important step most prescriptions skip
The provisional isn’t window dressing. It’s the physical blueprint for the lab. Skip the discipline here, and you’re guessing at the finals.
Here’s what a well-made temporary actually does, mapped to what we need back at the lab:
| Job of the temporary | What it tells us back at the lab |
| Protect the prepped tooth from sensitivity and bacterial ingress while dentin tubules are exposed | Confirms your prep depth and isolation plan were appropriate |
| Maintain the proximal contacts and prevent drift | Sets the contact geometry for the final scan or impression |
| Preview the final shape, length, and incisal edge position | Lets the patient and you sign off antes de we mill — the cheapest place to make a change |
| Test the phonetics and lip posture | Confirms whether your proposed incisal edge position will actually work for that patient |
| Drive soft-tissue healing | Well-contoured temps = healthy gingiva at seat = clean margins |
The chairside takeaway: the patient often judges the final result by how the temporary looks and feels. That’s a problem if the temp was thrown in. It’s an opportunity if it was done on a wax-up or digital mock-up that we can scan and use as the basis for the final design.
This is also why the temporary is the cheapest place to change anything. Once the final is bonded, you can’t easily subtract length or thickness — porcelain isn’t enamel, and clinical guidance on adjusting porcelain after seating is unambiguous about the cost.
3. The three things people call “veneer” (and why we need you to specify which one)
This is the part where vocabulary quietly wrecks cases. The word chapa gets used for three genuinely different things, and they share no materials, no indications, and no lab workflow. When we receive a prescription that says “vener” with no further qualifier, here’s what we have to guess:
| Clinical provisional (chairside temp) | Definitive bonded veneer | Removable “snap-on” appliance | |
| Propósito | Holds the prep while the final is made | Restores appearance and function long-term | A cosmetic accessory for photos/events |
| Made by | You, at chairside | Dental lab | Mail-order company |
| Material in our hands | Bis-acryl, PMMA, or PEMA — handled chairside | Feldspathic, lithium disilicate (e.max class), zirconia, or lab-processed composite | Acrylic, sometimes 3D-printed |
| Retención | Frictional grip; non-setting or weak temporary cement | Chemical bond to enamel after etch + silane | Friction — pops in and out |
| Expected wear time | 1–3 weeks (sometimes longer for gum healing cases) | 10–15+ years; eventual replacement | Disposable, often replaced yearly |
| Treats dental disease? | No | No — it restores them | No |
| Reversible? | Yes, by the dentist | No — prep is permanent | Yes, by the patient |
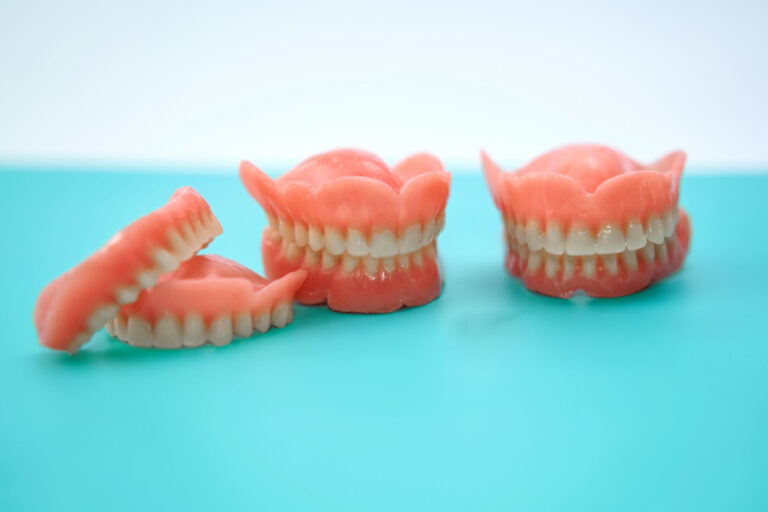
Why this matters lab-side: when a patient Googles “temporary veneers” and lands on a DTC snap-on comparison, they often come back to the chair asking for the same thing. ADA has formally addressed this — the chairside conversation lands on you, not on the DTC vendor.
4. Materials — the lab’s actual menu, written for the chair
We get asked a lot which material we recommend. The honest answer is: it depends on the tooth, the bite, and the patient. There’s no universally “best” veneer material. Here’s how we think through it at the bench:
Provisional materials (what you place at chairside, or what we hand back if you ask us to fabricate)
- PMMA / PEMA (acrylic) — Cheap, fast, easy to adjust chairside. Edge fit and polish leave a lot to be desired, and they stain aggressively. Fine for a 7–14 day black light. Not fine for a 6-week gum-heal case.
- Bis-acryl composite (e.g. Luxatemp, Integrity) — The workhorse chairside provisional. Better polish, better marginal stability than straight acrylic, easier to handle. The most common pick for a 2–3 week veneer provisional.
- Direct composite resin — Useful when the prep is highly conservative and the temp is essentially a contact-bonded thin shell. Limited by the same polish-and-wear constraints as any chairside composite.
- Indirect provisional (lab-fabricated PMMA, sometimes 3D-printed resin) — When the case needs longer wear, a heavier occlusion, or a try-in that mirrors the final, we’ll fabricate a provisional in-house. This costs more and adds days, but it’s the right call when you need a temp that survives 4–6 weeks or longer.
Definitive materials (what we send back)
| Material | Best fit | Notas |
| Feldspathic porcelain | Highest esthetics, low-prep or no-prep cases where translucency matters more than strength | Demanding on the lab and the prep; survival data is excellent when the case is right |
| Lithium disilicate (IPS e.max class) | The default modern choice for most veneer cases — strong, etchable, well-bonded | Bonding protocols are evidence-based and forgiving chairside |
| Translucent zirconia | Heavier occlusion, darker substrates that need masking | Less translucent than lithium disilicate; bond strength depends critically on MDP-containing cements and proper conditioning |
| Lab-processed composite | Cases where future repair is a priority, budget constraints, or where you want the option to add or subtract later | Wears and stains faster than ceramic; longevity comparison is fair, not a deal-breaker |
The mistake we see most often: a case prescribed as “porcelain” that, on closer inspection of the prep and bite, really wants lithium disilicate or vice versa. When in doubt, send the pre-op photos and the opposing dentition — we can recommend a material rather than guess.
5. The temporary-to-permanent handoff — what actually transfers
The temporary and permanent veneers aren’t independent phases — they’re two fabrications from the same design source. Done right, the final is the temporary, translated into a different material. Done wrong, the final is a guess, and the patient sees the difference at seat. This section is about what crosses the bridge between them, and where that bridge usually breaks.
What the temporary tells us (and what it can’t)
When you send us a photo of the seated temporary, or when we fabricate the temporary ourselves and you send back notes about how it looked and felt, here’s what we’re reading:
| Signal from the temporary | What we use it for in the final design |
| Incisal edge length | Sets the final length — patients rarely accept a shorter final than the temp |
| Facial contour and volume | Maps where the porcelain needs to sit; we copy the approved contour |
| Proximal contacts | Tells us how tight or loose the patient found the contacts; we adjust in CAD |
| Gingival emergence | Shows us where the tissue healed to; we design the final margin to match |
| Color reaction | Tells us if the patient wanted lighter, darker, or more translucent |
| Phonetics notes | If you noted sibilance or lip posture issues, we adjust incisal length or labial contour |
What the temporary doesn’t tell us: the final shade under intraoral lighting, the final translucency (bis-acryl is opaque; lithium disilicate is translucent), or how the final will feel under the tongue (ceramic is smoother and thinner).
The biggest mistake we see: a photo of the temporary with no notes. If the patient hated it, loved it, or asked for changes, we need to know that. Otherwise we’re fabricating to a blueprint that was never approved.
How changes to the temporary propagate to the final
If you adjusted the temporary after seating — trimmed the incisal edge, added bulk to the contact, reshaped the gingival contour — that adjustment needs to be in the final design. Here’s the reliable way to communicate it:
- Best case: Send a post-adjustment photo of the temporary with a note. “Reduced incisal edge 1 mm, patient happy with result.” We’ll measure the change and apply it.
- Good case: Note it in the prescription. “Temp was trimmed shorter, use seated temp geometry.”
- What doesn’t work: Saying nothing and expecting us to infer it from the prep scan. We can’t see what the temp looked like after you adjusted it.
If the temporary was remade (fell off, patient didn’t like it, or you made a second version), the final version is the one we need. Send us the geometry you and the patient signed off on, not the first draft.
The temporary scan as a design file
The cleanest workflow we see: you seat the temporary, the patient approves it, you scan it in the mouth, and you send us that scan. We import the temporary geometry directly into CAD and use it as the surface model for the final. The final veneer is now a material swap — same shape, same contacts, same everything — with the only variables being shade and translucency.
This works when:
- The temporary is well-made (good margins, accurate contour, stable contacts)
- The patient explicitly approved it (“I want the final to look like this”)
- You scanned it after any adjustments
This doesn’t work when the temporary was a rough placeholder and the real design work is supposed to happen at the lab. If the temporary was quick-and-dirty bis-acryl with gaps and a provisional shade, don’t send us a scan of it and ask us to copy it.
The cost of changing geometry between temporary and final
This is the part most prescriptions underestimate. Once the patient has lived with a temporary for 2–3 weeks, that geometry is now their expectation. If the final is longer, shorter, bulkier, or less bulky than the temp, the patient often rejects it at try-in — even if the final is objectively better.
Changing geometry between temp and final costs:
- La hora: Try-in, rejection, lab adjustment or remake, second try-in.
- Dinero: Lab remakes are billable or eat into the margin, depending on the agreement.
- Trust: The patient loses confidence. “I thought you knew what you were doing.”
The temporary phase is your chance to iterate cheaply. Adjust it until it’s right. Once it’s right, the final becomes predictable. If you skip that step and hope the lab will “make it better,” you’re gambling.
When the temporary should differ from the final
A few legitimate cases where we intentionally diverge:
- Shade verification: The temporary is a working shade, not the final. If the patient asked for lighter or warmer, we adjust in the final.
- Gingival healing cases: The temporary is intentionally undercontoured to let inflamed tissue heal. Once healed, the final is contoured to the new, healthy tissue line.
- Provisional thickness: The temporary is slightly overthick because bis-acryl doesn’t bond — we’re relying on mechanical retention. The final is thinner because it’s chemically bonded and doesn’t need the bulk.
- Compromised preps: The temporary had to compensate for an unclear margin or a prep that jumped between minimal and conventional. Once we have the final impression, we design to the actual prep, not to the stopgap temp.
In each of these cases, the divergence is planned and communicated. The prescription says why the temp differs and what the final should target. What wrecks cases is unplanned divergence — where the final just happens to come back different and no one knows why.
6. Why temps fall off (and why that’s not always bad news)
This is the chairside question we hear about most, and the honest answer is: it’s usually a feature of conservative veneer preparation, not a bug.
Veneer temps fall off more than crown temps for a mechanical reason. A crown covers 360° of the tooth and locks onto it through total surface area. A veneer covers only the facial surface — typically half the tooth or less — with nothing on the lingual side to retain it. So the temp relies on frictional grip from a weak, non-setting cement, plus whatever surface area and undercuts the prep offers. Conservative preps — the prep design that preserves the most enamel and is the right choice for long-term bond strength — give the temp menos to grip. The final porcelain doesn’t share this problem because it’s chemically bonded to the etched enamel.
Four retention techniques we see in real prescriptions:
- Shrink-wrap technique — A silicone matrix is loaded with provisional material and seated over the prepped teeth; the material shrinks as it sets and mechanically locks onto the prep. Works well when the prep has clear margins.
- Spot-etch retention — A small spot of enamel is etched and bonding agent placed, providing a single chemical-bonded anchor point to hold a single-unit temp in place.
- Interproximal interlock — Leaving a small amount of material between adjacent teeth so the temps brace against each other. Used with the one-piece (connected) approach.
- One-piece / connected temps — Adjacent veneers fused into a single unit. This sacrifices the ability to floss between teeth, in exchange for dramatically better retention. The patient’s home care instructions change accordingly.
When a temp falls off, the patient often reads it as a quality failure. It usually isn’t. It often means the prep was appropriately conservative and the temp simply didn’t have enough surface to grip. If you can recement the same day with the same temp — great. If not, save it and we’ll fabricate a replacement quickly.
7. Real-world longevity, ranked by what actually fails first
Here’s what ten years of veneer follow-up in the literature and in our own casework actually shows. The failure ranking matters because it changes what you design for.
The most common long-term issue with bonded veneers is not chipping — it’s gum-line change and margin staining. The literature cites this consistently, and our casework confirms it. A thin porcelain margin at the gum line is the area most exposed to biofilm, most subject to small gaps, and most likely to develop visible discoloration over time.
The next most common issues, in rough order:
- Bruxism-driven fracture — Patients who grind their teeth are a higher-risk population; the design needs to account for it. A review of feldspathic and lithium disilicate veneers flags occlusion as the dominant failure driver.
- Debonding — Usually associated with bond degradation over time, or contamination during seating.
- Staining at margins — Stain from the underlying tooth showing through thinner porcelain, or leakage at the margin.
- Aesthetic regret — The “too white” or “too uniform” complaint, usually appearing 5+ years in when the patient’s preferences have shifted.
What this means for the design phase: margin design matters more than chip resistance. A well-contoured emergence profile, a clear finish line the lab can read, and a bonding protocol that isolates the prep are the chairside decisions that determine whether the case holds up at year 10.
8. Case characteristics that change the lab’s design and material choice
Not every veneer case is the same at the bench. A few patient and case characteristics directly affect how we design, which material we pick, and what compromises we build in. When you flag these up front, we can plan around them. When they arrive as a surprise at try-in, the case often needs to go back.
Bruxism or heavy occlusal load
If the patient grinds or clenches, we need to know before we design. This changes:
- Material choice — We may recommend translucent zirconia or thicker lithium disilicate over feldspathic porcelain, which is more fragile under lateral load.
- Espesor — We’ll design thicker incisal edges and avoid feathered margins that chip easily.
- Occlusion — We may request a bite guard as part of the treatment plan, or design the veneers with group function rather than canine guidance.
Without this information, we default to a thinner, more translucent design that may not survive the patient’s bite.
Dark or heavily restored substrate
If the underlying tooth is discolored (tetracycline staining, prior metal restorations, endodontically treated tooth), or if there’s a large Class III or Class V restoration under where the veneer will sit:
- Material choice — We may shift from standard lithium disilicate to high-opacity e.max or translucent zirconia.
- Layering — We may add an opaque layer or use a stacked ceramic technique rather than monolithic.
- Shade expectations — The achievable shade is bounded by the substrate. If the patient wants A1 and the tooth is currently C4, we need to have that conversation before the prep, not at try-in.
A shade photo with the underlying tooth visible, plus a note about existing restorations, saves us a lab remake.
Aesthetic extremes (the “Hollywood white” request)
When a patient requests B1 or lighter on a naturally B3+ tooth, or wants a uniform shade across teeth that have different substrates:
- We’ll recommend a mock-up or wax-up antes de the prep so the patient can see what that shade looks like in their face.
- We may need to go thicker (more prep) or more opaque (less translucency) to achieve the requested shade.
- If the request isn’t achievable within the clinical boundaries of the case, we’d rather know that before the temp goes in — because the temp is when the patient decides whether they’re happy.
En literature on color agreement between try-in paste and final cement is clear: surprises at final seat are avoidable with a 60-second pre-prep conversation about what’s realistic.
9. Common questions we get from prescribing offices
How long does the lab actually need?
For a standard veneer case, 5–10 working days is a realistic window from receipt of a complete record package to delivery of the final. Heavier cases, multi-unit full-arch veneer work, or cases requiring complex staining can run longer. The single biggest delay source isn’t fabrication — it’s incomplete or low-quality impressions and missing records. A complete package in, a predictable delivery out.
Can we send a digital intraoral scan instead of an impression?
Yes — for veneer cases, an IOS scan from any major scanner (3Shape, iTero, Medit, Primescan) is usually our preferred format. Vinyl polysiloxane impressions work fine but add handling steps and shipping risk. If you’re sending an analog impression, please don’t use a third-party impression-shipping service that holds it in transit for a week.
Should I do a wax-up or digital mock-up first?
If the case involves more than 2–4 veneers, or any change in length/shape beyond mild, sí. The wax-up or mock-up is the design file. If we have the mock-up scan, we can design the final to match it precisely and the case becomes predictable. Without it, we’re designing blind against photos and a final impression.
What about provisional fabrication — should I handle it chairside or do you handle it?
For a standard 2–3 week wear, chairside bis-acryl is faster and cheaper. For longer wear, complex cases, or when the patient is going to be in the temp for 4+ weeks, lab-fabricated PMMA provisionals wear better and look better. We can fabricate in either case. If you’d like us to handle it, send the pre-op scan, the prep scan, and a bite registration; we can return a provisional alongside the final design.
What if the temp debonds multiple times in the first week?
That’s a signal, not a disaster. It usually means the prep is too conservative for reliable frictional retention, or the temp material handling was off, or the patient is loading it heavily (chewing on the front). Check the occlusion, check the diet, and consider whether the patient would benefit from a lab-fabricated temp instead of a chairside one.
Lumineers, no-prep, and brand-name confusion
Lumineers is a brand name for a specific type of ultra-thin feldspathic veneer historically marketed as no-prep. A no-prep veneer is a design choice, not a brand — we fabricate them in lithium disilicate and feldspathic without a brand license. The clinical considerations for no-prep design are well-documented and don’t require a trademark. When the patient asks about a brand, we focus on the underlying design (prep depth, material, thickness) and what they can expect from it.
The patient wants Snap-On / Smilewear / TruSmile / Brighter Image / Veneera instead
Patients see DTC snap-on products on social media and come in asking for them. The clarifying question: do they want a clinical provisional, or a removable cosmetic appliance for photos and events? They’re not the same product. The ADA has formally addressed the DTC dental services category, and a peer-reviewed user study on fake snap-on veneers found majority dissatisfaction with fit and durability. Cosmetic appliance for events is fine if that’s what the patient actually wants; it’s not a substitute for clinical care.
The patient is going overseas for cheaper veneers — can you do the aftercare?
Patients do this, and the conversation is best had honestly. The CDC Yellow Book y el medical tourism page lay out the considerations. If they travel, the case falls outside our warranty terms; follow-up is paid out of pocket; if complications arise, you’re managing them in a foreign mouth with no records. The lab-side reality is that we can fabricate to a prescription, but we can’t take clinical responsibility for a prep we didn’t see.
The patient’s underlying tooth is dark or has big fillings — can we still get a great shade match?
Yes, but we need to know before the prep. A shade photo with a reference tab, a note about existing restorations (especially large Class III or Class V that may show through translucent ceramics), and a realistic final-shade goal. We may shift from standard lithium disilicate to high-opacity e.max or translucent zirconia, or use a layered approach. Surprises at seat are avoidable with a 60-second pre-prep conversation.
10. A short list of records that make our (and your) day easier
If you’re sending us a veneer case, here’s the package that gets you the cleanest result:
| Record | Why we want it | Can we work without it? |
| Pre-op photos (frontal, lateral, retracted) | Establishes starting point, helps us design within the patient’s natural envelope | Yes, but expect more questions |
| Pre-op scan or impression | Reference for tooth length and contour design | - |
| Prep scan or impression | The actual prescription | No — this is the minimum |
| Bite registration | Sets occlusal scheme | Yes for small cases, no for full-arch |
| Shade photo with tab | Sets color target | Can guess, but expect mismatch |
| Mock-up / wax-up scan | Sets the agreed-upon geometry | Strongly preferred for >2 unit cases |
| Pre-op notes (medical, parafunctional, dental history) | Tells us about bruxism, sensitivity, prior restorations | Yes, but call ahead |
11. References
The clinical guidance above draws on the following peer-reviewed and authoritative sources:
- Long-Term Survival and Complication Rates of Porcelain Laminate Veneers — MDPI
- Survival and Complication Rates of Feldspathic, Leucite-Reinforced, and Lithium Disilicate Veneers — PMC
- No-preparation and Conventional Veneers in Esthetic Dentistry: Clinical Considerations — PMC
- Bonding Protocols for Lithium Disilicate Veneers — PMC
- Comprehensive Review of Techniques for Enhancing Zirconia Bond Strength — PMC
- 10-Year Practice-Based Evaluation of Ceramic and Direct Composite Veneers — ScienceDirect
- Fabrication of Porcelain Veneer Provisional Restorations: A Critical Review — ScienceDirect
- Mechanical Properties of Provisional Dental Materials — PMC
- A Study on Provisional Cements, Cementation Techniques, and Their Effects — PMC
- Color Agreement Between Try-in Paste and Resin Cement — PMC
- 3D Printing of Ultra-Thin Lithium Disilicate Veneers — JERD (Wiley)
- User Insights into Fake Snap-On Veneers — CCIDE (Dove Medical Press)
- ADA Statement on Direct-to-Consumer Dental Services
- ADA Statement on “Veneer Technicians”
- Cleveland Clinic — Veneers Overview
- American College of Prosthodontists — Veneer FAQ
- CDC Yellow Book — Medical Tourism
- CDC Travelers’ Health — Medical Tourism
- Glidewell — Veneer Preparation and Temporization
- Direct vs Indirect Composite Veneers: Longevity Comparison — MD.co.uk