6 Veneers Case Study — Anterior Six-Unit Porcelain Veneers


🕢 [ ¡Rellene el formulario y le responderemos en 30 minutos! ]
Scope note, up front: this page describes our laboratory manufacturing process y what we were asked to produce on one real case. All material and design decisions rest with the prescribing clinician. Case details are shared without patient, clinician, or practice identifiers. Nothing here is medical advice or a clinical claim.
1. The patient situation
The patient arrived at the practice with a combination of problems that no single fix would have solved.
Base discolouration running through the dentine. The underlying tooth colour was distinctly darker and more saturated than what the patient wanted. This is the important part: this was not a surface stain. Whitening would not have brought the upper front teeth to a consistent, lighter shade, which is why a simple whitening-plus-bonding approach was never going to hold.
Failing direct composite on the two central incisors. The existing bonding was old, and the margins had started to break down and pick up stain. So the case had two layers of colour to deal with — the dark base underneath, and a dirty, discoloured margin line sitting on top of it. Re-bonding the same way would have repeated the earlier result.
Discrete white-spot opacities on the neighbouring enamel. Small, patchy opacities in the enamel of teeth that were not being restored. These matter more than they look. A uniform ceramic surface sitting next to patchy natural enamel reads as “painted on” — the value and texture have to be matched, not just the shade tab.
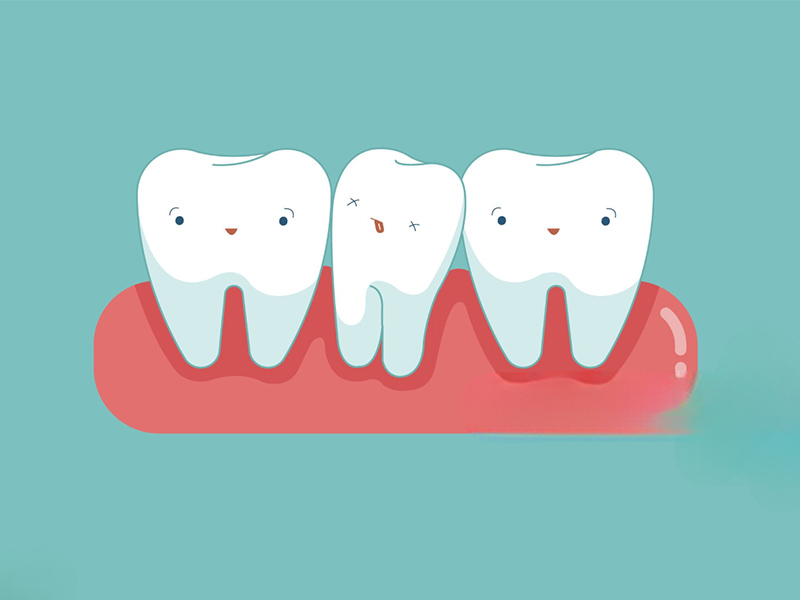
Thin enamel and a history of a lot of dental work. This was the constraint that ruled out several options. Anything requiring aggressive reduction was off the table, which is exactly why fabricated thin ceramic veneers were chosen over full-coverage crowns: veneers can be built to mask a dark base while removing the least amount of sound tooth structure.
A smile line that reached the canines. This decided the number. Because the case ran to the canines, the two outer units had to be characterised so they would not read as a hard line where ceramic met natural premolar. Stopping at four, or even at six without characterising the canines, would have left exactly the kind of transition the whole case was meant to remove.
A confirmed grinding habit, flagged in the prescription.
4. What the prescribing clinician required
This was the instruction set we received. It is reproduced here because the quality of a finished case is set by the specificity of what arrives with it — a lab cannot manufacture information it never received.
| # | Requirement | Detail |
| 1 | Case scope | Six units, upper arch, #6–#11, produced and delivered as one set |
| 2 | Material direction | Pressed lithium disilicate, with individual layering rather than a single uniform shade |
| 3 | Stump shade, recorded per tooth | The colour of each prepared tooth recorded separately from the target shade — not one number for the whole case |
| 4 | Target shade, with the shade system named | Readings from different shade systems are not interchangeable, so the system had to be stated |
| 5 | Shade photographs | Natural tooth and shade tab in the same frame; prepared tooth and shade tab in the same frame |
| 6 | Reference for the diagnostic wax-up | Approved wax-up used as the reference for margin position and contour, tooth by tooth |
| 7 | Occlusal notes | Grinding habit noted; instruction to keep contacts off the veneer margins |
| 8 | Try-in arrangement | Units returned in a sequence that allows shade and contour to be checked before anything is bonded |
5. Design Challenges in a 6 Veneers Case
This is the part of the case that shaped the actual work. Each obstacle had a specific consequence for the manufacturing stage, and each one turned into a requirement on our side of the case.
| Obstacle | Why it threatens the outcome | What it required from us |
| Dark dentine base | Thin ceramic transmits what is underneath it, so a finished unit can land darker than the shade on the prescription | Use the per-tooth stump shade to build a blocking layer at the cervical third, rather than covering the whole surface opaquely |
| Stained margins around old composite | Copying the old margins copies the stain forward | Follow the approved wax-up to re-establish margin position and emergence, instead of tracing the existing bonding edges |
| White-spot enamel on adjacent teeth | A uniform ceramic next to patchy enamel looks applied rather than integrated | Match surface texture and value, and keep controlled translucency in the incisal third |
| Thin enamel, limited reduction | Over-reduction is permanent and makes shade control harder to guarantee | Design within the enamel-saving range; confirm every margin position on the approved wax-up before any ceramic work starts |
| Smile line reaching the canines | A hard stop at the lateral incisors leaves a visible material change | Build all six as one coordinated case and characterise the canine units so they blend into the premolars |
| Grinding habit on the prescription | Excess occlusal force is a leading cause of chipping and remakes | Keep occlusal contacts off the veneer margins, keep incisal support on the tooth rather than the ceramic edge, and flag it back to the clinician as worth a protective splint |
| Previous composite on the centrals | Old material and residual adhesive change what the prep actually exposes | Confirm the prepared tooth colour per tooth on receipt, and re-confirm it before layering rather than trusting a single earlier reading |
6. Porcelain Veneer Design and Fabrication Process
6.1 What we required before we started
Everything on this list came in with the case, and everything on this list was confirmed on receipt. Receiving a complete set is the difference between a predictable case and a case that stalls.
- Full-arch prepared scan or physical impression, plus opposing arch
- Bite record and maximum intercuspation data
- Pre-op records of the teeth before preparation
- Approved diagnostic wax-up — or an approved mock-up
- Neighbouring teeth and soft tissue included in the scan
- Stump shade, tooth by tooth — not one reading for the whole case
- Target shade with the shade system named
- Shade photographs: natural tooth with tab, prepared tooth with tab
- Frontal smile, resting, profile, intraoral and shade photographs
- Aesthetic parameters: colour, translucency, incisal characteristics, surface texture, tooth proportions, midline, smile line
- Reference images: target smile, photos of any existing restoration, DSD design if one exists
We also take sketches, photos of an old restoration, a diagnostic wax-up or an existing temporary as references — genuinely useful, and often the thing that answers a design question faster than another message would.
Data cases go straight to us as a scan file. Physical impressions ship to us, and we will provide a shipping label or you can send it your own way and give us the tracking number. Either way, we confirm receipt and confirm the case count before anything enters production. Both channels are open — digital and analog are both accepted, and neither is a fallback.
The wider point is simple. A large share of shade-related remakes trace back to workflow inconsistency in how information travels, not to the shade guide or the equipment in front of anyone. Guides on this are worth reading: what information must be submitted to the lab for anterior veneer cases y dental shade matching methods, tools and best practices both make the same argument from different ends.
6.2 Shade Matching for Six Porcelain Veneers
This is the part of a six-unit anterior case that deserves the most attention, because six teeth have to agree with each other y with the neighbours that are not being restored.
Two separate records, never one. En stump shade is the colour of the prepared tooth. The target shade is what the finished unit should read. On a case with a dark base these are far apart, and the gap between them is exactly what the ceramic has to make up. A prescription carrying only a target shade gives us no way to know how much blocking is needed.
The shade system gets named. Readings from different systems are not interchangeable. If the prescription does not say which system was used, we ask before we start. It is a short question and it prevents a remake — this is worth understanding in more depth in why not all shades are custom shades.
Layered, not a single shade. Matching one front tooth comes down to layered shade matching plus individualised ceramic work — not a single tab. Shade is taken in natural light with the tooth clean and wet; the neck reads deeper and more saturated, the body transitions, and the incisal edge gets translucency and opalescence. Where the neighbouring teeth are involved, an intraoral shade photo or video of the neighbour is what lets us line the value and translucency up correctly. Six techniques that turn shade matching from a guess into a repeatable process covers the chairside side in detail.
Reference control across the case. For a six-unit case the units are made to one reference — the confirmed shade tab, the reference photographs and the original design file. Material batch and firing parameters are held consistent, and the six are cross-checked against each other before they leave.
Photo-based cross-check before layering. We compare against the prepared tooth against the shade tab in the same frame, which is what tells us whether blocking is required and how much.
Consistency checked after glazing. Colour is compared again after firing, because translucency and opalescence do not always land where the build-up predicted.
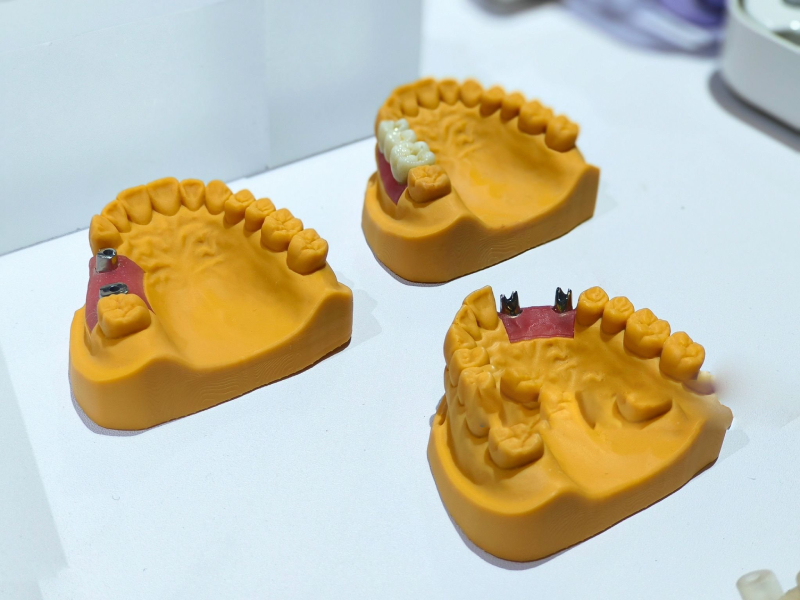
6.3 Design and margins, set from the approved wax-up
Margin position was decided tooth by tooth against the approved wax-up antes de any ceramic work started. On the two discoloured centrals the cervical margin was placed to sit below where the old bonding had been, so the transition is carried by ceramic rather than by a stained margin line inherited from the previous restoration.
The neighbouring teeth, the soft tissue and the opposing arch were all on file, which is what allowed the cervical contour to follow the gingival line rather than approximating it. Where a margin is a poor fit for the chosen material, we raise it with the clinician in the case group rather than quietly adjusting it at the bench — a decision that changes the case belongs to the prescriber.
6.4 Material selection, and why this one
Pressed lithium disilicate was the right call for this case, and not just for the optical reason.
On survival, the evidence is close. A 2025 meta-analysis covering 29 studies and 7,753 veneers at a mean follow-up of 10.4 years put lithium disilicate at 96.81% survival and feldspathic porcelain at 96.13% — effectively level with each other. The full comparison against manufacturer instructions for use is here.
On complications, it is not close at all. The same analysis put technical complications at 6.1% for lithium disilicate against 41.48% for feldspathic. That gap, not the survival rate, is the reason this material is our default for an anterior case where the margin and the finish both matter.
On light behaviour, the numbers are in our favour too. At equal thickness, lithium disilicate transmits more light than any zirconia option — around 40% transmission at 0.5 mm, against roughly 34% for the most translucent zirconia, and the gap holds at thicker sections. On a case with a dark base and an incisal edge that has to look like enamel rather than a block, that is a working advantage.
Where zirconia would be the better call. Zirconia veneers are stronger and more wear-resistant under heavier occlusal load, and a multilayer zirconia with a natural gradient is our choice for a high-aesthetic anterior case where the budget has to be weighed against the requirement. The honest way to put it: glass ceramic for aesthetics and translucency, zirconia for load. Choosing between them is a clinical call, and we will say so if the prescription points the other way.
6.5 Production
Every stage happens in our own facilities in Shenzhen and Huizhou. We are a full-service dental laboratory, not a trading company, and we do not hand cases to third-party labs. For a case like this the route is:
Case data receiving and data check → CAD design and design review → model and refractory work → pressing and individual layering → firing → contouring, glazing and polishing → multi-stage QC → final inspection and release → packing and shipment.
Design review is a real gate, not a formality. A six-unit anterior design that goes to milling without review is a design that has to be re-cut if the incisal plane is off.
Digital and analog both run through the same review and the same inspection steps. Where a digital workflow applies, the finished restorations can be overlaid against the approved CAD design before dispatch, so deviation shows up as a number rather than as an argument on delivery day.
6.6 Inspection before dispatch
- Fit and margins — on the die, seated without forcing
- Contactos — no tightness, no dead space
- Occlusion — centric and excursions checked, no interference left in
- Sombra — against the target, and the six cross-checked against each other after glazing
- Contour and incisal — against the approved design, not against a general idea of it
- Surface — free of chips, cracks and under-fired areas under dedicated inspection lighting
- Material batch, technician and inspection result — all recorded against the case ID
Release is not signed off by the person who made the case. A separate QC check has to pass first. Anything that fails is tagged with a rework note stating the reason and goes back through the full set of key checks — not a shortened re-check.
Every case carries a unique barcode from the moment it is created, and production can be traced end to end: which technician, which machine, which material batch, which inspection result at each stage. The clinical reference for what good traceability looks like at this level is in the Certified Dental Laboratory handbook.
6.7 Surface state on delivery
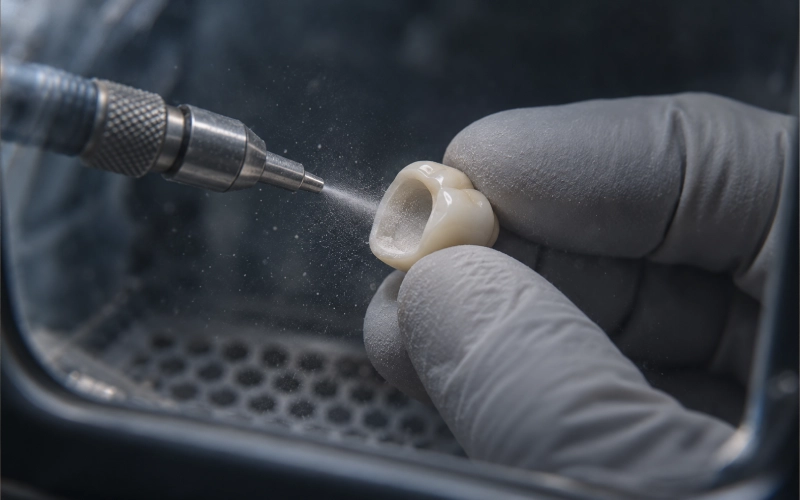
We hand over with the surface state agreed with the clinician, and the choice is theirs. On delivery, the restorations can be returned unetched and unsilanated so bonding is done chairside under the clinician’s control, or surface-conditioned — sandblasted, etched and silanated — ready for bonding after cleaning. Clinical practice sets out both routes clearly in this porcelain veneer handout. Tell us which one you want on the prescription and we will match it.
7. What we delivered
Six individually characterised pressed ceramic veneers, delivered as one coordinated set, with the case documentation to match.
| What was delivered | Detail |
| Units | Six upper anterior veneers, #6–#11, produced and released as one case |
| Build | Pressed lithium disilicate, individually layered — cervical, body, incisal translucency and opalescence built per tooth rather than uniform |
| Shade outcome | Six units agreeing with each other and with the untreated neighbours, checked against the target after glazing |
| Contour outcome | Margin position and emergence taken from the approved wax-up, with the transition on the two previously restored centrals carried by ceramic rather than by an inherited stained margin |
| Documentation | Case ID, technician, equipment, material batch, inspection results, archived and traceable |
| Packaging | Individually packed, foam-protected, in a separate packing area from production |
How the case is meant to look when it returns to the practice. Even, continuous colour across all six units. No visible line where the ceramic meets the first premolars — which was the whole point of characterising the canines. No dark cervical shadow, because the blocking was built from the per-tooth stump shade rather than guessed. Surface texture and translucency that read alongside the neighbouring natural enamel instead of sitting on top of it. Margins sitting exactly where the approved wax-up put them, so seating is straightforward and the fit is the fit the clinician designed.
That is a manufacturing outcome, and it is the part we control. What happens clinically after bonding is the clinician’s call.
11. Questions we get about 6 veneers
What is the social six?
The six upper front teeth visible in a normal smile — two central incisors, two lateral incisors, two canines, canine to canine. In the universal numbering system, #6 to #11. It is the most common anterior veneer configuration.
How do you decide whether six is the right number?
By the smile line. If the smile stays within the front six, six is enough. If it exposes the first premolars, you usually want eight, otherwise there is a visible material change. The count should be decided by a photographic smile analysis, not by a budget conversation.
What do you need from us for a six-unit veneer case?
Prepared scan or physical impression plus opposing arch, bite record, pre-op records, the approved diagnostic wax-up, per-tooth stump shade, target shade with the shade system named, shade photographs with the tab in frame, frontal smile and intraoral photos, and the aesthetic parameters — colour, translucency, incisal characteristics, surface texture, proportions, midline, smile line. Target smile references and DSD designs are welcome if you have them.
Why do you need the stump shade separately from the target shade?
Because they are two different things. The stump shade is what the tooth looks like prepared; the target shade is what the finished unit should read. With a dark base the two are far apart, and the distance between them is what the ceramic has to make up. One number cannot tell us how much blocking is needed.
Why does the shade system need to be named on the prescription?
Readings from different systems are not interchangeable. If we do not know which system was used, we have to ask — and an unasked question is how shade remakes start.
Do you accept digital scans and physical impressions?
Both. Digital cases arrive as a scan file; physical impressions ship to us, with a label from us or your own carrier and the tracking number. Both channels run through the same design review and the same inspection steps.
How long does the lab take?
Routine lab working time is 2–3 working days from the moment complete data is in hand. If you want to review and approve the design before we cut or fire, add 1–2 days. Clinic-side appointment scheduling is separate and outside our scope.
Can we review the design before production?
Yes, and on an anterior case we would generally suggest it. The case is designed and you are sent it for approval before it goes to milling or firing. If the design is not right, changes are made at that point rather than after.
What if the margin is not ideal for the material?
We tell you and propose an option in the case group. A change that affects the case design is your decision, not ours to make quietly at the bench.
Will you tell us if a case looks like a poor fit for veneers?
Yes. If the case is marginal we would rather raise it at design review than discover it later. The commonly cited exclusions — insufficient enamel, active caries, untreated periodontal disease, severe grinding, significant malocclusion, large existing restorations — are set out in this clinical overview.
How do you handle a patient who does not want to wait for a full case?
That is a conversation about sequencing rather than a manufacturing question, and it is yours to have. What we control is the working time and the ability to deliver a complete set as one case.
Can you sign an NDA?
Yes — as well as quality agreements and supplier agreements, wherever your practice needs one.
Do you need the patient’s name?
No. A clinic case reference works fine and is better for privacy. If you do submit a name, we handle it accordingly.
Can we visit the factory?
Yes. Factory visits, line tours and video inspections are all available in Shenzhen and Huizhou. Arrange it through your sales contact.
12. Send us a case
The fastest way to start is to send the case data and tell us what you need. If you are sending a data case, the scan file plus the work order gets us moving; if you are shipping physical impressions, we will send a label or you can send it your way and give us the tracking number.
Tell us the shade system, whether the stump shade is recorded per tooth, whether you want to approve the design before production, and which surface state you want on delivery. Those four things are where most of the case information gets lost, and where most of the remakes start.
We reply in English, we assign a dedicated case manager, and you can see the case status at every stage.
This page describes laboratory manufacturing process and case documentation. It is not clinical guidance, and it is not a claim about any clinical outcome. Material selection, case planning and all design decisions rest with the prescribing clinician. Case details are shared without patient, clinician or practice identifiers. Prices, promotions and commercial terms are not published on this page — contact the case team directly.
Reduzca los plazos de entrega gracias a nuestra tecnología de vanguardia
Recomendado