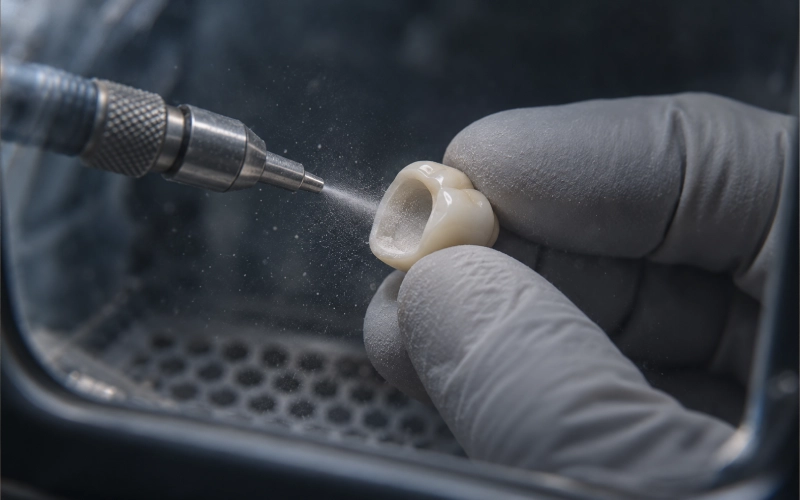
Molar Implant Crown Case — Screw-Retained Zirconia on Custom Abutment


🕢 [ ¡Rellene el formulario y le responderemos en 30 minutos! ]
We’re ASD Dental Lab — a full-service dental manufacturing facility located in Shenzhen and Huizhou, China. We’ve been producing custom abutments, implant crowns, and prosthetics since 2012, working directly with dentists, clinics, and labs in the US, Europe, and beyond. This page shows how we handled a real lower-molar implant restoration case.
Patient Overview
A 52-year-old patient presented with a missing mandibular right first molar (#46 / #30), lost to extraction after failed endodontic retreatment. The adjacent second bicuspid and second molar were sound — no reason to prepare them for a bridge. The patient wanted a permanent, independently cleanable solution and preferred to avoid a removable partial.
Patient-reported priorities: chew normally on the right side again; nothing removable; “want it to last.”
Doctor’s Requirements for the Lab
The prescribing dentist placed a Nobel Biocare Replace Select 4.3 × 11.5 mm fixture (platform NP, internal tri-channel connection) and allowed four months’ healing. At the restorative appointment, the doctor sent us:
- Intraoral scan with a Nobel scan-body in place (.stl file)
- Opposing-arch scan and one centric-bite record
- Shade selection: A3
- Fixture-packaging label photo confirming brand, platform, and diameter
- Specific instructions on the work-order form:
- Screw-retained monolithic zirconia crown (no cement retention)
- Custom titanium abutment — the implant axis was slightly lingual; doctor wanted the screw-access hole moved to the center of the occlusal table, away from the buccal cusp
- Occlusal thickness ≥ 1.5 mm over the abutment platform — patient had moderate bruxism history; doctor asked for “no thin spots that might fracture”
- Tight proximal contacts — the patient had complained of food packing before the extraction
- Passive fit on the abutment — doctor wanted to verify seating before cementing the abutment to the fixture
- Delivery in 6 business days (free rush on our end)
How We Met Those Requirements
1. Design Phase — CAD Modeling
Our CAD team imported the scan data, confirmed the Nobel platform library in the software, and designed:
- A custom Grade-5 titanium abutment con un angled screw channel (ASC) redirecting the access hole from 18° lingual to vertical occlusal. Margin placed 1 mm subgingival to support soft tissue without impinging on biologic width.
- A monolithic multilayer zirconia crown (material: Wieland Luxen Multi) with natural A3 gradient and translucency. We intentionally widened the mesial and distal contact areas and raised contact-point height to junction of occlusal and middle thirds — tighter than what the scan showed between the natural teeth.
- Occlusal design: functional cusp anatomy based on the opposing second molar; minimum occlusal thickness 1.8 mm at the thinnest load-bearing zone (doctor’s spec was 1.5 mm; we added margin). Centric contacts marked on two tripods; excursive clearance checked in lateral and protrusive.
We emailed a PDF design preview y un color screenshot to the doctor. Doctor approved design within 18 hours; we moved to milling.
2. Production — CAM Milling & Finishing
Abutment production:
- 5-axis CNC mill cut the custom abutment from a Grade-5 titanium blank (batch-certified ASTM F136 / ISO 5832-3).
- After milling, the abutment was cleaned, passivated, and inspected under magnification for burrs or margin defects. We verified the Nobel tri-channel anti-rotation geometry with a reference analog and handheld caliper — fit
had to be snug with no play. - Abutment screw included (Nobel genuine replacement screw, torque spec per manufacturer: 35 Ncm).
Crown production:
- The zirconia crown blank was milled pre-sintering (green state), accounting for 24% volumetric shrinkage. Our software applies Nobel-platform-specific compensation; we run a dimensional test block every morning to validate the active sintering curve.
- After milling, the crown was sintered at 1,450°C for 10 hours in a Wieland Vita furnace (validated temperature curve on file).
- Post-sintering, a technician hand-polished the occlusal surface to 400-grit, glazed the buccal and lingual with Wieland glaze powder, and re-fired at 900°C.
- Internal surface left matte to improve micromechanical retention for the bonding adhesive.
3. Quality Checks Before Shipment
Every restoration goes through three checkpoints in our workflow. For this case:
① Pre-production data check (handled by case coordinator):
Verified fixture brand/platform matched the scan-body library; confirmed we had all required files (scan, bite, shade, special instructions).
② Mid-production inspection (handled by department lead):
Abutment measured on CMM for margin circularity and platform fit; crown test-seated on the abutment analog — passive fit confirmed (no rocking, no light gaps at margin).
③ Final quality-control inspection (independent QC team, 25 staff):
- Margin integrity: checked 360° under ×5 loupe — smooth, no chipping.
- Proximal contacts: brass shim stock pulled through mesial and distal embrasures with firm resistance (contact-area width ≈ 2 mm).
- Occlusal clearance: articulator-mounted die checked centric, protrusive, and left/right lateral — no binding, uniform 150–200 µm tripod contacts in centric.
- Screw-access fit: crown seated on abutment, abutment screw threaded through crown access hole and into abutment body without cross-threading — full seating confirmed.
- Esthetics: A3 shade validated against VITA 3D-Master guide; surface glaze uniform, no visible pores.
QC inspector signed off digitally in our case-tracking system. The case then moved to packaging.
4. Packaging & Shipment
We packed:
- 1 × custom titanium abutment (with Nobel tri-channel connection, in a sterile pouch)
- 1 × abutment screw (Nobel genuine, 35 Ncm torque spec printed on label)
- 1 × monolithic zirconia crown (screw-access hole pre-drilled, ready for try-in)
- 1 × batch certificate for the titanium blank (material lot, origin, test results)
- 1 × sintering-curve log for this production batch
- 1 × work-order summary listing fixture platform, material grades, torque spec, and our internal case ID for traceability
Shipment left our facility 5 business days after digital-file receipt (1 day ahead of the requested 6-day window). Tracking number emailed same day.
Final Outcome
The doctor reported passive abutment seating at try-in (no rocking on the fixture) and ideal proximal contacts after crown delivery — shim stock showed resistance mesially and distally, patient could floss with effort but no jamming. Occlusal contacts were adjusted <0.5 mm chairside with a diamond bur (minor tripod refinement in protrusive). Crown torqued to final at 15 Ncm through the access hole, then access sealed with composite.
Patient feedback : chewing comfort restored; no sensitivity; visually blends with the natural second molar.
Why This Case Worked
Obstacle ↔ Lab Solution
| Clinical Challenge | What We Did |
| Implant angled 18° lingual — straight screw-access would exit on buccal cusp | Custom ASC abutment redirected screw channel to occlusal center |
| Bruxism history — doctor worried about fracture | Designed 1.8 mm min. occlusal thickness (exceeded the 1.5 mm request); chose high-flexural-strength zirconia (Wieland Luxen Multi, ~1,200 MPa) |
| Food-packing complaint before extraction | Tightened proximal contacts (brass shim = firm drag); raised contact-point height |
| Passive-fit verification before final cementation | Milled abutment on Nobel-certified library; ran dimensional test block same morning; CMM check post-mill |
| 6-day delivery | Prioritized case in production queue (no extra fee for standard rush) |
Materials & Specifications We Used
- Abutment material: Grade-5 titanium (ASTM F136 / ISO 5832-3), batch-certified for biocompatibility
- Crown material: Wieland Luxen Multi multilayer zirconia, A3 shade, sintered at 1,450°C
- Fixture compatibility: Nobel Biocare Replace Select, NP platform, tri-channel connection
- Retention method: Screw-retained (no cement sub-gingivally)
- Screw torque (abutment → fixture): 35 Ncm per Nobel spec
- Crown-seating torque: 15 Ncm per doctor’s protocol
How Dental Implant Molar Restorations Are Built in Our Lab
We handle the complete workflow in-house — no outsourcing to third-party labs. A typical screw-retained molar implant crown follows these steps:
- Digital file intake & validation — check fixture platform, scan-body library, special instructions
- CAD design — model custom abutment (if needed) and crown; calculate shrinkage compensation for zirconia
- Design approval — email preview PDF to doctor; wait for green light
- CAM milling (abutment) — 5-axis CNC cuts titanium blank
- CAM milling (crown) — pre-sintering green-state zirconia milling
- Sintering — 1,450°C, 10-hour cycle, validated temperature curve
- Hand finishing — polish occlusal, glaze buccal/lingual, re-fire
- Three-stage QC — pre-production data check / mid-production fit test / final
independent inspection - Packaging & shipment — batch certificates, torque specs, tracking number
Team behind this case: 1 case coordinator, 2 CAD designers, 1 milling technician, 1 sintering operator, 1 finishing technician, 1 QC inspector. Total in-house staff: ~460 technicians across all departments.
Evidence Notes — Why We Built It This Way
Screw-Retained vs. Cement-Retained
Research shows retrievability matters. One systematic review found that residual subgingival cement can contribute to peri-implant biological complications. Screw retention eliminates that risk and allows future component replacement without cutting off the crown. When the implant axis permits clean screw-access placement, we default to screw-retained unless the doctor specifies otherwise.
Material Choice — Zirconia for Molar Load
Molars aren’t an esthetic zone; they’re a high-load functional zone. A 2025 review noted that zirconia shows broadly comparable short-term survival to titanium fixtures in selected cases, and monolithic zirconia crowns avoid the porcelain-chipping problem seen in older PFM designs. For a bruxism-risk patient, high-flexural-strength zirconia with adequate thickness is a defendable choice.
Proximal Contacts & Food Impaction
Tight contacts aren’t just comfort — they prevent food wedging and secondary caries on adjacent teeth. The original research didn’t quantify an “ideal” contact tightness, but clinical teaching and our client feedback consistently show that firm shim-stock resistance (roughly 20–40 µm metal foil dragging through the contact) produces the best patient acceptance without causing floss breakage.
Occlusal Thickness & Fracture Risk
Material failure reviews repeatedly cite insufficient occlusal thickness as a mechanical-complication risk factor. For monolithic zirconia in load-bearing areas, 1.5 mm is often cited as a clinical minimum; we routinely design 1.8–2.0 mm in the central fossa to leave a safety margin after any chairside adjustment.
Custom Abutment — When and Why
ITI consensus documents and ADA references describe both stock and custom abutments. Pilares a medida let us redirect screw-access holes, optimize emergence profiles, and correct minor angle discrepancies — exactly what this case required. We mill them from certified-grade titanium and verify dimensional accuracy before the crown is ever seated.
What Happens If Something Doesn’t Fit?
Our free-remake policy covers:
- Margin gaps or internal seating problems (abutment or crown)
- Proximal contacts too loose or too tight after try-in
- Occlusal interference the doctor can’t adjust in <1 mm of reduction
- Visible color mismatch vs. approved shade
- Crown doesn’t thread onto abutment screw channel
What we don’t cover (counted as new case or billable adjustment):
- Doctor changes material or design después de original approval
- Impression/scan quality was flagged up-front and doctor asked us to “try anyway”
- Prep was modified after we milled the restoration
In 95% of our cases, the restoration passes final QC on the first attempt — that’s our internal first-pass yield metric, measured at the final inspection gate before packaging.
Traceability & Compliance
Every case gets a unique internal ID linking:
- Designer name & approval timestamp
- Material batch numbers (titanium blank lot, zirconia blank lot)
- Milling-machine log & sintering-furnace curve
- QC inspector signature
We keep those records on file indefinitely. If a component needs replacement five years later, we can pull the original design file, confirm the fixture platform, and produce an exact duplicate. That’s part of running a full-service manufacturing lab instead of outsourcing pieces to third parties.
Regulatory note: We hold ISO 13485 certification for medical-device quality management. Materials we use carry CE marks and comply with ISO 10993 biocompatibility standards. Implant fixtures themselves (the screw-shaped root analogs) are Class III devices regulated directly by the FDA; custom abutments and crowns made to a dentist’s prescription enter the US through the FDA 510(k) pathway when they meet substantial-equivalence criteria. (FDA guidance on custom devices)
What We’d Need From You for a Similar Case
If you’re a dentist, clinic, or lab partner interested in working with us on molar implant restorations, here’s what we typically need on the work order:
Must-have information:
- Fixture brand, platform (NP / RP / WP), connection type (internal hex / tri-channel / conical), diameter & length
- Intraoral scan with manufacturer scan-body (or physical impression + analog)
- Opposing-arch scan or model
- Bite registration (centric)
- Shade selection (VITA guide or custom photo)
- Retention method: screw-retained or cement-retained
- Material preference: monolithic zirconia / circonio en capas / E.max / PFM / metal
Helpful additions:
- Photos (smile, occlusal, buccal)
- Special design requests (custom abutment / angled screw channel / emergence-profile notes)
- Bruxism status or nightguard use
- Any occlusal-thickness constraints
- Requested delivery date
We’ll confirm receipt same day, send a design preview within 24–48 hours, and ship the finished restoration within the agreed timeline.
About ASD Dental Lab
We’re a direct manufacturing facility, not a trading company or order broker. Both of our factories (Shenzhen & Huizhou) are open for client visits — you’re welcome to tour the production floor, meet the design team, and review our quality systems in person.
Our in-house capabilities:
- CAD design (~100 designers)
- CNC milling & 3D printing (~70 milling technicians)
- Implant prosthetics (~80 implant-department staff)
- Ceramic & metal work (~70 technicians)
- Removable prosthetics (~55 technicians)
- Quality control (~25 dedicated QC inspectors)
Client base: 50+ dental labs, 100+ clinics, 400+ individual dentists across the US, Netherlands, Germany, France, Belgium, Austria, UK, and Switzerland.
Monthly capacity (normal season):
- Zirconia single crowns: ~8,000 units
- Zirconia bridges: ~2,000 cases
- All-on-X full-arch: ~20 arches
- Removable dentures: ~4,000 cases
Get in Touch
Interested in partnering with us, requesting a case quote, or scheduling a factory visit?
Email our sales team or reach out through the contact form on our Dental Lab page. We provide English-language case coordination, technical meetings, and documentation (material certificates, custom declarations, product labels).
Next steps:
- Tell us your typical case volume and material preferences
- We’ll send a B2B product catalog & pricing guide
- Start with a trial case (no minimum order)
- If you’re satisfied, we’ll set up a dedicated case coordinator and streamline file-exchange workflows
Reduzca los plazos de entrega gracias a nuestra tecnología de vanguardia
Recomendado