Mastering Dental Composite Shade Selection: Your Easy Guide to Using the VITA Colour System for Natural-Looking Fillings
If you want your dental fillings and crowns to look real, matching the color is super important. The VITA Colour Guide helps dentists pick the right shade. Today, I’ll walk you through how to use the VITA Colour Guide to choose the best dental composite. This guide has simple tips, real stories, and advice you can use every day. You’ll pick up skills to make your work look better, and help your patients leave smiling.
Table of Contents
Why Does Shade Matching Matter in Dentistry?
Getting the right shade for a filling or a crown isn’t just about looking good. If the color is off, the filling stands out. That can upset people, or make them feel bad about their teeth. I remember a patient who worried about a white spot on her front tooth. We used the VITA shade guide and found a great match. She left happy and smiling. That’s how much the right shade matters.
Let’s face the problem: When the color is wrong, the tooth will look fake. That’s not good for anyone. Your work is a reflection of you. You don’t want people to look at your work and think, “Wow, that filling is easy to see!” To stop that from happening, you need a tool that helps you pick the right shade every time. That’s the VITA Colour Guide—it’s a simple, trusted way to get great, real-looking results.
What Is the VITA Colour Guide and How Does It Help?
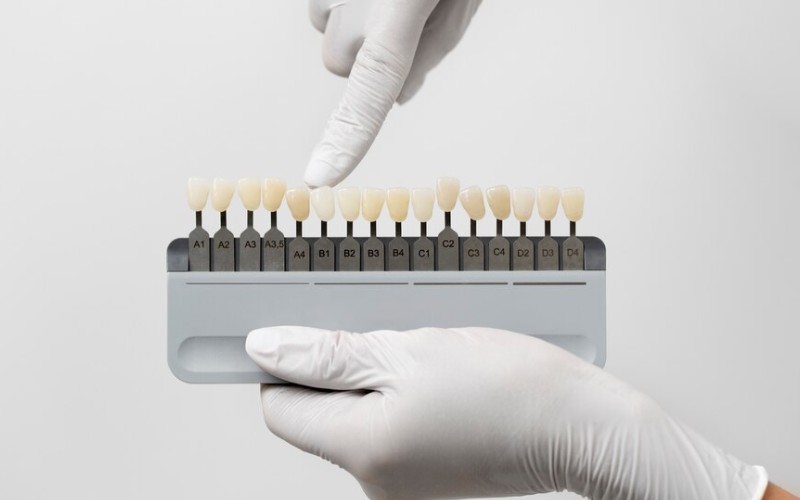
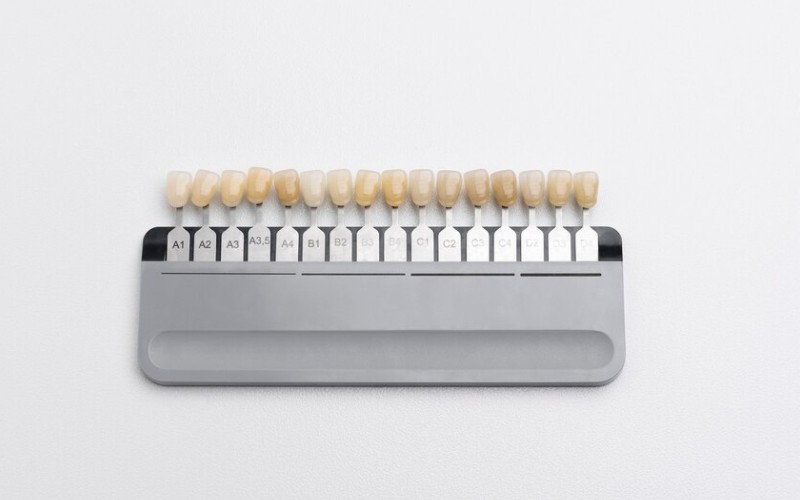
The VITA Colour Guide is a chart filled with little tooth-shaped tabs, each in a different color. Think of it like a box of crayons, but instead of coloring book pages, you’re matching real tooth colors. The VITA shade guide mainly comes in two types:
- VITA Classical A1-D4 Shade Guide
- VITA 3D-Master Shade Guide
Both of these help you find the best match for natural teeth. If you’re just starting out, try the VITA Classical. It groups colors into A, B, C, and D, making things simpler. When you get the hang of it, you can use the 3D-Master for more choice.
How Does the VITA Classical Shade Guide Work?
Here’s how I use the VITA Classical guide:
- Check the Group Letters:
- “A” shades are reddish-brown.
- “B” shades are reddish-yellow.
- “C” shades are gray.
- “D” shades are reddish-gray.
- Look at The Numbers:
- The numbers 1 to 4 tell you how light or dark the tooth is.
- Try a Few Tabs Quickly: Hold up different tabs next to your patient’s teeth. Work fast—your eyes get tired in just 5 seconds!
- Pick Hue, Chroma, and Value:
- Hue: The main color (A, B, C, D).
- Chroma: How strong the color is.
- Value: How bright or dark it looks.
If you want an even closer match, the 3D-Master has more options, especially if your patient’s teeth are very white.
What’s Different About the VITA 3D-Master Shade Guide?
The VITA 3D-Master is more exact. You pick the shade in three steps:
- Value: How light or dark is the tooth?
- Chroma: How strong is the color?
- Hue: What color is it, exactly?
This helps a lot for lighter teeth. Studies show this guide matches more of the colors you see in real life. So, if you have a hard case, grab the 3D-Master.
How Should You Get Ready Before Taking a Shade?
Getting ready the right way helps a ton. Here’s what my friends and I do:
- Light Matters: Use daylight or a lamp that says “5500K.” Stay away from yellow or orange lamps—they can trick your eyes.
- Have the Patient Brush: Clean teeth show their true color. If teeth are dirty, you might pick the wrong shade.
- No Bright Colors Around: Ask the patient to cover bright shirts or lipstick, since these can reflect and change what you see.
- Hydration: Dry teeth look lighter. Take the shade soon after cleaning, before teeth dry out.
Get these things right, and the rest is much easier.
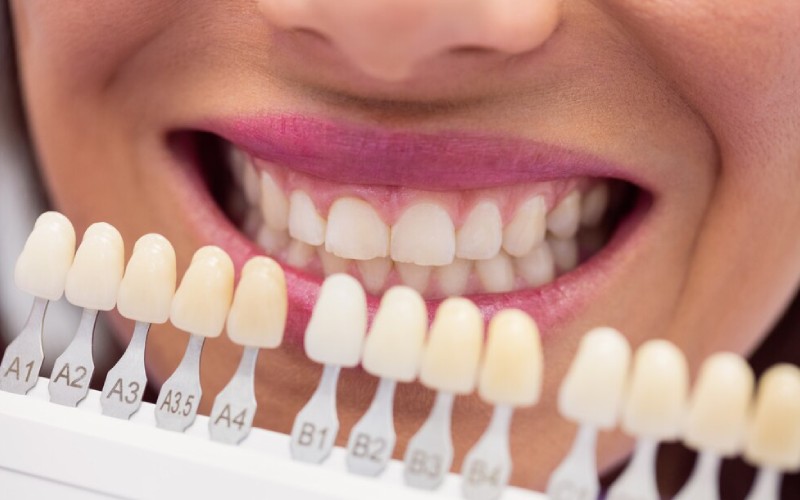
How Do You Use the VITA Shade Guide in the Mouth?
Doing it right makes a big difference. Here’s the simplest way:
- Hold the Tab Next to the Tooth: Try to match the color in the middle part of the tooth first.
- Use the Right Angle and Distance: Hold the tab the same way as the real tooth, about half an inch away.
- Don’t Stare Too Long: Check for about 5 seconds. Look away at something blue between checks (a blue glove box works great).
- Work Quickly: Your eyes start to play tricks after 7 seconds.
Pro tip: Always check the color in two types of light. Something can look perfect in the treatment room but too light or too dark outside. This is called metamerism—a real pain in dentistry!
What Mistakes Can Happen with Shade Taking?
Let’s be honest. Even when you do everything right, matching color can be hard. Some common slip-ups:
- Metamerism: The tooth looks different in different light. Check inside and outside.
- Just Focusing on Shade Tab: There’s more than just color. Real teeth can be see-through or cloudy in parts.
- Ignoring Tooth Parts: The biting edge, middle, and gum area may all need slightly different shades.
If you just slap on one flat color, your work can stick out. I learned this on my first front tooth filling. Trust me—don’t copy that mistake! Look at the whole tooth.
How Do Composite Brands Match Up With VITA Shades?
Here’s where it gets fun. Once you’ve picked your VITA shade, how do you find the right composite? Most big brands try to match these colors. You’ll find the shade written on the box or in the instructions—words like “Universal,” “Body,” “Enamel,” or “Dentin.”
Table: Sample Composite Brand Conversion
| VITA Shade | 3M Filtek Universal | GC G-aenial | Tokuyama Estelite |
|---|---|---|---|
| A2 | A2 | A2 | A2 |
| B1 | B1 | B1 | B1 |
| A3.5 | A3.5 | A3.5 | A3.5 |
But be careful: Not every shade you find on the VITA guide is in every brand. Check each brand’s chart to see what matches best.
Here’s how to start:
- Manufacturer’s Chart: Read the conversion chart. Some composites change color after curing, so always look at the cured color.
- Layering: Many dentists put a dentin shade underneath and an enamel shade on top to look more real. If your patient has white marks, special effect shades can help.
Can Digital Shade Matching Devices Help?
Yes, they can. Shade guides do a good job, but mistakes happen. Digital devices, like spectrophotometers or colorimeters, can be more than 70% exact. They don’t get tired, and you can keep the color for later use. Bigger clinics use these for hard cases.
Why you might like them:
- Less guessing
- Same results every time
- Makes it easy to check old work
But: These gadgets cost more than a simple VITA guide. And even then, you might have to do a bit of fine-tuning. Most people use the VITA guide, and only grab a digital tool when they’re really stuck.
What About Custom Shade Guides and Test Restorations?
If a case is extra tricky, you can make your own guide. Here’s my trick:
- Mix a bit of composite, shape it like the tabs, then cure it.
- Hold your custom tab up to the tooth.
- Try, check, and change until you’re happy.
You can also try a little test filling in the mouth, cure it just a bit, then look. If it works, go for it. If not, swap the color and try again. Custom guides work really well for tough stains, white spots, or for kids’ teeth.
How Do Photos and Communication Help?
Taking good pictures really helps. With clear photos, you can:
- Keep a record for the next appointment
- Show the dental lab the real tooth and shade
- Save before-and-after pictures
How to do it right:
- Use a clean background, like blue or gray.
- Show both the tooth and the shade tab together.
- Use the same light each time so the colors match.
Labs love getting photos. It means fewer problems and mistakes. You can also watch yourself get better at matching shades over time.
What Makes a Dental Composite “Best”?
The “best” composite doesn’t just match the color. Here’s what you want to look for:
- Strength: Some are stronger for back teeth. Others shine up better for front teeth.
- Easy to Use: Does it stick to your tools, or shape nicely? Try a few and see what fits you.
- Looks Over Time: Good brands don’t stain and stay shiny for years.
Most dentists use nanocomposites or microhybrid composites for their shine and strength. For kids or areas with white marks, you might want a softer or bulk-fill composite.
Who Sells Composites That Match VITA the Best?
These brands come up over and over when people talk about good shade match:
- 3M Filtek Supreme Universal Restorative
- GC G-aenial
- Tokuyama Estelite Sigma Quick
- Ivoclar Vivadent Tetric N-Ceram
Check if the brand you pick has a shade chart. If you’re stuck, ask your dental dealer or check their website.
How Can You Get Good Results Every Time?
Here are my best tips for matching teeth every visit:
- Layer for a Natural Look: Start with dentin shade, then add enamel. Add a clear shade at the edge for more see-through teeth.
- Cure It Right: Too much or too little light can change the color. Check your curing light every month.
- Polish: A shiny tooth mixes in better with the real enamel.
- Final Check: The color can look different after polishing. Always check again in daylight at the end.
Frequently Asked Questions
Q: Can I use the VITA shade guide for veneers and crowns?
Yes! You can use it for any tooth-colored restoration—even dentures.
Q: What if I can’t find a perfect match?
Layer different shades or mix a little. Test in the mouth with a small piece.
Q: Do composites get darker over the years?
Modern composites stay bright for a long time, but things like smoking can stain them.
Q: Do I need special training to use the VITA guide?
Anyone can start. The more you practice, the better you get. Your dental helpers can do it too, if you teach them.
Key Things to Keep in Mind
- Shade matching is part science, part art. The VITA guide is your top tool for picking the right composite.
- Use good light, clean teeth, and choose quickly for the best results.
- Most composite brands follow VITA shades—double check with the chart.
- Digital devices and making your own guides help for tricky cases.
- Good photos are great for labs and for your records.
- The more you practice, the better you’ll get—every tooth is a chance to learn!
Helping your patients get a smile they love is worth all the extra effort. Use the VITA guide, take your time, and soon you’ll know exactly how to pick the best shade for any filling, every time.