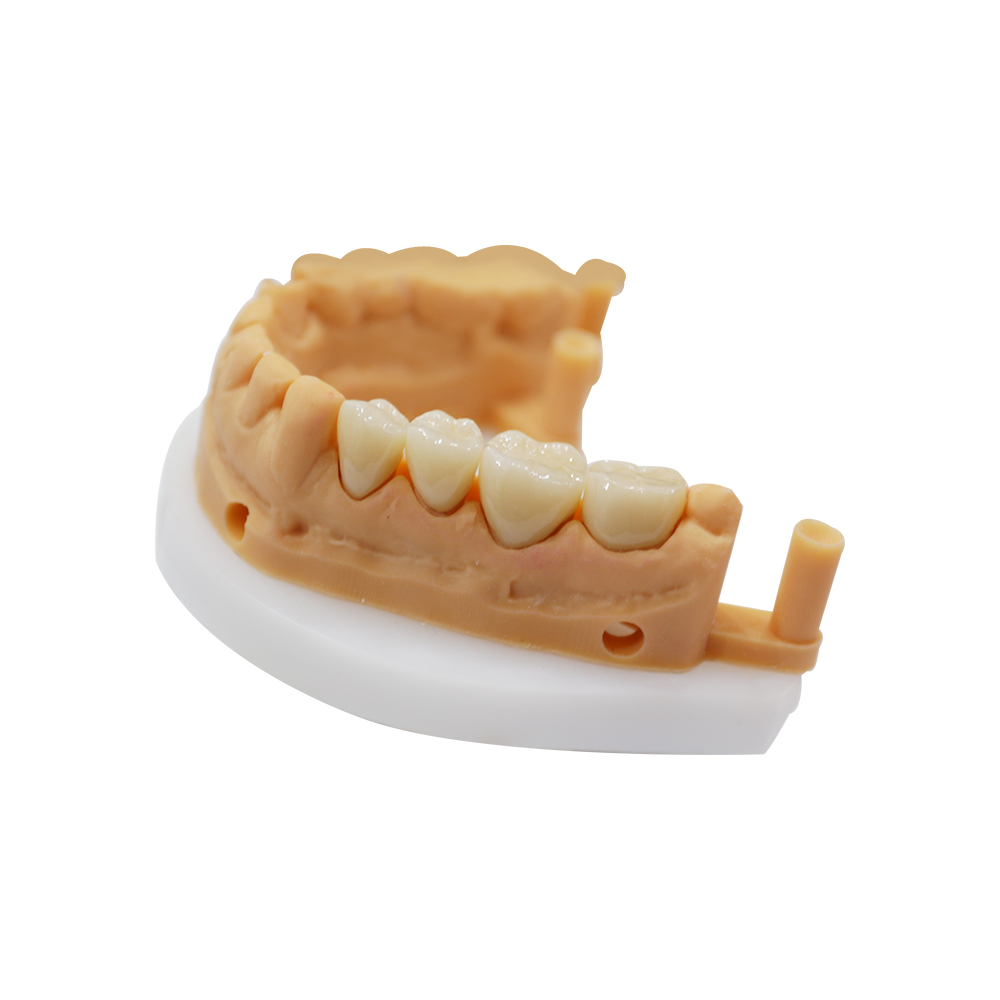
Temporary Front Tooth Implant Crown: Immediate Restoration Case Study


Wypełnij formularz, a my odpowiemy w ciągu 30 minut!
A case from ASD Dental Lab — how we handled a dental implant front tooth temporary when the patient needed a natural-looking restoration from day one.
The Patient
Male, 41. Sales manager. Smoker, 15 years.
The history matters more than the tooth, so here it is in full.
A root fracture had been sitting under this incisor since a lateral incisor trauma 8 years earlier. Two things followed from that: an infection that never fully cleared, and a slow, measurable loss of facial bone in that socket — on the CBCT, roughly a third of the buccal plate gone by the time he walked in. Adjacent #9 had a porcelain-fused restoration placed eight years ago and was structurally sound but had taken the load from years of compensated chewing. Soft tissue was thin — the classic translucent biotype, where you can see the root shadow through the gingiva.
He had already spent four months not smiling in meetings. He is the kind of patient who schedules every cleaning six months ahead, but had let this one run because it was a front tooth and every consultation had ended with “let’s think about the timing.”
The doctor recommended immediate implant placement with an immediate temporary crown. Extract, place, and deliver a restoration the same day — so the patient leaves with a tooth and never has to go through a gap period at all.
Why this case ended up on our bench rather than next door: the extraction was going to be traumatic for both of them, the buccal defect meant the lab would be working against a compromised tissue envelope, and the patient had a hard deadline in two days. That combination is most of the reason a case like this goes to a lab at all.
What the Doctor Prescribed
The prescription came in with the digital files, and it was specific in a way that tells you the doctor had done this before:
- Immediate temporary crown, maxillary central incisor
- Screw-retained, not cemented — retrievable for the adjustment visits ahead
- Non-functional loading — the crown had to look right and stay clear of occlusion while the implant integrated
- Facial under-contour — the tissue envelope was too thin to tolerate any pressure on the facial aspect
- Shade A2 to match #9’s existing restoration
Attached to that: digital impression taken intraorally post-placement, the implant position file in its own folder, photos of #9, and the note that told us the real constraint:
“He sees clients daily. He needs this to look correct — back at work Monday.”
That last line is what turns a normal prescription into a scheduling problem. Two days, one anterior abutment, a soft tissue envelope we can’t control, and a shade match against a restoration that has aged eight years.
Immediate Implant Temporary Crown Design and Fabrication
1. File Review — What We Looked At Before Milling
We open every case the same way, and most delays are caught here.
The implant position file. It came with this case, which is not a given. If the implant position file is missing, there is no safe way to place a screw access channel — the design goes back. We verify the file against the scan before we model anything, because a mismatched library and a mismatched scan will both produce a crown that looks right on screen and doesn’t seat in the mouth.
Occlusal clearance. Measured in the file: 1.4 mm at the incisal edge, 2.1 mm in centric. Enough to build a crown with a flat incisal plane and no protrusive contact. On a case with 8 mm of interarch space you’d have freedom to contour; here the freedom was gone, and that drove the emergence design.
The tissue side. Thin biotype, buccal bone loss. That combination sets one hard rule: whatever we design on the facial has to be under-contoured, not merely not-over-contoured. Under-contouring by a fraction still lets the lab hold a emergence profile; over-contouring by anything blanches the tissue immediately.
2. Design
Designed against #9 as the reference — same shade family, same incisal plane, but aged eight years. That’s the detail people miss: an eight-year-old restoration has settled, and its incisal edge is no longer where the lip expects it. We matched to the neighbour, not to a shade guide.
- Emergence angle — under-contoured on the facial, long enough to hold the tissue away from the margin rather than pressing it
- Screw access hole — cingulum-positioned, aligned to the implant axis from the position file, not guessed from the scan
- Incisal edge — flat, clear of protrusive contact by design
- Interproximal contacts — light mesial and distal, enough to support the papilla without blocking seating
The crown is passive by design. It won’t hold a bite. It holds space, holds the tissue, and looks like a tooth.
3. Material
PMMA. The standard for immediate temporaries and the right answer here for three reasons: it survives the integration period, it’s adjustable chairside if the doctor needs to refine the occlusion or contour in a week, and it can be reshaped to follow the gingiva as it settles without remaking the case.
Shade A2 against the clinical photos, milled, hand-finished at the margins, polished to a natural luster. Nothing here is complicated — that’s the point of a temporary. It’s specified so the doctor can change his mind about it.
4. Delivery
3 days from file receipt. The doctor seated it the same day it arrived. The patient left with a front tooth and no gap period.
What Happened After
Two Weeks — Reported by the Doctor
- Tissue — healthy pink, no blanching on the facial, papilla filling from the contact point down
- Occlusion — still clear of contact in centric and protrusive
- One adjustment — the doctor took another 0.5 mm off the incisal edge at day seven, out of caution, even though the initial clearance was already there
That adjustment is worth noting for a second reason: it’s the kind of thing that can only happen with a material that adjusts easily. A cement-retained or zirconia temporary would have turned a five-minute chairside refinement into a remake.
Three Months — Patient Feedback Through the Doctor
By three months the tissue had matured and the implant had integrated. The doctor’s notes from the follow-up:
- Appearance — the patient’s own reaction, as reported: “it looked natural from day one, nobody at work mentioned anything”
- Funkcja — he adapted quickly to not biting with it, and stayed careful about front-tooth contact through the tissue maturation period
- Komfort — no sharp margins, no irritation around the screw access, nothing to report
He was ready for the final crown. The temporary had done its job: it held the space, shaped the tissue, and got him through a job interview without a gap in his smile.
Prescription Requirements for a Temporary Front Tooth Implant Crown
This is the same list we use internally, and it’s what decides whether a case goes fast or goes sideways. The short version is that everything below is something that has cost us or a client a remake at some point.
| What we need | What goes wrong without it |
| Digital impression (STL or equivalent) | No design possible. Analog impressions rarely work for immediate cases. |
| Implant position file | No screw channel to place. Crown won’t seat. |
| Implant system + platform size | Screw channel diameters differ by system. Mismatch = remake. |
| Photos of the adjacent teeth | Shade from photos, not from the guide — A2 in the clinic isn’t A2 on the lab bench. |
| Occlusal clearance measurement | If it’s tight, the design has to change before milling, not after. |
| Screw-retained or cemented? | Determines whether adjustment is a chairside fix or a remake. |
| Odcień | Match to the neighbour tooth, which may be an aged restoration. |
| Functional or non-functional? | If he plans to bite on it, material and design both change. |
| Gingival biotype | Thin means under-contour the facial. Thick gives more freedom. |
| Patient timeline | If he needs it in 24 hours, that changes prioritization at booking, not at design. |
| Anatomical challenges | Thin bone, a post-extraction socket still settling, adjacent mobility — flag it and we’ll design around it. |
| Contact preference | Light contact to support the papilla, or no contact at all. It’s a decision, not a default. |
| Material preference | PMMA standard. Composite or zirconia for longer-term temporaries, specify it. |
Missing items aren’t a rejection — we call back before we start. But a complete prescription is the difference between a 3-day turnaround and a week of back-and-forth.
Common Risks with Immediate Implant Temporary Crowns
Premature loading. If the temporary contacts during function before the implant has integrated, the risk is an early failure. Survival data for single crowns is strong — 93.5% at 5 years, 92.2% at 6–11 years — but that data describes cases that weren’t overloaded early. Our design target is 0.5–1.0 mm clear of occlusion, and the doctor can always add material back; removing it later is the cheap direction to be wrong in.
Gingival blanching. Over-contoured temporaries compress the soft tissue, the gingiva blanches, the papilla recedes. Papilla loss doesn’t come back on its own. On a thin biotype this is the most likely way the esthetic result gets compromised before the final crown is ever placed. Under-contour the facial, keep interproximal contacts light, and let the tissue hold the crown rather than the crown pressing on the tissue.
Screw access in the wrong place. This one is entirely a file problem. An inaccurate or missing position file means the access hole is modelled off an assumption, and the crown either doesn’t seat or puts a visible screw on the facial. That’s a remake with no workaround.
Fracture during the temporary phase. PMMA can crack if the patient bites something hard or the section is too thin, and parafunctional habits are the usual culprit — bruxism is a recognized risk factor. We reinforce the incisal edge and the screw access area by default, and when the history is there, a thicker temporary plus a nightguard is the cheaper answer than a fracture and a remake.
Send Us the Case
If you place anterior implants and want a lab that reads the prescription the way it was meant to be read — digital workflow scan to delivery, 3–5 day standard turnaround with rush available, and a callback before we start if anything in the file is unclear - asd-dentallab.com is where the files go.
ASD Dental Lab Servicing dental professionals since 2012 Digital design | Full-arch restorations | Implant-supported prosthetics
This describes a case processed by our lab, written as a representative account. Clinical decisions — implant placement, loading protocol, provisional design parameters — were made by the treating dentist. Every case differs; outcomes depend on patient factors, surgical technique, and follow-up. We make no claims about clinical results or survival rates.
Szybszy czas realizacji dzięki naszej najnowocześniejszej technologii
Zalecane