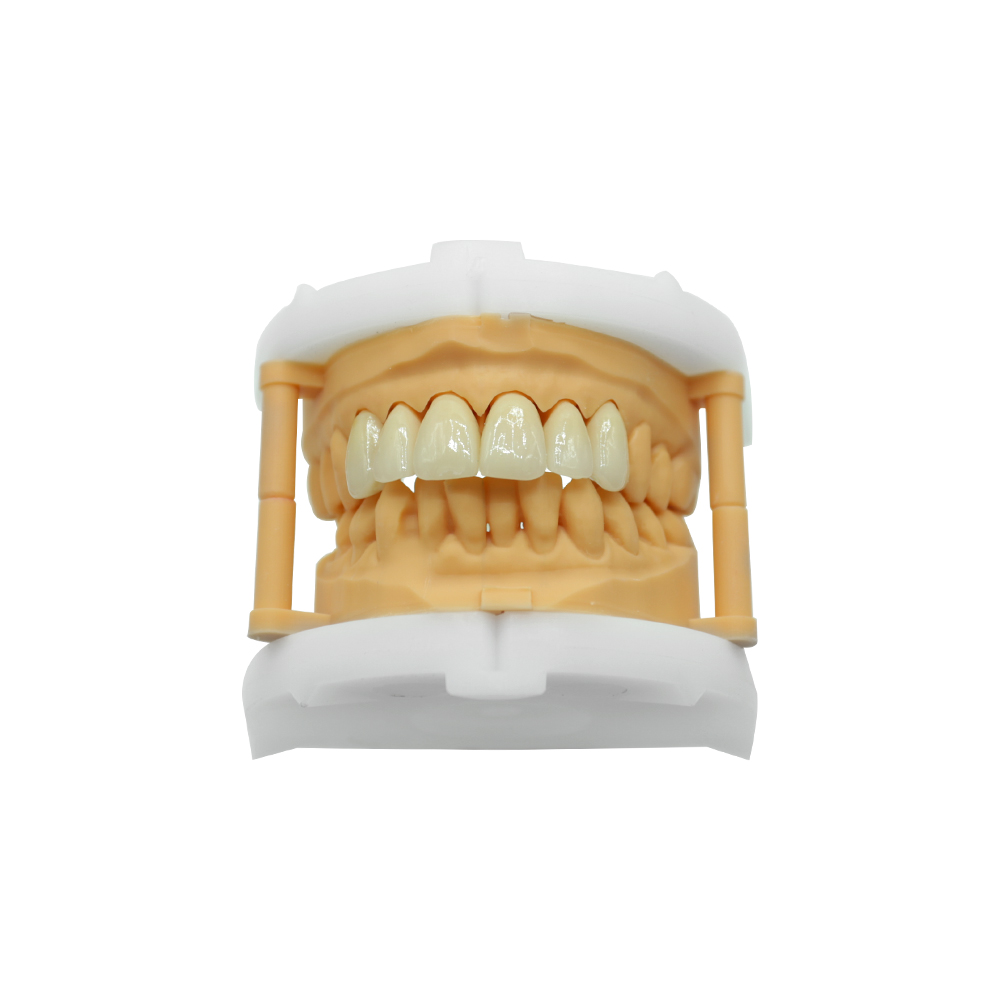
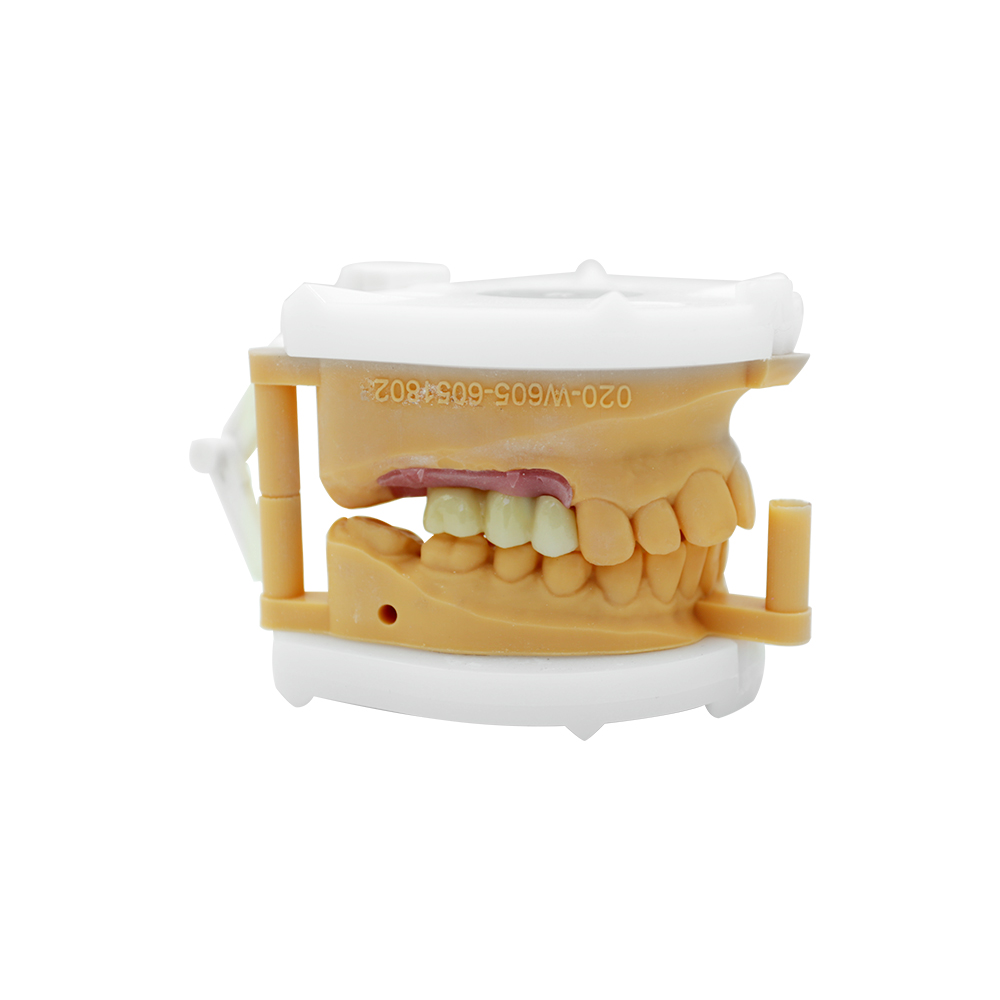
Temporary Front Tooth: Single-Wing Bridge Case Study


One missing lateral incisor. Not an implant candidate. Reference tooth already compromised. Patient refusing removables.
This is what the case sheet said when it reached us. One upper lateral — FDI 12, right in the smile line — congenitally absent, kept open through ortho, healthy space. No bone for an implant. Peg lateral on the other side covered in old stained composite. Patient had been wearing a clear retainer with a pontic and wanted it gone.
The prescription asked for a single-wing resin-bonded bridge. Temporary category, permanent constraints.
What we were handed
The lateral had never come in. The space was orthodontically maintained, which meant the position was clean and the neighbouring teeth hadn’t drifted. CBCT showed a labial bone plate too thin to support a fixture — the surgical team ruled out an implant. The contralateral lateral was a peg shape under old discoloured composite, so mirroring the form straight across wouldn’t work without accounting for that.
The patient’s objection to the retainer was specific: removing it to eat, and the fact that it announced itself as a prosthetic. A flipper would have the same problem with visible acrylic at the gum line. The conventional three-unit bridge would mean cutting into two neighbours, one of which was already the compromised peg. Leaving the space open long-term would let the neighbours drift, and reopening it later for an implant would mean going back through ortho first.
We were looking at the intersection of four requirements the dentist had circled on the work order: fixed, minimally invasive, reversible, single tooth. A single-wing resin-bonded bridge (Maryland-type, using one wing rather than two) met all four.
The obstacles list
Before the dentist signed off, they wrote down seven things that could go wrong. That became our specification.
B1 — Not much enamel to work with. A lateral incisor is one of the smallest teeth in the arch. The lingual bonding area is limited to begin with.
B2 — The neighbours don’t move together. Each tooth has its own PDL. Under function they displace in slightly different directions. Bond to both and you’re asking the adhesive layer to stretch across a moving joint.
B3 — The reference tooth is asymmetric. The peg lateral with the stained composite is what we had to reference for form. We couldn’t just copy it wholesale.
B4 — The space can’t sit empty. Neighbours drift. If this case ever converts to an implant later, you’d need ortho to reopen the space first.
B5 — Reversibility is non-negotiable. Bone conditions can change. The design had to allow removal without losing tooth structure.
B6 — Occlusal load undecided. We needed to know whether this pontic would see any lateral excursion contact, because a resin bond on a small tooth can’t take shear.
B7 — Time pressure. The patient wanted this done quickly, without multiple try-in visits.
B2 is the design constraint that decides everything else. Each neighbour moves independently under load. A double-wing design — bonding to both — spreads the bond line across two teeth that don’t move together. That’s the documented failure mode. Five-year debonding sits at 19.2%, annual rate around 3.05%, and debonding is the most frequent complication in anterior resin-bonded work. Another review put 78% of failures on debonding, 13% on porcelain fracture. The literature ties better outcomes to enamel-confined prep, supragingival margins, and keeping the pontic out of excursive contact — all of which the dentist had already specified.
The prescription
Every line on the Rx traced back to one of those obstacles.
Single wing. Bond to one neighbour only. The other side stays untouched.
Prep confined to enamel, middle third lingual, margins supragingival. Stay inside the zone that gives you predictable bond strength without cutting into anything you can’t take back.
Match the contralateral form, don’t pull from a library. Copy width, length, labial curve, incisal translucency from the peg lateral, adjusting for the composite overlay.
Shade at the start of the appointment, record the stump shade. Take the shade while the teeth are still hydrated. The underlying tooth structure shade matters — it governs how the restoration reads under light.
Ovate pontic, light ridge contact, relief space reserved. Maintain the soft tissue profile without loading it. The pontic holds the space; it doesn’t compress tissue.
Minimal or zero prep on the neighbours. This has to come off later without leaving a preparation behind.
Out of occlusion. No contact in protrusion or lateral excursions. A resin bond on this much enamel can’t be asked to resist shear.
How We Designed the Temporary Front Tooth Restoration
Checking the incoming data
First thing we do with an anterior interim case: verify the data supports the design. Tooth position in universal numbering, shade system and shade selected, pontic-to-ridge relationship, occlusal clearance. If any of those are missing or contradictory, we stop and go back to the dentist before we start cutting anything.
We also confirmed the scan covered what we needed: the site, the neighbours, the gingival margins. The opposing scan had to show the full occlusal arch — distal to the last molar, mesial to the anterior, and at least two teeth either side of the site with the corresponding soft tissue. That’s our baseline for checking occlusion.
Shading one anterior tooth
You can’t shade a single anterior with one guide tab. We work in layers.
We record the base shade while the tooth is clean and moist, and we record the underlying tooth structure shade separately — because that’s what governs how the final restoration reads in different light. The neck gets mapped deeper and more saturated. The body transition is built gradually. The incisal edge gets translucency and opalescence to match the adjacent teeth. Surface texture gets layered on last.
We’re working under standardised light sources for comparison and final inspection. Photographs help, but we tell the dentist up front: screen colour is not a colour reference. Photos give us zone and form information. The actual shade match happens under controlled light with the physical restoration.
The dentist’s shade photo spec called for soft ring or dual-head macro flash, no natural light, consistent settings. A photo taken in casual daylight doesn’t hold up as a shade record.
Copying form from the other side
When you have a contralateral tooth to reference, you don’t approximate — you copy. We pulled the digital model of the peg lateral, mirrored it, and transferred the form. The peg shape and the composite overlay became part of the reference. We matched the form, adjusted the shade work to account for the discolouration on that side.
Designing out of occlusion
The pontic was designed as an ovate form with light contact at the neck and relief carved out below. We checked occlusion against the opposing scan and the bite registration. The pontic sits clear of protrusive and lateral pathways — no contact in excursions. That’s not an afterthought you adjust at try-in. It’s baked into the design.
Where the dentist sent a centric bite and a max intercuspation record, we used that to verify contacts in centric and excursive movements, and to remove any early contacts before we shipped.
Materials and the thickness trade-off
The interim material options we stock for provisional crown and bridge work are composite resin and PMMA. Materials are selected against the indication, cleared for intraoral use, and we can provide brand, origin, lot number, and certificates per case.
There’s a standing rule in our anterior work: thickness is the primary variable. Translucency and strength are inversely related. Aesthetics is the goal, but only after strength and bond reliability are locked. When thickness is constrained, strength wins and aesthetics adjusts. We keep that feedback loop open with the prescribing dentist.
Three inspection stages
Every case here passes three checks. First is incoming — materials and documentation. Second is in-process between major steps. Third is final, released by an inspector who wasn’t on the production team. Anterior aesthetic cases get an additional review at each stage, and they’re handled by technicians with ten-plus years on the bench.
Final inspection checks margins, internal surface, proximal contacts, and occlusion. Margins have to be even with no lifting or voids. Internal surface gets checked for burrs, residual spatter, and air bubbles. Contacts have to seat without binding and hold without gaps. Occlusion gets verified in centric and excursive — we remove any early contacts before the case leaves. Approval is against the confirmed Rx and the design the dentist signed off on.
If something’s off at final — a margin, an occlusal high, a material question — the case goes back to the dentist by email or work group before we adjust it on our own judgement.
Traceability
Every case binds to a unique ID. The production record follows it through the whole workflow: who did each step, what equipment, what material lot, what the inspection result was at every gate. If we need to trace something back later — a margin fit, an occlusal contact, a material batch — we can pull the record and go back to the technician who ran that stage.
Where a dentist’s preferences are consistent, we archive them in writing and bind them to the account. The next order can reference them directly. One rule on that: preferences are binding once they’re confirmed in writing. Verbal requests don’t count.
Design previews are available before production starts — we can send STL, screenshot, or rendering by email or work group for approval.
Temporary Front Tooth Restoration: Final Result
The restoration seated in one visit. Single-wing design bonded to the lingual enamel of one neighbour. Enamel-confined prep, supragingival margins. Form following the peg lateral reference. Shade mapped in layers with the underlying structure shade accounted for. Ovate pontic with light ridge contact and relief carved. Zero prep on the contralateral neighbour. Pontic clear of occlusion in excursions.
From the patient’s side: a fixed pontic that didn’t need to be removed for eating, positioned in the smile line without visible removable hardware. From the treatment planning side: the design stays reversible. If bone conditions shift and an implant becomes viable later, the restoration comes off without loss of tooth structure.
One thing to clarify on longevity. In comparable anterior interim cases, resin-bonded restorations have been documented remaining in service for eight months or longer before removal for implant surgery. That’s category data from published clinical literature, not ASD case records. It describes how this restoration type behaves, not what any individual patient will see. Actual performance depends on enamel area, occlusion, isolation, and patient hygiene.
The same applies to the failure data cited earlier. Anterior composite build-ups show overall survival of 88.34% up to ten years in the literature, though that evidence base covers restorative build-ups rather than free-standing pontics. Fracture is the most frequent failure mode in broader anterior composite work. Staining and loss of anatomic form show up particularly in aesthetic cases. These are category-level numbers. They tell you how a restoration type performs over time in documented cases, not what happens in any one patient’s mouth.
Ordering a Temporary Front Tooth Restoration from ASD Dental Lab
What do you send us to start a case like this?
Tooth position in universal numbering. What you’re asking for. Material. Shade system and shade. Occlusal records. Any case-specific notes. We have downloadable Rx forms and case checklists.
How do you shade a single anterior when the contralateral tooth is compromised?
Layered shade mapping, not a single guide shade. We record the underlying tooth structure shade separately because it governs how the restoration reads under different light. Neck gets mapped deeper and more saturated, body transition is gradual, incisal edge gets translucency and opalescence. Surface characteristics go on last. Photos give us zone and form reference — screen colour isn’t a colour reference, so the actual match happens under controlled light with the physical piece.
Can you mirror the contralateral tooth even when it’s not a clean reference?
Yes. We pull the digital model, mirror it, transfer the form. When the reference tooth is compromised — peg shape, old composite, whatever — we match the form and adjust the shade work to account for what’s there. The key is we’re not pulling from a generic anterior tooth library. We’re following what the patient already has on the other side.
What changes when the missing tooth is at the end of the arch?
Tooth position is the first gate, not the last. Design constraints shift considerably between positions. The aesthetic risk from visible removable hardware shifts too. That call gets made before the design is drawn, not after the try-in reveals a problem chairside.
What if we need to change the prescription after you’ve started?
You can modify shape, colour, occlusion, contacts, tooth arrangement, material. Changes get approved by our production manager and plant manager. Technical questions route to the technical director. If you’re changing a fundamental requirement — single wing to double, enamel prep to full prep — we flag the cost and timeline impact before we proceed.
Can you expedite an anterior case?
All cases can be expedited. Standard lab turnaround for a conventional crown or bridge is two to three working days. Multi-stage cases run by stage: diagnostic waxing or guide stage is two to three working days, interim PMMA try-in stage is two to four working days, final restoration is three to five working days.
One thing on scheduling: domestic weekends and Chinese public holidays are not production or shipping days. They don’t count toward the committed turnaround. So if you submit Thursday night and the following Monday is a holiday, the clock starts Tuesday.
Who owns the clinical side?
Diagnosis, treatment planning, placement, follow-up — that stays with the licensed dentist. We’re manufacturing against a dentist’s written prescription. Prescription and design approval records default to three months retention, extendable on request.
Can you trace a case after it’s delivered?
Yes. Each case binds to a unique ID with a full production record: technician per stage, equipment used, material lot, inspection results at each gate. The record is archived for full-process traceability. We can provide material brand, origin, lot number, and certificates per case for review.
Digital case data is encrypted in transit and storage. Access is restricted to the case coordination team. Cases reference the clinic’s own case number where the dentist specifies that.
Case details are a de-identified composite from comparable anterior interim cases. Diagnosis, treatment planning, placement, and follow-up remain the responsibility of the licensed dentist. Restorations are manufactured against a dentist’s written prescription. Outcomes depend on individual case conditions. Figures cited from published literature describe restoration categories, not individual patient outcomes. This content documents laboratory process and case workflow; it is not medical advice.