Ceramic Inlays and Onlays: A Case Walk-Through from Our Dental Lab

Real case studies from our bench: what the dentist sent us, what we built, and how it sat.
Why this page exists
We are a dental lab. Every day, dentists ship us scans, impressions, and prescriptions for ceramic inlays and onlays — and they ask us the same handful of questions over and over: Can you build this on a cracked molar? What’s the minimum thickness for lithium disilicate? My patient had endo last year — is onlay enough or do they need a crown?
This page walks through real cases on our bench so you can see exactly how the work flows: the patient situation that triggered the referral, what the doctor wrote on the script, how we worked through the design, and how the final piece sat at try-in.
Case 1 — Cracked lower molar, endo-treated, ceramic onlay
Patient situation
A 52-year-old patient presented with a cracked lower right first molar (#30). The tooth had been endodontically treated 14 months earlier by the general dentist and had been wearing a direct composite core ever since. The patient reported lingering cold sensitivity on the mesial-buccal cusp and occasional pain on biting release. Clinical exam showed a visible crack line running from the mesial marginal ridge across the central groove toward the disto-lingual cusp. The buccal and lingual walls were intact, and approximately 60% of coronal tooth structure remained. No probing defects, no mobility, no percussion tenderness.
The patient’s stated priorities, in order, were: keep as much natural tooth as possible, get a tooth-colored result, and avoid the cost and chair-time of a full crown if it could be avoided.
What the doctor asked us for
The doctor sent us a full digital intraoral scan (Trios 5), a bite registration, a stump-shade photo, and a written prescription that read:
Ceramic onlay #30. Coverage: mesio-buccal cusp. Material: lithium disilicate. Shade: A2. Margin preference: equigingival. Minimum occlusal clearance: 1.5 mm. Iso thickness: 2.0 mm. Please flag if you see the crack running deeper than the captured margin.
The prescription also noted a history of mild bruxism (the patient wore a store-bought night guard sporadically) and asked us to build in extra occlusal thickness on the working cusp. The doctor specifically did not want a crown-lengthening procedure and did not want full circumferential coverage if we could avoid it.
How we handled the design
We opened the scan in our CAD software (3Shape Dental Manager) and measured the following from the prep:
| Parameter | Measured | Target | Action |
| Occlusal clearance (central groove) | 1.6 mm | ≥1.5 mm | OK |
| Iso thickness (working cusp) | 2.1 mm | ≥2.0 mm | OK, recommend doctor check working-side contacts |
| Buccal wall thickness | 1.4 mm | - | Within normal range, no ferrule concern |
| Lingual wall thickness | 1.6 mm | - | OK |
| Margin location | Equigingival | Equi or supra | OK |
| Crack visibility on scan | Confined to enamel + outer dentin | - | Within scope of partial coverage |
We designed a mesio-occlusal-distal onlay covering the mesio-buccal cusp with a butt-joint margin at the cusp tip transition. The design included a slight occlusal anatomy rebuild to restore the working-side cusp contour that had been flattened by the prior composite core. The contact areas on mesial and distal were designed for tight floss passage without a contact that would wedge.
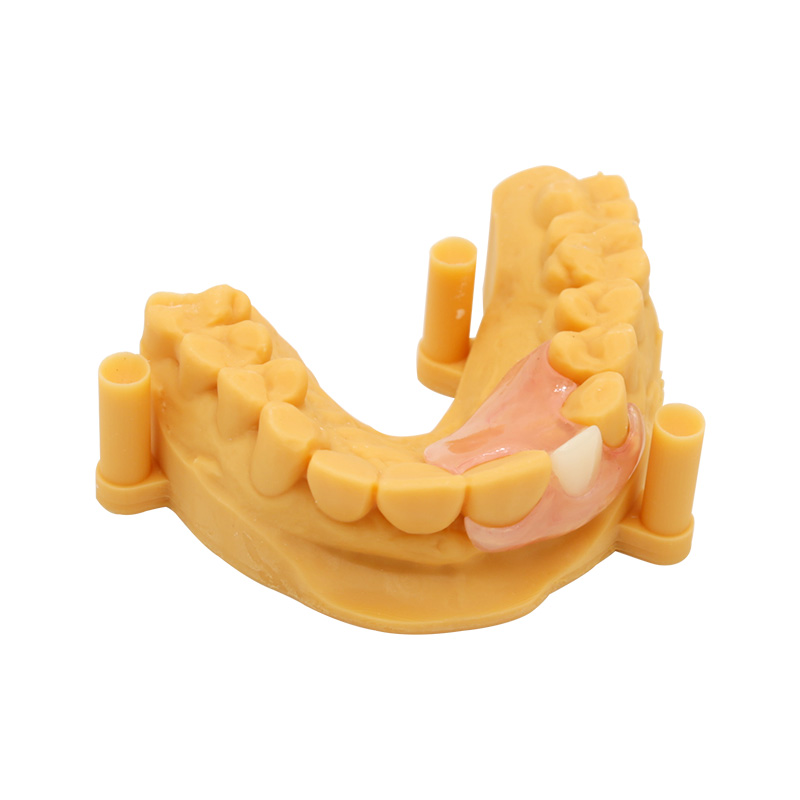
The MDT (model) was nested, and the restoration was milled from a lithium disilicate block (Ivoclar IPS e.max CAD, A2, LT translucency), crystallized, stained, and glazed per the manufacturer’s parameters. Try-in fit-check on the printed model: marginal gap measured under 10× magnification came in around 35 µm.
How it sat at try-in
The doctor tried it in after isolation with a rubber dam. Seating was passive with finger pressure. Proximal contacts verified with floss (snug, no shred, no wedge). Marginal fit was confirmed visually and with explorer — no open margins, no overhangs, no catch.
Occlusion was checked in centric first: even contacts on the restoration and on the adjacent teeth, with light contact on the working cusp (lighter than the other quadrant’s working cusp by design, to account for the patient’s bruxer history). Lateral movements showed immediate disclusion on the working side with no posterior interference. No adjustment needed at try-in.
The doctor then proceeded to adhesive cementation using a total-etch protocol (HF etch on the intaglio for 20 seconds, silane, adhesive; 37% phosphoric acid on the tooth, adhesive, then Variolink Esthetic dual-cure resin cement). Excess cement was removed tack-cure-then-flap, margins refined, occlusion re-verified post-cementation. Total chair time for try-in and cementation: approximately 40 minutes.
Follow-up
The doctor reported back at the 6-month hygiene re-care: restoration intact, no sensitivity reported, patient wearing a professionally-made night guard nightly, no occlusal wear visible on the opposing ceramic.
Case 2 — Failed large amalgam, MOD inlay, lithium disilicate
Patient situation
A 38-year-old patient came in with a failing amalgam on the upper right second molar (#2). The amalgam was 9 years old and showed both marginal ditching and a new mesial caries lesion at the gingival margin. The tooth was asymptomatic — no pain, no cold sensitivity, no percussion tenderness. The patient had a low caries rate overall and no parafunctional habits.
On exam, the buccal and lingual cusps were sound, with no visible cracks. Approximately 75% of coronal tooth structure remained. No endodontic involvement. The patient asked specifically for a tooth-colored restoration and wanted to avoid a crown if at all possible.
What the doctor asked us for
Digital scan (Medit i900), bite, photograph of the prep with shade tab in frame. Prescription read:
Inlay #2, MOD design. Lithium disilicate preferred. Shade A1. No cusp coverage — both buccal and lingual cusps are intact. Margin: supragingival. Occlusal clearance target: 1.5 mm. Please contact me if the prep doesn’t support it.
The doctor noted that direct composite was discussed with the patient and declined because of the proximal contact control challenges with a wide MOD preparation and the patient’s stated preference for a single-visit-result option. The patient was willing to wait for a lab-fabricated piece.
How we handled the design
| Parameter | Measured | Action |
| Cusp coverage required | None — both cusps intact | Inlay, not onlay |
| Occlusal clearance (groove) | 1.8 mm | Comfortably above the 1.5 mm floor |
| Proximal box depth (mesial) | 4.5 mm | Adequate for connector strength |
| Connector width (isthmus) | 3.2 mm | Above minimum for lithium disilicate |
| Margin continuity | Continuous, no steps | OK |
| Internal line angles | Rounded | OK |
The design followed the natural central groove anatomy and replicated the patient’s contralateral occlusal scheme as closely as possible from the scan data. We did not rebuild the marginal ridges — they were intact on the prep. We added a slight occlusal embrasure form to clear the contact with #3.
Milled from the same lithium disilicate system as Case 1 (A1, MT translucency to match the brighter shade), crystallized, polished, no staining required. The intaglio was left in a pre-crystallization, etched-ready state.
How it sat at try-in
Passive seating. The proximal contacts on mesial and distal were tight but floss-passable. Margins showed no step or open interface under 10× loupe. Shade match to the contralateral #31 and to the adjacent #3 was verified with the try-in paste (the doctor used a try-in paste matched to the cement shade they’d planned to use — Variolink Neutral).
Occlusion: even contacts on the restoration’s occlusal surface in centric, no interferences in excursions. No adjustments made.
Cementation followed the same total-etch, HF-etch + silane protocol as Case 1. Total try-in plus cementation time: about 30 minutes.
Follow-up
Doctor confirmed at 3-month recare that the restoration was performing well, margins clean, no chipping. The patient reported that the bite “felt like a real tooth” within the first week and had no complaints.
Case 3 — Premolar with structural loss, porcelain onlay with cuspal coverage
Patient situation
A 61-year-old patient with a long history of large composites and a recent debonding event on the upper left first premolar (#12). The previous composite had been replaced twice in the past decade. On presentation, the tooth showed:
- A wide MODL preparation occupying most of the coronal structure
- Buccal cusp undermined (approximately 1.0 mm of remaining wall thickness at the buccal cervical)
- Lingual cusp intact but thin
- No endodontic involvement, asymptomatic
- Opposing tooth: a ceramic crown placed two years prior
The patient reported sensitivity to cold lasting 2–3 seconds, no spontaneous pain. The patient was opposed to a crown (cost concern, “didn’t want to grind down a good tooth”) but accepted that some coverage would be needed if it meant the restoration would last.
What the doctor asked us for
PVS impression, bite registration, photographs, and a written prescription that read:
Onlay #12, full cuspal coverage (both cusps). Material: lithium disilicate acceptable; zirconia OK if you think strength matters more. Shade: A2.5. Margin: equigingival where possible. Doctor’s concern: buccal wall is thin — please flag if ferrule isn’t adequate.
The doctor specifically asked us to evaluate whether the remaining buccal wall supported a bonded ceramic onlay or whether a crown was the more honest recommendation.
How we handled the design
We poured the impression in type IV dental stone and sectioned the die. Measurements:
| Parameter | Measured | Flag |
| Buccal wall thickness | 1.0 mm | Thin — within the lower acceptable range for bonded ceramic |
| Lingual wall thickness | 1.8 mm | OK |
| Occlusal clearance | 1.5 mm | At minimum threshold — request more reduction if doctor can give it |
| Connector dimensions | 3.5 mm × 2.5 mm | Above minimum |
| Ferrule available | Marginal — buccal wall doesn’t provide full circumferential ferrule | Note in lab communication |
| Margin location | Buccal margin equigingival | Acceptable, but margins in function |
We called the doctor’s office (per our standing protocol: any clinical concern gets a phone call, not just a written note) to discuss the buccal wall. After a 10-minute conversation, the doctor confirmed they preferred to attempt the onlay with an understanding that if it debonded, the next step would be a crown with crown-lengthening or orthodontic extrusion.
We designed the onlay with full cuspal coverage and a conservative axial reduction on the buccal to preserve what remained. Internal line angles rounded, butt-joint margins at the cusp tips, contact areas built to the adjacent teeth’s contour.
The choice was lithium disilicate over zirconia because the patient was not a heavy bruxer and the esthetic demand was high (a premolar in the smile line). Milled from lithium disilicate, crystallized, characterized with light stain at the cervical to blend the equigingival margin, glazed.
How it sat at try-in
This was the case where our written notes mattered most. Seating was slightly resistant — the doctor noted mild resistance at initial placement, consistent with the tight proximal contacts we built. After a quick check with a thin shim stock, the contacts were within range (the initial resistance was a feature, not a bug, given the patient’s history of debonding). Full seating confirmed under 10×.
Margins: continuous, no gaps. The buccal cervical margin was verified visually and with explorer — the characterization we built in helped the margin blend.
Occlusion: light centric contact on the restoration, even contacts on adjacent teeth, no interferences in excursions. One minor adjustment on the buccal-lingual incline using a fine-grit diamond, then re-polished with rubber wheels and diamond polishing paste (the glaze had been removed in that small spot, so we re-polished to a high shine per the protocol for lithium disilicate — a rough surface can accelerate wear on the opposing ceramic crown).
Cementation: same total-etch protocol. After cementation, occlusion re-verified, no high spots.
Follow-up
At the 2-week follow-up, the doctor reported no post-op sensitivity. The patient adapted to the new bite within a few days. At 6 months, the restoration was intact, the buccal margin was clean, and the patient reported no issues.
What we ask for on every case
From our bench side, the cases that go smoothest are the ones where the doctor sends us what we need to start work without a phone call back. Here’s the list we work from:
- A complete digital scan or accurate PVS impression of the prep, the opposing arch, and the bite. If digital, please check the scan on the screen before exporting — voids at the margin, saliva bubbles, and tissue overlap are the most common reasons a scan has to be retaken.
- A written prescription identifying the tooth, the restoration type (inlay vs onlay, surfaces, cusp coverage), the requested material, the shade, the translucency/opacity, and the desired delivery date.
- Margin visibility — supragingival or equigingival margins are easier for us to scan, design, and verify. Deep subgingival margins add risk to every step.
- Stump shade or prepared-tooth shade when using translucent ceramic. Without it, we’re guessing.
- Photographs of the prep with margins visible and a shade tab in the frame. iPhone photos in operatory light are fine.
- Notes about the patient that affect the design — bruxism, occlusal scheme, existing restorations, implants in opposition, requested occlusal modifications.
- A preoperative scan or wax-up if the case requires copying existing anatomy. We can wax to a pre-op if you have one.
This isn’t exhaustive, but it’s the core. If your office is sending a case that includes a previous restoration you want us to match in anatomy, a pre-op scan saves us a phone call.
We do not accept scans with margin voids, saliva/blood contamination in the prep zone, or missing opposing-arch data. We will call your office to discuss before we send a case back, but those are the most common reasons a case needs to be retaken.
Materials for Ceramic Inlays and Onlays
For 세라믹 인레이 및 온레이, our default material choices:
| 재료 | When we recommend it | Bonding protocol |
| Lithium disilicate (IPS e.max CAD, similar) | Posterior inlays/onlays in esthetic zones, standard occlusal clearance available, patient is not a severe bruxer. Our most-used material for porcelain inlay onlay work. | HF etch (5%, ~20 sec) → silane → adhesive → resin cement |
| 지르코니아 | When strength and parafunction dominate the decision; when clearance is at the upper end of what we can achieve; when occlusal loads are heavy. Less translucent than lithium disilicate. | Air abrasion → MDP primer → adhesive → resin cement (no HF/silane as primary protocol) |
| Hybrid ceramic / resin nanoceramic | When intraoral repairability is a priority; when occlusal forces are moderate; when the patient has a complex medical history that makes future adjustments more likely. | Material-specific — air abrasion and/or HF, then silane/adhesive |
Submit a Ceramic Inlay or Onlay Case
We accept cases by:
- Digital upload through our portal (preferred): STL/PLY files, photographs, prescription forms.
- 이메일 for small cases under 20 MB.
- Physical impressions by courier (we cover return shipping on cases above a minimum value).
If you’re considering a case and want to talk it through before sending, you can reach our technical team by phone during business hours. We routinely discuss prep design, material selection, and complex cases before fabrication starts — the conversation is free and it saves chair time later.
Notes on sources
The clinical and materials information on this page is drawn from peer-reviewed dental literature and standard clinical guidelines. Key sources include: Morimoto et al. 2016 systematic review and meta-analysis on pooled ceramic survival rates; Abduo and Sambrook 2018 on ceramic onlay complications; Journal of Esthetic and Restorative Dentistry materials review on bonding protocols; and PMC review of glass-ceramic cementation. CDT procedure codes referenced are current to the ADA CDT 2026 guide.