Case Study: Unilateral Flexible Partial Denture


🕢 [ Compila il modulo e ti risponderemo entro 30 minuti! ]
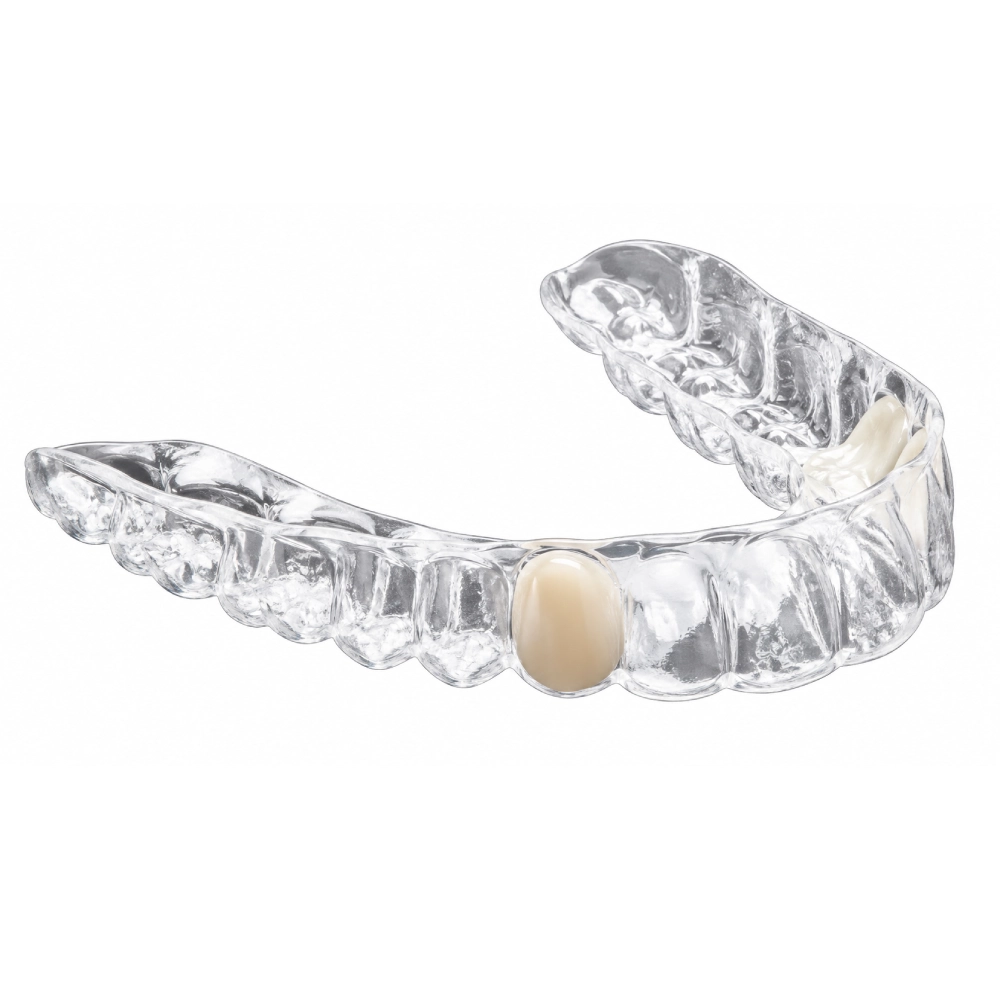
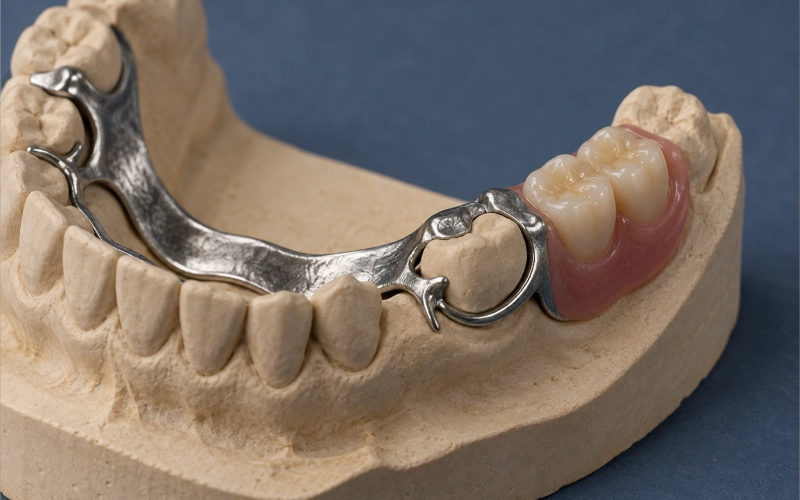
This unilateral flexible partial denture case study explores how ASD Dental Lab fabricated a metal-free removable restoration for a Kennedy Class III posterior edentulous space. The case involved thermoplastic nylon, flexible retentive elements, injection molding, and fit verification according to the clinician’s prescription.
1. The Patient
1.1 What brought the case to us
The case arrived as a written prescription from a general practice, with a full-arch silicone impression and a bite registration attached. The prescription asked for a unilateral flexible partial replacing #29 and #30, with the note that the patient did not want any metal visible when speaking or smiling.
The referring dentist’s record documented that a fixed option had been discussed and set aside — no fixed plan was committed to, and no implant work had been started. What was wanted was a removable solution that could be adjusted, relined, or replaced over time without cutting into sound tooth structure.
1.2 What the diagnostic cast showed
On the cast and in the mouth, the finding that shaped the whole case was this: the edentulous space was bounded. There was a standing tooth anterior to the gap (#28) and a standing tooth posterior to it (#31). That makes the space a Kennedy Class III — a bounded edentulous area, classified under the Applegate rules by the most posterior edentulous area, so this space stands on its own rather than as an extension[16].
Two details from that examination mattered more than anything else on the prescription:
The abutments were both usable, and both had surveyable height of contour. #28 and #31 were periodontally stable with intact crowns. Neither required preparation. This gave us two retention points rather than one — the single biggest factor in how a unilateral appliance behaves once it is in the mouth.
The opposing arch was complete. This is where most unilateral flexible cases fail at the design stage. A complete opposing dentition puts real load through the prosthetic teeth, and it leaves limited room between the arches for anything that needs vertical thickness — a retentive feature, a reinforcement, a metal-free attachment. We measured the available space on the cast before committing to a design, because the answer decides whether the case can be built this way at all[12].
The remainder of the mandibular arch was intact. No other edentulous space was present, which keeps the classification at Class III rather than moving it to a multiple-space designation.
1.3 Why a unilateral flexible partial, specifically
Three things in the presentation pointed at this particular appliance, and none of them were the patient’s request alone.
The bounded space did not need to cross the midline. Extending a framework across the arch to reach a single bounded quadrant adds connectors, adds tooth surface, and adds a second failure point for no functional gain. A unilateral design stays inside the quadrant that needs restoring[1].
The requirement was metal-free retention. Flexible partials retain through tissue-toned clasps that deflect over height of contour and return to position, rather than through cast metal arms[23].
The abutments offered undercuts on both ends of the space, so retention could be distributed across #28 and #31 instead of concentrated at one tooth.
2. The Dentist’s Instructions
This section is the prescription as we received it — what the dentist asked for, in the form the case arrived.
Design scope. Unilateral appliance, replacing #29 and #30. Design limited to the mandibular right quadrant. No extension across the midline.
Retention. Tissue-toned retentive elements requested. No visible metal in the aesthetic zone. Retention to be taken from the undercuts on #28 and #31.
Material. Thermoplastic nylon resin. Dentist specified flexible rather than cast metal, citing the patient’s preference and the metal-free requirement.
Prosthetic teeth. Resin teeth rather than porcelain.
Abutment preparation. None. The dentist’s record noted that no reduction was planned on #28 or #31.
Space and load. Dentist flagged the complete opposing arch and asked us to confirm the case could be designed within the available interocclusal space, and to report back before fabrication if it could not.
Delivery expectations. Single delivery appointment, with the case released for finishing after a try-in appointment at the office.
What we asked back before starting
We do not open a case on assumption. Before modeling, two questions went back to the office:
- The clearance question, because it is binary — either the vertical space supports the retentive features this design depends on, or the case needs a different approach.
- The shade and mould, which the form had left blank and which we could not infer from an impression.
3. Unilateral Flexible Partial Design and Fabrication
Written against the prescription in the section above — every step below answers a specific line in it. The shade and mould came back answered from the office before modeling began; the clearance question was answered by the first step on this list.
Model and survey. This is the step that answers the clearance question the dentist raised about the complete opposing arch. We poured the impression, seated the cast against the bite registration, and surveyed #28 and #31 to confirm the existing undercuts were usable on the intended path of insertion, and to read whether the vertical clearance supported the design the prescription called for. Consistent with the instruction that no reduction was planned, nothing was cut on either abutment — the survey was used to read the teeth, not to change them.
Digital design. Held inside the scope the prescription drew: mandibular right quadrant only, replacing #29 and #30, with no extension across the midline. The denture base covers the edentulous ridge to the depth needed for support, and the gingival margin is relieved where the appliance crosses it.
Retention. Built to the retention instruction rather than to a template. Because the dentist asked for tissue-toned retentive elements and no visible metal in the aesthetic zone, retention is carried by elements engaging the surveyed undercuts on #28 and #31 — two points of retention, one at either end of the space, not one. Neither abutment was prepared, so the retention works with the contour the teeth already present.
Prosthetic teeth. Resin teeth, as specified, rather than porcelain.
Retention features. Diatorics — mechanical retention anchors — were placed into the master die before molding, positioned where the opposing arch will bear on the prosthetic teeth. This step exists because of the dentist’s note on the complete opposing arch: that is the load the teeth have to stay attached through. Without these anchors the teeth can part from the base under functional load[12].
Molding. Injection molded following the published protocol for this material class — plasticized at 550–560 °F, injected at 100 psi, held 3–5 minutes, bench-cooled 15–20 minutes before opening the flask[12]. The material is the one the dentist specified: thermoplastic nylon resin, flexible rather than cast metal.
Finishing. Carried out only after the case returned from the office carrying the dentist’s release following try-in, as the delivery instruction required. Finished and polished, with the retentive areas left at the texture needed for them to keep working rather than smoothed flat.
4. Unilateral Flexible Denture Try-In and Fit Checks
The appliance was tried in at the dentist’s office, with the patient present.
At that appointment we reviewed five points with the dentist:
- Full seating. The base seated completely on the ridge, with no rocking on either abutment.
- Retention. Clasp engagement on #28 and #31 confirmed by direct pressure test.
- Occlusion. Tooth position against the opposing arch — no supraocclusion, no interference on excursion.
- Insertion and removal. The patient inserted and removed the appliance independently, without assistance.
- Tongue space. No bulk interfering with speech or swallowing on the tongue side.
The dentist confirmed the design and released the case for finishing.
5. After Delivery
The dentist
The case involved a bounded posterior edentulous space in the lower right quadrant, replacing teeth #29 and #30. With tooth #28 anterior to the space and tooth #31 posterior to it, the case was classified as Kennedy Class III. Both abutments provided usable undercuts for the prescribed flexible retentive elements.
What I liked about working with this lab: they pushed back on my first impression in a good way. I asked for a metal-free design because the patient didn’t want anything visible in the smile zone, and they told me straight what that meant — no rigid framework, a different approach to retention, and a realistic word on how it would feel. That’s more useful than just taking the job.
At delivery: it went in snug. Not “we’ll see how it settles” snug — properly retentive, two-point contact, and it didn’t rock when I pressed on the tissue side. For a bounded space like this, that’s the whole ballgame. A distal-extension case would be a different conversation entirely, and they were upfront about that.
One week in: the patient came back for review and the fit was still where we left it. Nothing had loosened. For a flexible appliance, that’s the bit I watch most closely, and it held.
The patient
What I noticed first: nobody could see it. That’s it, that’s the thing. I talk a lot for a living and I was braced for that “wait, is something in your mouth?” moment, and it never came.
How it feels: way lighter than I expected. I’d been picturing something bulky sitting there, and it isn’t. I forget I’m wearing it.
Talking and eating: the first day I was a little self-conscious — my mouth felt different, words felt vaguely thick. By day two or three that was gone. Having it on one side only, with nothing crossing the midline, made a real difference. Nothing bulged my lip or changed how my face sat.
The first-week questions, honestly: can I take it out? Yes — it’s removable, it comes in and out like any other partial. How do I clean it? The normal way, and the lab walked me through it properly. Do I need to come back? Yes, periodically, to have it checked and relined when the gums change.
Why I actually wear it: I expected to be annoyed by it and mostly leave it in a drawer. That didn’t happen. It’s in my mouth all day, I take it out to eat, and I genuinely forget about it — which is the highest compliment I’ve got for something like this.
About Our Lab
We are Laboratorio dentale ASD, a dental laboratory established in 2012. We operate two production sites — Shenzhen and Huizhou, China — with approximately 460 technicians across CAD/CAM design, zirconia milling, implant restorations, fixed ceramics, and removable prosthetics.
All fabrication steps are handled in-house. Nothing is outsourced to a third-party laboratory. Our removable prosthetics department produces 4,000–6,500 cases per month depending on season, with a dedicated quality assurance team.
We work with over 50 dental laboratories, 100+ clinics, and 400+ dentists across the United States, Europe — Netherlands, Germany, France, Belgium, Austria, UK, Luxembourg, Switzerland — and other markets. Factory visits are welcome at either site.
Submit a Unilateral Flexible Partial Denture Case
If you have a case like this one, send it in before you commit to a design. We will tell you whether the case fits this approach, and flag anything we think needs a different plan.
Submit Your Case for Design Review
Send us:
- Full-arch impression or digital scan files
- Bite registration
- Prescription form with tooth positions, clasp preference, and any specific instructions
- Shade and mould selection
Sperimentate tempi di consegna più rapidi grazie alla nostra tecnologia all'avanguardia
Consigliato