Translucent Zirconia Veneers for an Intrinsically Discoloured Anterior Segment: A Documented Case


🕢 [ Compila il modulo e ti risponderemo entro 30 minuti! ]
In one paragraph
The case at the centre of this page is a full-arch anterior tetracycline-type discolouration — the kind where the dark band sits inside the tooth, whitening has already been tried and failed, and the patient has been living around a self-conscious smile for years. The clinician came to us for translucent zirconia veneers on the upper front eight units because they needed a material that could actually mask a dark internal background at a thin section, not just look pretty in the try-in. What follows is the file as we handled it — what the patient came in with, what the clinician asked us to build, how we handled each of those asks on the bench, and what came out at the end.
1. Patient situation
- The discolouration is intrinsic and near-full-arch. The dark banding runs through the dentine, not on the surface. That is the crucial line. Surface stain can be polished or whitened away; internal stain cannot. In this file the darker band was present across essentially every anterior tooth, with the incisal thirds slightly lighter than the cervical thirds — the classic pattern of a substrate that colours the whole arch, not one tooth.
- The patient has already tried whitening and it did nothing. In the patient’s own words, it was “any whitening will not work because the grey is intrinsic and not just superficial.” That sentence saves everyone a step: whitening as a standalone route was already off the table before we saw the file.
- The patient has been self-conscious about the front teeth for a long time. The self-report in the case notes mentioned “brown blotches on the two front teeth from tetracycline as a child” and the resulting habit of covering the mouth when smiling. That is not a cosmetic complaint we solve with a shade guide; it sets the acceptance bar for what “good enough” means on the try-in.
- The patient asked about veneers, but was worried about tooth removal. They had read that veneers require grinding healthy tooth structure down, and were asking whether the amount of tooth removed was really worth the aesthetic gain on a substrate as dark as theirs.
- No parafunctional history was flagged on the file. That matters — it means the material choice is being driven by masking, not by fracture resistance. In a bruxism file the answer would tilt further toward zirconia; here it stays there for a different reason.
- Substrate character. The stump shade is one of the two variables that drive the final read on a zirconia laminate veneer, and on this file it sat in the darker half of the standard shade guide across the segment, with two of the eight teeth measurably darker than the rest.
2. What the clinician asked us to do with these translucent zirconia veneers
The prescription on this case was not a one-liner. The clinician, having read up on the material, wrote in a stack of specifics — each one solving one of the bullets above. We reproduce the list here as it came in.
- Pick a material that will actually mask the dark background at veneer thickness. The clinician was explicit that this was the deciding constraint. In their words: zirconia was the “most reliable material option to cover tetracycline staining.” They wanted us to confirm the class of zirconia we would use for that job.
- Be honest about how much of the darkness we could hide. The clinician wanted a written note on the case telling the patient, upfront, that a very dark intrinsic background is hard to mask completely. If the try-in showed the band still leaking through in the cervical third, that had to be a known outcome, not a surprise.
- Keep tooth removal minimal. The patient’s worry about grinding healthy tooth structure was the main soft objection to going ahead. The clinician’s ask was: hit our own minimum thickness protocols and no more. If the design allowed for a lighter preparation on any of the eight units, take it.
- Do custom shading in-house, not by shade code alone. The clinician had seen shade matches on dark substrates go wrong when the lab worked to a single shade tab. They asked us specifically for custom shading, done at the local lab handling the case, and offered to supply as many photographs of the neighbouring teeth and the smile as we could use.
- Report the stump shade back on the paperwork. They wanted the actual measured background value in the file, so that when the units read a shade darker than the tab under the operatory light, the whole team knew why.
- Use an adhesive protocol that suits zirconia. They had a glass-ceramic bonding routine on the shelf and wanted to know if it transferred. Our answer to that had to be on the case note, not left as a phone call.
- Deliver the units try-in-ready. With a try-in note, an intaglio that had not been contaminated, and enough information for their bonding step to be run against the same reference we had built the design against.
Point 4 is the one that changed the plan. Everything else is a standard translucent zirconia veneers workflow; the request for custom shading, done deliberately for this substrate, is what pushed the case from “mill and glaze” into “design, mill, characterise, verify against photographs.”
3. Translucent Zirconia Veneer Design and Fabrication
We are going to walk down the seven asks in order. Each subsection below answers one — with what we did on the bench, what we decided against, and where the choice came from. This is the substance of the page, so we do not compress it.
3.1 Picking the material class — high-translucency zirconia, and why not the highest-translucency grade
Zirconia is not one material; it is a family. Grades used for posterior full-contour crowns and long-span bridges sit at the low-yttria end (3Y) — very strong, quite opaque. Grades used for anterior aesthetics sit at the high-yttria end (5Y and above) — more translucent, but with flexural strength ranges that do not overlap the 3Y numbers, and with a class-by-class trade-off between optics and mechanics that defines the modern anterior-zirconia landscape.
For this file we picked a multilayer 5Y grade, not the most translucent option on the shelf. The reason is directly in the material science: the more translucent the grade, the less it masks. On a light substrate that is a fine trade; on a substrate this dark, it would leave the cervical banding leaking through. Multilayer 5Y gives us a denser cervical layer that helps hide the dark base, and a more translucent incisal that keeps the edge reading as enamel — which is exactly what an intrinsically discoloured anterior segment needs. How much of the final colour comes from thickness versus material class has been quantified across both monolithic zirconia and lithium disilicate at matched veneer sections.
Where zirconia is not the right answer, we say so. A glass-ceramic like lithium disilicate lets more light through at the same thickness and is the default we would reach for on a lighter substrate with a lower functional load. For the wider view on that route we keep a separate Emax Veneers page.
3.2 Being honest about the ceiling — a written expectation-management note
The clinician asked us to put the “cannot be fully masked” line on paper, not just in a phone call. Our case note went out with three things in it:
- The bench limit. On a stump shade this dark, even a purposely denser 5Y unit does not mask 100 percent. A residual translucency in the darker regions is expected, and it will be visible in the cervical third if the lighting in the mouth cross-lights the unit strongly. We wrote that verbatim on the case note.
- The design lever we did use. We built extra opacity into the cervical zone of each unit — not by adding thickness, but by placing the design in the disc so the denser layer of the multilayer landed at the cervical. Then we characterised.
- The design lever we did not use. Adding a porcelain layer on top of a zirconia core would let us push masking further, but that layer is where zirconia veneers usually chip. We chose not to.
This is not a fine-print disclaimer. It is a design decision that shows on the units, and putting it on paper is how we make it verifiable at the try-in.
3.3 Keeping tooth removal at the minimum
The published protocol range for zirconia laminate veneer thickness on the facial sits at roughly 0.4–0.5 mm at the middle third, with a butt-joint incisal seat of about 1 mm on cases that need incisal coverage. Those are study values, not universal minimums — but they set the floor.
For this file we ran the CAD at 0.5 mm facial cervical, 0.6–0.7 mm at the middle third, and an incisal reduction of about 0.9–1.0 mm on the two central units only. The lateral units and the canines were left with only a butt-joint incisal seat, no wrap. That kept the preparation on the enamel-dominated part of the tooth on six of the eight units, and gave the clinician a defensible answer to the patient’s question: on this file we removed as little as the mask would let us. Where the finish line sits changes the fracture resistance, e the thickness itself behaves non-linearly as the facial section comes down — both of which drove the per-zone values we settled on.
A no-preparation route was raised and then set aside. No-prep works on additive cases — closing spaces, building up peg laterals, extending a short tooth. It is not the tool for a case where the goal is to hide a dark substrate: the units on a no-prep run thin, and thin is exactly the direction that pushes the substrate through. The inclusion criteria that make a no-prep file defensible are tight, and this case did not meet them.
3.4 Custom shading in-house, driven by photographs
This is the ask that changed our workflow on the file. The clinician’s instruction was clear: do not read a single tab and mill to it; do custom shading, done in-house, against photographs.
Here is what that looked like in practice.
- Photograph set. We asked for and received a full set — front smile, retracted view, profile, intraoral shots of the adjacent teeth from three angles, and shade photographs with the shade tab placed lightly wet against the neighbouring tooth in natural light. We did not proceed without them.
- Layered read of the target. We read the target shade in three zones — cervical, middle, incisal — and picked a multilayer disc whose colour transition matched the zone-by-zone read, rather than a single tab match.
- Design-file colour placement. In CAD, the units were placed inside the disc so that the disc’s denser cervical layer aligned with the cervical of the unit. That is not automatic — the default disc placement is optimised for milling yield, not for optical layering.
- Characterisation, not layered ceramic. After sintering, the units were built up in colour using external stains and a fluorescent glaze. We did not add a porcelain layer. The single most common failure mode on a “prettier” translucent zirconia veneer is a delaminated porcelain layer over the core; we would rather characterise a monolithic surface than chase translucency with a layer we know can peel.
- Verification against the photograph set. Before the units left inspection, we photographed them under a standardised light source against the reference photograph, at the same angle. Any character line on the neighbouring tooth that did not show on the unit was fixed at that stage, not at the try-in.
3.5 Reporting the stump shade back on the paperwork
Stump shade — the shade of the prepared tooth — is different from the target shade. It is the background the unit has to sit on top of, and on a case like this the background does measurable work on the final translucency. Two rules on our side:
- We do not start milling on a translucent zirconia veneers file without a stump-shade record. If it is missing from the file, we come back and ask. That is not a stalling tactic; it is the row that most commonly goes wrong on this material class, and it is the row that is hardest to recover from after the sinter.
- We write the measured stump shade back on the paperwork. So that at insertion, when a unit reads slightly darker than the tab under the operatory light, the whole team — clinician, assistant, patient — knows that the background is doing part of the reading, not the unit.
3.6 An adhesive protocol that actually matches zirconia
Zirconia does not respond to hydrofluoric acid and silane the way a glass-ceramic does. If a glass-ceramic bonding routine gets used on a zirconia unit, the bond is not what the paperwork says it is. Our note on the case had four things:
- Intaglio conditioning. Air abrasion with fine alumina at low pressure. Alumina and pressure both matter; too much of either damages the ceramic, too little of either leaves the surface unprepared — the parameter envelope for surface pretreatment of zirconia is well mapped and this is where we land it.
- A cleaning step after try-in. Once the unit has been tried in, it has seen saliva. Rinsing with water or wiping with alcohol is not enough — dedicated zirconia cleaners outperform acid, water or alcohol when adhesion has to be rebuilt after saliva contact.
- Cement type. An MDP-containing resin cement, which has one-year randomised clinical data behind it on zirconia veneers.
- Documented on paper. The conditioning we had already run in the lab, the cleaning step to run chairside, and the cement type to pair with it — written on the case note, in that order.
3.7 Try-in-ready delivery
Delivery included:
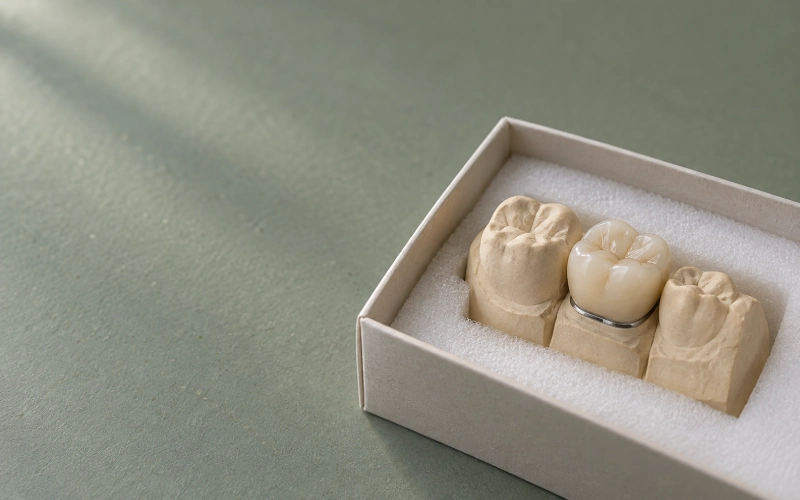
- The eight units, individually seated on a working model matched to the design file.
- A try-in note listing the shade the design was built against, the stump shade measured pre-op, the disc used, the sinter cycle, and the intaglio conditioning already run.
- The digital design file, in case the clinician wanted to check the seating on their end before try-in.
- A shade photograph of the finished units on the model under standardised lighting, at the same angle as the reference photograph the case was designed against.
- No cement in the box, and no cement recommendation for a system we could not verify at their end. That call belongs to the clinician.
4. What came out at the end
The units seated at try-in with the seating check the clinician had asked for. The margins were closed, the interproximal contacts were as designed, and the shade at the middle third matched the target across the segment. In the cervical third, a residual read of the substrate was visible against the strongest cross-light — as we had said on the case note it would be — and was accepted by the clinician and the patient as within the expected range for a substrate that dark. The two central units, which had the incisal wrap, took the incisal light the same way the neighbouring teeth did on the reference photograph.
Two things we want to be careful about in this section, because case pages tend to overreach here.
- On follow-up. We do not publish a follow-up interval or a success rate for this case. The reason is not modesty; it is that the veneer-specific long-term literature on zirconia is thin. A recent systematic review of survival and complication rates across feldspathic, leucite-reinforced, lithium-disilicate and zirconia veneers puts the zirconia row at short-term follow-up with a limited dataset, and a one-year randomised clinical trial of zirconia versus lithium-disilicate laminate veneers found no statistically significant difference between the two at the one-year mark. That is the shape of what we can say honestly. Anything beyond it is guessing.
- On what “success” means on this file. The clinician’s success criteria for this case were: mask the substrate to a defined degree, not “completely”; keep tooth removal at the minimum protocol; deliver units the patient would keep. All three were met on the file we handed back. That is the standard we work to — the case’s own goals, written down at the start.
5. Translucent Zirconia Veneer Case Submission Requirements
If you have a case in your chair that looks like this one — an anterior intrinsic-discolouration file where translucent zirconia veneers are being considered — this is what we would want with the case data, and why each item is on the list.
- Stump shade. Not the target shade. The shade of the prepared tooth after preparation. On a dark background the design has to be built against a known background; otherwise the mill is working blind on the variable that decides the outcome.
- Full photograph set. Front smile, retracted view, profile, intraoral of the neighbours from three angles, shade photographs with the shade tab lightly wet against the neighbour in natural light. The layering comes from photographs, not shade codes.
- Preparation scans and opposing arch. Including any pre-op scan and any mock-up worn.
- Bite record and parafunctional note. Maximum intercuspation, and any parafunctional habit flagged with whether an occlusal guard is planned. Zirconia handles wear well, but the risk still deserves a line on the paperwork.
- Aesthetic parameters. Target shade zone by zone, translucency preference, incisal character preference, surface texture, tooth proportion, midline, smile line. A reference photograph of a smile the patient likes, or a DSD design if one was done.
- Expected turnaround. So the sinter cycle and any characterisation step can be scheduled properly.
If any of the above is missing, we come back and ask before we start milling. That happens most often on the stump shade, which is the row that most commonly gets left off — and it is the one row that changes the outcome the most.
6. Translucent Zirconia Veneers: Frequently Asked Questions
- Can translucent zirconia veneers really hide an intrinsic tetracycline-type discolouration? Substantially, yes; completely, no. The material can lift the substrate perception more than a glass-ceramic of the same thickness can — that is the reason it was picked here. But the physics limit is real: at veneer thickness the substrate colour still contributes to the final read, and on a very dark background a residual cervical shadow may still be visible under strong cross-light. The right answer on the case note is honesty about that ceiling, not a claim that the mask is total.
- Why not use the highest-translucency zirconia grade? Because the more translucent the grade, the less it masks. On a light substrate a high-translucency grade earns its keep; on a substrate this dark, it lets the background through. Multilayer 5Y with the denser layer aligned to the cervical is the compromise for this file.
- Why not lithium disilicate? Lithium disilicate lets more light through at the same thickness — a real advantage on lighter substrates. On this substrate that same property becomes a problem: the darker background reads through the unit. For a lighter substrate at moderate functional load, lithium disilicate remains our default anterior veneer material — that is why we run Emax Veneers as a separate service page.
- Does removing more tooth structure hide the substrate better? Slightly, up to a point, and then the returns diminish quickly while the biological cost of a deeper preparation on an adhesive veneer keeps rising. Sitting at published minimum protocols with the design placed for optical layering is what we would do on this class of file.
- Do you offer other veneer materials besides translucent zirconia veneers? Yes. Feldspathic, lithium disilicate and composite routes are all fabricated in-house. The wider picture sits on the Veneer Lab page. Zirconia crowns and bridges — the broader restorative side, not veneer-only — sit on the Zirconia Dental Lab page.
- Can I book a factory visit or a video audit? Yes. Both are available at our Shenzhen and Huizhou facilities. Send the request through the sales team.
7. About the lab that fabricated these translucent zirconia veneers
ASD Dental Lab has been running since 2012, out of two production facilities in Shenzhen and Huizhou. Around 460 people work in-house across CAD design, milling, ceramic and metal, implant restoration, removable prosthetics, quality control and case coordination. The full workflow — from scan review to final inspection — is done inside our own facilities; we do not send cases out to third-party labs.
On the crown-and-bridge side, our normal-season capacity runs at roughly 8,000 zirconia single crowns and 2,000 zirconia bridges per month, scaling to about 15,000 and 3,000 respectively at peak. Over the past decade we have supplied more than 50 dental laboratories, over 100 dental clinics and around 400 dentists across the United States and Europe. Factory visits, production-line tours and video audits are all available on request.
If a case like the one on this page has landed in your chair and you want to walk through the plan before it hits our bench, reach out through the sales team.
Scope and limits
- We fabricate restorations to a clinician’s prescription. Material selection, preparation design, the decision to place the restoration, and all clinical judgement remain with the attending clinician.
- The thickness values above are the design values agreed for this specific work order. Published study protocols in a similar range are study designs, not universal prescriptions.
- Long-term veneer-specific evidence for zirconia is still limited. Survival and outcome statements above are quoted with their follow-up period and should be read alongside it.
- Nothing on this page is clinical advice.
- Material and process details on any specific case are as stated on the case paperwork that ships with the units.
Sperimentate tempi di consegna più rapidi grazie alla nostra tecnologia all'avanguardia
Consigliato