Anterior Zirconia Crown Case Study — From a Shade-Matching Challenge to a Natural Finish


🕢 [ Compila il modulo e ti risponderemo entro 30 minuti! ]
Who We Are: We are Laboratorio dentale ASD, a full-service dental laboratory serving dentists, clinics, and dental professionals across the US. This case shows how we handle a single anterior zirconia crown for front teeth — a type of restoration that combines strength and esthetics when a natural tooth needs full coverage.
Patient Situation
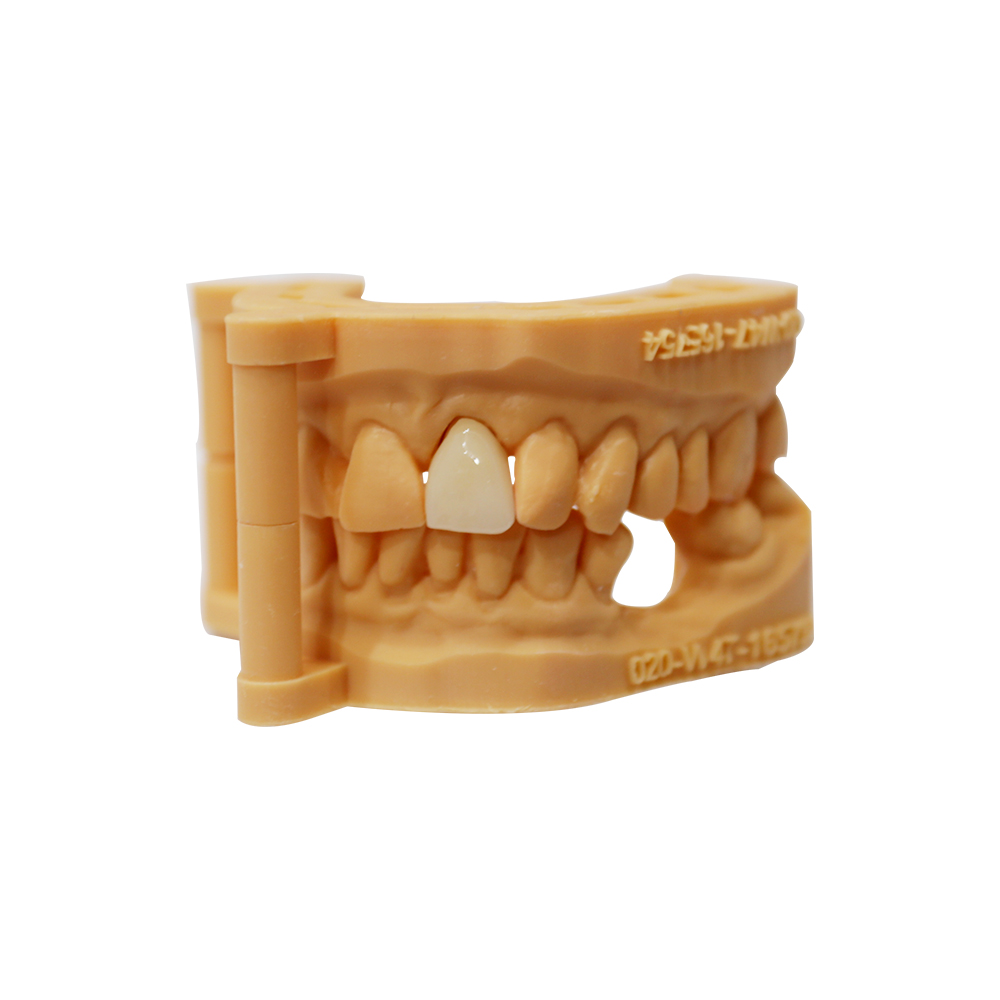
A patient in his early 40s came to a general dentist with a concern: his right central incisor (tooth #8) had extensive decay that reached deep into the tooth structure. The tooth already had an old composite filling that failed, and the dentist noticed significant discoloration underneath. The patient wanted the tooth fixed but was hesitant to do anything that looked “too fake” — he mentioned his job required him to meet clients every day, and he couldn’t have a restoration that stood out against his natural teeth.
What made this tricky:
- The adjacent tooth (#9) was natural and hadn’t been restored, so the new crown had to match it — not just in color, but in translucency and layered appearance. Shade matching and translucency were cited as challenges by 36% of respondents in an ADA ACE Panel report.
- The tooth had discolored dentin underneath, which meant we had to block out that shade without making the final crown look opaque or flat.
- The patient had a strong bite and occasional bruxism (nighttime teeth grinding), so strength couldn’t be sacrificed for esthetics.
The Dentist’s Requirements to the Lab
The referring dentist sent us a prescription form with the following notes (we’ve paraphrased to make it clearer):
| What the dentist told us | Why this matters for the lab |
| “Prep is 1.0 mm axial, 1.5 mm incisal, shoulder with rounded internal line angle.” | Standard prep for a monolithic anterior zirconia crown with layering. We confirm the reduction figures fit the selected material grade before accepting the case. |
| “Please make it zirconia with hand-stacked porcelain on the labial surface.” | Questo è un layered (not full-contour) design. The zirconia framework stays strong, but we build up a thin veneer layer on the front to mimic the natural translucency gradient of enamel. |
| “The adjacent tooth (#9) is natural. Match shade A2 body, with a slight translucent incisal edge. Photos attached.” | Shade matching was evaluated against the adjacent tooth and clinical photos, not against a shade tab alone — that’s where most match failures happen. The dentist sent us close-up photos in natural light and a written record of the shade areas (cervical / body / incisal). |
| “The patient grinds at night. Make sure it can hold up, but don’t make it too bulky.” | We selected a 3Y zirconia grade (selected for its strength) for the framework and kept sufficient framework thickness to support the expected occlusal loads. Layered restorations carry a greater porcelain-chipping risk than full-contour designs, but the dentist specifically requested cutback for esthetics, so we used a conservative porcelain layer design. |
| “Patient has a dark prep. What do I need to tell you?” | We asked for confirmation of the material and masking plan: use a 3Y zirconia framework with >1 mm thickness, and the dentist should use an opaque-white resin cement at try-in (not a transparent one, which would let the dark show through). The final masking power comes from the zirconia itself, not from relying on cement alone. |
How We Met These Requirements
1) Shade Development — Layered, Not a Single Block
We didn’t just pick “A2” and call it a day. Matching an anterior tooth means replicating three distinct zones: a slightly saturated cervical shade (where the gingiva meets the crown), a body color that transitions smoothly, and a translucent incisal edge with subtle opalescence. We use hand-layered feldspathic porcelain on the facial surface to build that gradient — it’s what makes the crown read as natural under real lighting, not just under operatory lights.
Our ceramist referenced the dentist’s photos and the written shade breakdown. We fired three test tabs (cervical / body / incisal) alongside the actual crown to confirm the color under the same kiln cycle, so there’s no surprise when the dentist tries it in.
2) Framework Strength vs. Esthetic Thickness
Because the patient grinds, we couldn’t go ultra-thin. But because it’s an anterior crown, we couldn’t make it bulky either. A review of zirconia preparation design describes approximately 1.0 mm axial and 1.5–2.0 mm incisal reduction for layered zirconia restorations. The dentist’s prep gave us 1.0 / 1.5, which is right at the minimum safe threshold. We milled the framework conservatively, leaving enough zirconia bulk to handle occlusal stress, and kept the porcelain veneer layer thin (around 0.8–1.0 mm on the labial) to avoid a “chiclet” look.
Veneering porcelain can chip or fracture from a zirconia framework, but careful design and processing can help manage that risk:
- Keep the veneer thin
- Avoid sharp angles at the cutback junction
- Fire it properly (slow cooling, no thermal shock)
We log every firing cycle and save the parameters, so if a remake ever happens, we can reproduce the exact result.
3) Dark Prep Masking
Masking a dark tooth preparation without sacrificing translucency is one of the hardest things to get right. The trick is thickness + material choice + cement. A 3Y zirconia framework at >1 mm will mask moderate discoloration on its own, but you still need an opaque white cement (not a clear one) to finish the job. We noted that on the delivery slip and sent a written reminder with the crown: “Use opaque-white resin cement. Avoid transparent cements on this case.”
4) Case-Specific Documentation
Every case we send out includes:
- A material certificate with the zirconia brand, batch number, and country of origin (we use Ivoclar, Zenostar, 3M Lava, and ARUM depending on the case and the dentist’s preference)
- A fabrication record showing which technician designed it, which mill cut it, which sintering cycle it went through, and which ceramist did the layering
- A QC checklist that confirms margin fit, occlusal clearance, contact tightness, and shade match were all verified before we packed it
5) Turnaround and Communication
We received the case on a Tuesday morning. The dentist had marked it “standard” (not a rush), so we gave him a 5-business-day lead time (receive to ship). That included:
- Day 1: Scan the model, design the framework in CAD, send the design back to the dentist for approval
- Day 2: Mill and sinter the zirconia (18-hour sintering cycle)
- Day 3–4: Hand-layer the porcelain, fire it (multiple cycles), adjust and polish
- Day 5: Final QC, pack, and ship
The Final Result
The crown was shipped on day 5 as promised. The dentist seated it the following week and sent us a photo of the try-in. Here’s what he noted:
| Checkpoint | Result |
| Shade match | “Blends in perfectly. The patient and I both had to look twice to see which one was the crown.” |
| Marginal fit | No gaps at the shoulder; seated with finger pressure. The dentist said he “didn’t need to force it.” |
| Occlusion | Checked in maximum intercuspation and lateral excursions. No high spots. The lab occlusion held up. |
| Patient reaction | The patient smiled during try-in and said, “I can’t even tell.” That’s the goal. |
Key Takeaways for Dentists Ordering a Zirconia Crown for Front Teeth
If you’re a dentist placing an order for front teeth zirconia crowns, here are a few things we’ve learned from cases like this:
1) Send us the shade breakdown, not just one letter-number combo.
A single “A2” tells us nothing about the translucency gradient or the incisal halo effect. A single shade designation is incomplete shade communication. If you can, send:
- Close-up photos in natural daylight (not operatory LED, which skews blue)
- A written note: “cervical = A3, body = A2, incisal = translucent with slight opalescence”
- A reference to the adjacent tooth (#9 in this case) so we know what we’re matching against
2) Confirm the prep dimensions before you send the case.
For layered zirconia, preparation requirements depend on the material and design; the review cited above discusses approximately 1.0 mm axial and 1.5–2.0 mm incisal reduction. If your prep is under that, we’ll call you and suggest either:
- Adjusting the prep (if the tooth allows it)
- Switching to a higher-strength zirconia grade
- Accepting that the restoration might have a slightly bulkier profile
We’d rather have that conversation upfront than deliver a crown that fractures three months in.
3) If the prep is dark, let us know.
The masking strategy depends on how dark the preparation is. Mild discoloration? We can handle it with a 3Y framework and opaque cement. Severe? We might need to go thicker, or recommend a PFM with a full opaque layer. If you don’t mention it on the Rx, we’ll design it as a standard case and the dark might show through.
4) Understand the remake boundary.
We stand behind our work. If a crown doesn’t seat, or the shade is off because we misread your instructions, we’ll remake it for free. But if you change the prep after we’ve milled the crown, or if you ask us to switch from A2 to B1 after final firing, that’s a new case — we can do it, but it’s not a warranty remake.
Our standard turnaround is 5–7 business days for anterior zirconia restorations. Rush cases (2–3 days) are available if you need them — just mark the Rx and we’ll prioritize it.
What You Can Expect When You Work With Us
Full Material Traceability
bWe can provide, on request:
- Zirconia brand, batch number, and country of origin
- Sintering cycle parameters
- Porcelain brand
- Technician name and QC sign-off
For supporting research, see the review of zirconia crown retention and clinical performance.
No-Surprise Turnaround
Standard cases: 5 business days (receive to ship).
Complex cases (implant-supported, full-arch): 7–10 business days.
Rush cases (when you need it fast): 2–3 business days, no extra charge if you let us know upfront.
Lead times start from the day we receive the case with complete information. If we’re missing a scan file, a shade photo, or an occlusal record, the clock doesn’t start until we have it all.
Communication That Actually Helps
- You’ll get a design approval image (usually within 24 hours of receiving the case) if it’s a custom design
- You can message us during fabrication if you want to tweak something
- We’ll call you if we see a potential issue (like insufficient reduction, or unclear instructions) — we’d rather ask than guess
Our average response time during US business hours is under 1 hour. Outside of that (evenings, weekends), it’s usually within 12 hours.
Ready to Send Us a Case?
If this sounds like the kind of lab you want to work with, here’s how to get started:
- Download our Rx form — it walks you through what we need (prep type, material choice, shade breakdown, photos, occlusal record).
- Send us your first case — we’ll review it, design it, and send you an approval image before we mill anything.
- Try it in — if it doesn’t fit or the shade is off, we’ll remake it. No questions asked.
We’ve been doing this since 2012, and we’ve worked with over 400 dentists across the US. We’re the lab that answers the phone, sends you a design approval image before we start milling, and stands behind the work if something goes wrong.
Contact us to request a sample Rx form, or just send us your next anterior case and see how it goes.
Riferimenti:
- Current classification of zirconia in dentistry — PMC review
- ADA 2021 ACE Panel report — 61% use zirconia for anterior; shade matching #1 concern (36%)
- Current status on lithium disilicate and zirconia — PMC narrative review
- Zirconia restoration types, properties, prep design — Bonding and layering review
- Retention and clinical performance of zirconia crowns — Comprehensive review
- Dental crown cost breakdown — Patient-facing cost guide
- Lab fee for zirconia crowns
- Long-term clinical outcomes comparison — Zirconia vs. lithium disilicate
- CDT Code — ADA billing nomenclature
- CDT to ICD crosswalk (PDF) — D2740 definition
Sperimentate tempi di consegna più rapidi grazie alla nostra tecnologia all'avanguardia
Consigliato