Types of Burs in Dentistry: A Simple Guide
Table of Contents
Introduction to Dental Burs: Basic Tools in Dentistry
When I started in dentistry, I learned real fast: if you want to be good, you need to get to know your burs. The first time I held a handpiece, I felt excited and a bit lost. There were so many shapes, so many kinds, and a bunch of details to figure out. Every bur had a special use.
In my work, burs are like a painter’s brushes—each one helps me create something different. Choosing the right bur isn’t just about being quick. It’s about getting good results and making things easy and safe for me and my patients. In this guide, I’ll show you the main burs I use, what makes them special, and what I’ve learned about picking the right one for each dental job.
Types of Dental Burs by Material
The first thing I had to get was how burs are grouped by what they’re made of. I found out quickly that the material changes everything—how the bur feels, what it can cut, and how long it’ll last. Here’s what you need to know.
Carbide Burs
If you’ve worked in a dental clinic, you’ve used these. Carbide burs are mostly made from tungsten carbide. When I used carbide instead of steel for the first time, I couldn’t believe how much faster it was. These cut through enamel and metal with ease, so they’re great for making cavities and crown work.
- What They’re Made Of: Tungsten carbide, which is harder than steel.
- How Fast They Cut: The sharp edges on carbide burs cut away tooth fast. I use single-cut ones for controlled work, and cross-cut ones when I want to get old fillings out quickly.
- What I Use Them For: Removing old fillings, shaping for new fillings, and crown work.
- Good Things: Fast, accurate, and don’t get blocked if you match the bur to the job.
- Bad Things: They can “jump” if your grip isn’t steady and are too rough for porcelain or ceramic.
When I want to get stuff done quickly with less changing, I pick a carbide.
Diamond Burs
Diamond burs changed things for me when I started doing more cosmetic work. The tips are covered in tiny diamonds stuck to a metal stick. I think of diamond burs like really fine sandpaper.
- How Rough They Are: They come as fine, medium, and coarse. I grab coarse for cutting fast, like when prepping for veneers, and the smooth ones when polishing or fixing up porcelain.
- What I Use Them For: Cutting down teeth, shaping porcelain crowns, and finishing composite fillings.
- Good Things: Give a super smooth finish and work well on brittle stuff like ceramic.
- Bad Things: They get hot fast, so you need water spray, and they can clog if you don’t clear them.
Can’t do cosmetic dentistry without diamond burs.
Steel Burs (Stainless Steel/Carbon Steel)
I don’t grab steel burs much anymore except when working with soft stuff or showing students the ropes.
- Details: Softer than carbide or diamond. They work best at low speeds.
- What I Use Them For: Getting rid of soft decay, changing lab models, or small jobs that don’t need super sharp burs.
- Good Things: Make less heat, are gentle on gum and soft tissue, and you’ll see them in every lab for models or trimming.
- Bad Things: Get dull fast and don’t work great on hard enamel or metals.
Steel burs remind me you don’t always need the hardest tool—sometimes softer is better.
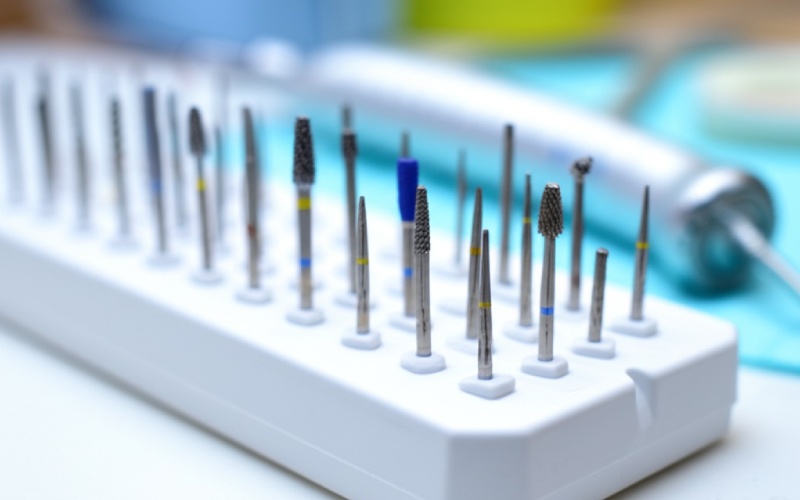
Types of Dental Burs by Shape and Head Design
Here’s where it gets interesting. Every bur has its own look, and once you know them, you can pick the right one easily. In dental school, I had to learn all the numbers and shapes and wasn’t sure I’d ever use them all. Now? I use them every day.
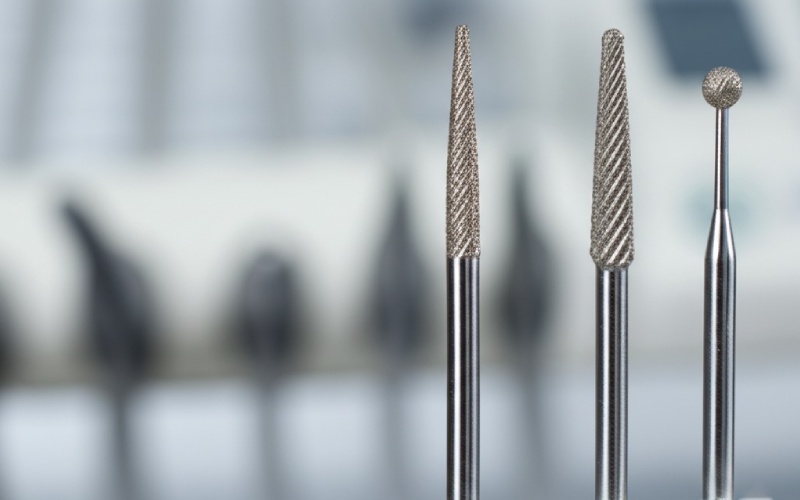
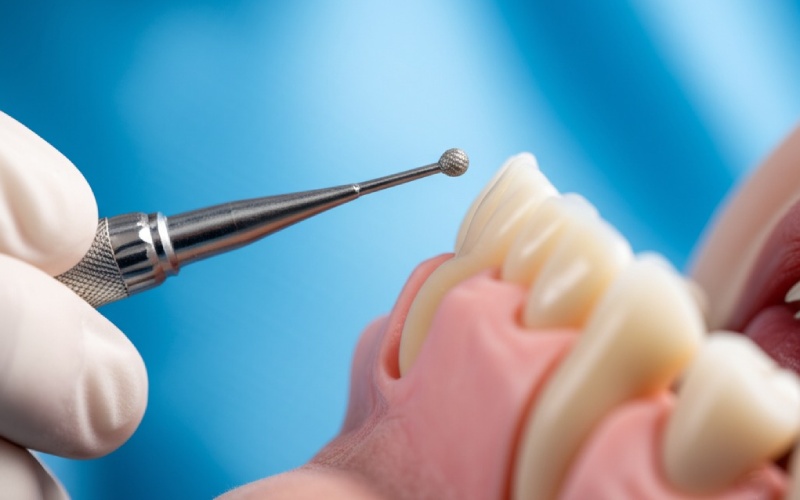
Round Burs
- I Use Them When: I want to start a cavity, make a little hole, or clean out decay.
- How I Use Them: Great for reaching the bottom of a cavity and scooping bad tooth out.
Inverted Cone Burs
- I Use Them When: I need to flatten the bottom of a cavity or make grooves for fillings to stay in.
- How I Use Them: These are my choice for giving fillings something to grab onto.
Pear-Shaped Burs
- I Use Them When: I want a bur that can handle lots of jobs, especially the first part of fixing a cavity.
- How I Use Them: The round sides let me make smooth walls in a cavity. If I’m using composite, I usually grab this first.
Fissure Burs (Straight & Tapered)
- I Use Them When: I need to make straight or sloped walls, especially for crowns.
- How I Use Them: Straight cuts through tooth easily. Tapered ones help match a tooth’s natural slope or prep it for a crown.
- Plain vs. Cross-Cut: Cross-cut cuts faster; plain is better for light touch.
Flame Burs
- I Use Them When: I’m finishing a filling or need to smooth between teeth or by the gums.
- How I Use Them: The shape slips between teeth or near gums for easy smoothing.
Wheel Burs
- I Use Them When: I need to make grooves or lower a tooth quickly.
- How I Use Them: Like a mini saw, these cut grooves or help me finish molar fillings quickly.
Special Shapes
Sometimes only a special bur will do. End-cutting, football, or oval burs cover those odd cases—like making a hole for a root canal or finishing a crown edge. These show just how custom dental tools have become.
Types by Use/Procedure
It didn’t take me long to see that “the right” bur depends on what I’m doing. Every job needs its own kind. Here’s how I break down what I use.
Operative Burs
For basic tooth repair—like fixing cavities or taking out old fillings—I grab my operative burs. Carbide round burs clear out the bad stuff, pear and fissure burs make room for the new filling.
Surgical Burs
For surgery, especially pulling teeth or cutting bone, you need special burs. Lindemann and bone-cutting burs do the work. They’re longer and stronger, so I can split teeth or smooth bone with care. I always keep these clean and on hand.
Finishing and Polishing Burs
These come out when I want to make a filling look and feel better. Multi-blade carbide burs shape, and fine diamond burs make things shine. Many think these are optional, but I know they turn “good enough” into “wow.”
Lab Burs
In the lab or when fixing up dentures, I use lab burs made for trimming plastic, working on models, or shaping plaster. These are bigger, and while patients don’t see them, the results show up in every denture or crown I give out.
Endodontic Burs
On root canal days, I use endo burs like Gates Glidden or Peeso drills. They help me find and shape root spaces. Long and skinny, they get the job done when nothing else will.
Orthodontic Burs
After braces come off, I use burs that clean off glue without hurting the tooth. Special ortho burs make this easy and safe, which helps nervous kids get that fresh new smile.
Handpiece Fit and Shank Types
Nothing’s worse than grabbing a bur and finding out it doesn’t fit your handpiece. I’ve done it, you’ll probably do it too, but here’s how to not mess up so much.
High-Speed Handpiece Burs
- Friction Grip (FG) Shank: These short, skinny burs pop right into my high-speed drill. I use them for cutting into enamel or making crowns.
- When I Use Them: Any time I need speed, water, and control. Slicing a whole cusp or opening a crown? FG burs, every time.
Low-Speed Handpiece Burs
- Latch-Type (RA) and Straight (HP) Shank: Latch types “click” into a low-speed drill, straight-shank for even slower work.
- When I Use Them: Cleaning out soft decay, polishing, fixing dentures in the lab. Speed’s not the key—being careful is.
Getting the right shank for the right drill isn’t just about being fast—it keeps things safe. You don’t want a bur flying across the room!
What to Think About When Picking a Dental Bur
Picking the right bur is kind of like buying shoes. Not every size or style works for every job. I always ask myself:
- What am I doing? Is it a filling, a crown, or a root canal? Each needs its own bur.
- What am I cutting into? Tooth, metal, bone? Carbide for metal, diamond for ceramic, steel for soft stuff.
- What speed do I need? Some burs work best fast, others take it slow. Go with what’s made for the job.
- How comfy and safe for the patient? The right bur cuts noise, shakes, and heat. Plus, nobody likes that burning tooth smell.
- What size or roughness? Big burs are quick but risky, fine ones are slow but careful.
There’s no exact rule, but if you practice, picking gets easier.
Cleaning, Sterilizing, and Bur Life
Not very exciting, but super important. Germs don’t show up by themselves—they hitch a ride on your tools, especially burs. Here’s how I keep mine clean and sharp.
- Cleaning and Sterilizing: After every use, I scrub off junk and run burs through an ultrasonic bath. Then they go into the autoclave to get hot and clean. Miss this, and not only do you risk infection, you also wreck the bur faster.
- Storing: I keep burs dry, upright, and away from wetness. Rust ruins a bur and makes it cut worse.
- When to Toss: If a bur is dull, jumps, or the tip is broken or worn, I throw it away. Diamond burs last maybe 10–15 cycles, and carbides wear out faster if you use them a lot.
One time, I tried to use a dull bur a week too long—big mistake. The work took longer, the patient got nervous, and my filling didn’t fit right. Don’t risk it. Use sharp burs!
Wrapping Up: Getting Good at Choosing Burs for Great Patient Care
When I got my first bur kit, I didn’t realize these small tools would matter so much. But the more you do dentistry, the more you see—it’s not just what you see with your eyes, it’s knowing what tool to pick and when.
- Learn your burs.
- Match shape, type, and speed to the job.
- Keep them clean and sharp.
- Stay open to new stuff—tools keep changing.
Getting the hang of dental burs takes time, trial and error, and sometimes you’ll get it wrong. But when you hit the sweet spot and nail a great filling or see a happy patient, you’ll see—it’s worth it.
Use my lessons to save yourself trouble. May your next dental job go a little easier, and your work be sharper, thanks to the right bur in your hand.