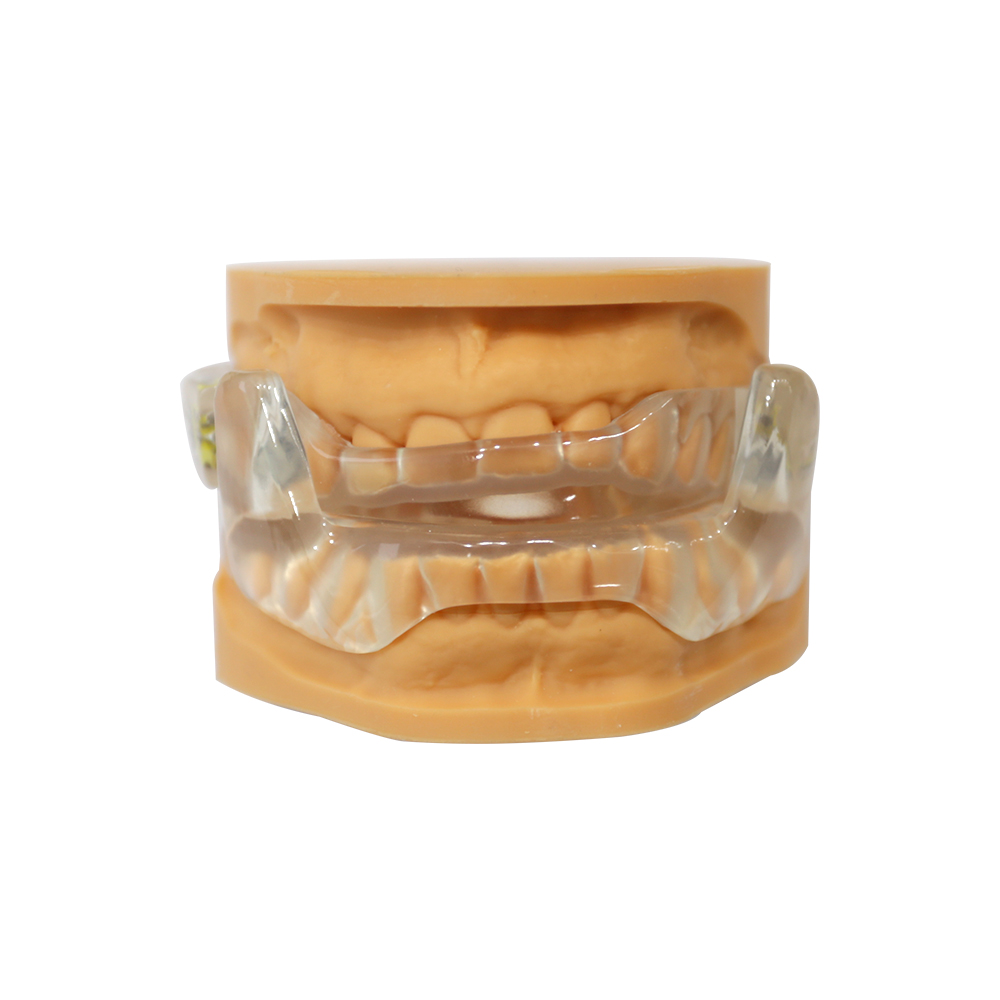
Partial Dentures for Front Teeth: A Lab Case Study on an Anterior Appliance Without Visible Clasps
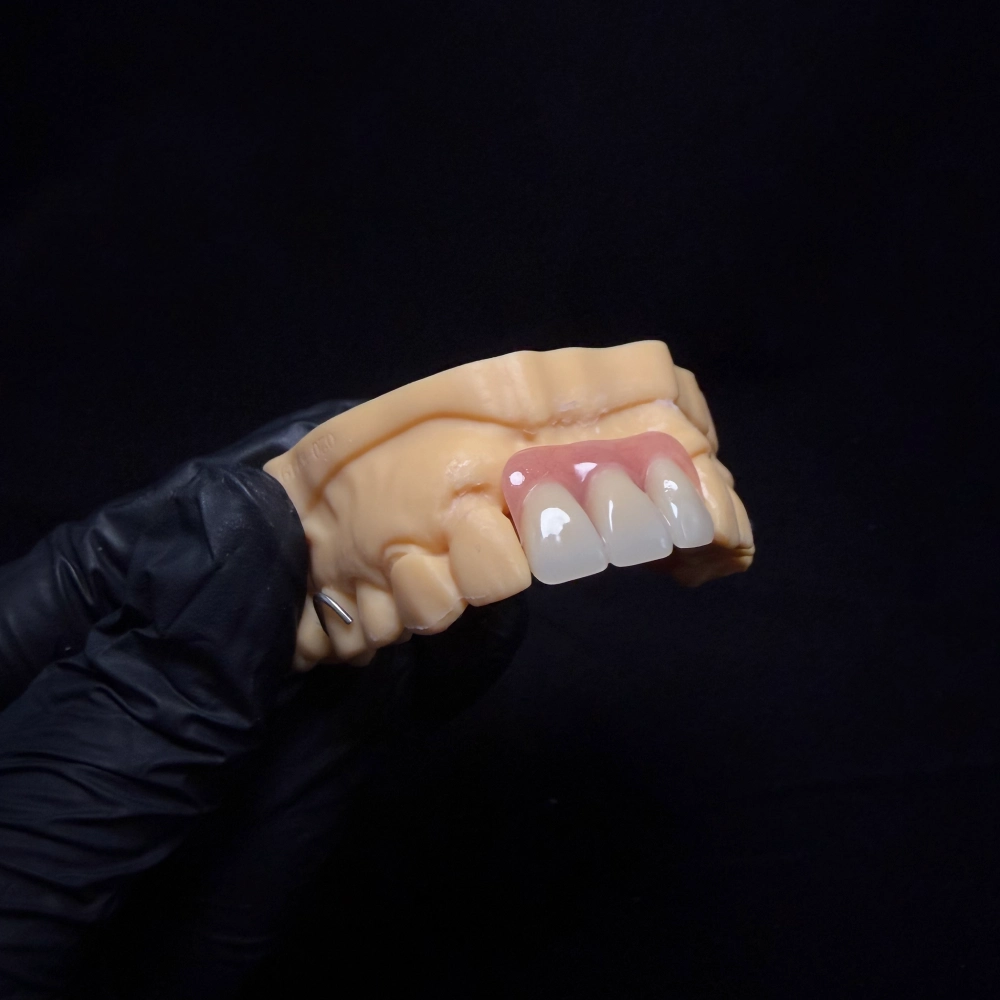
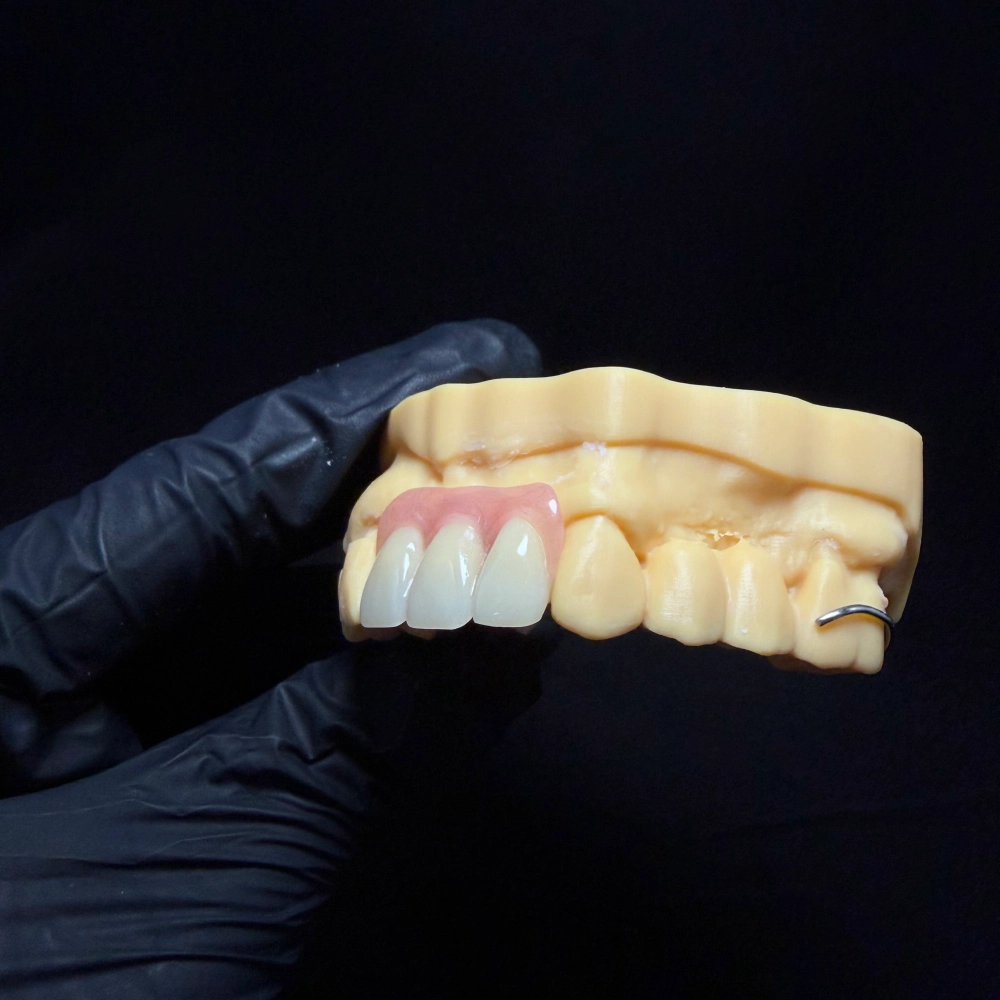
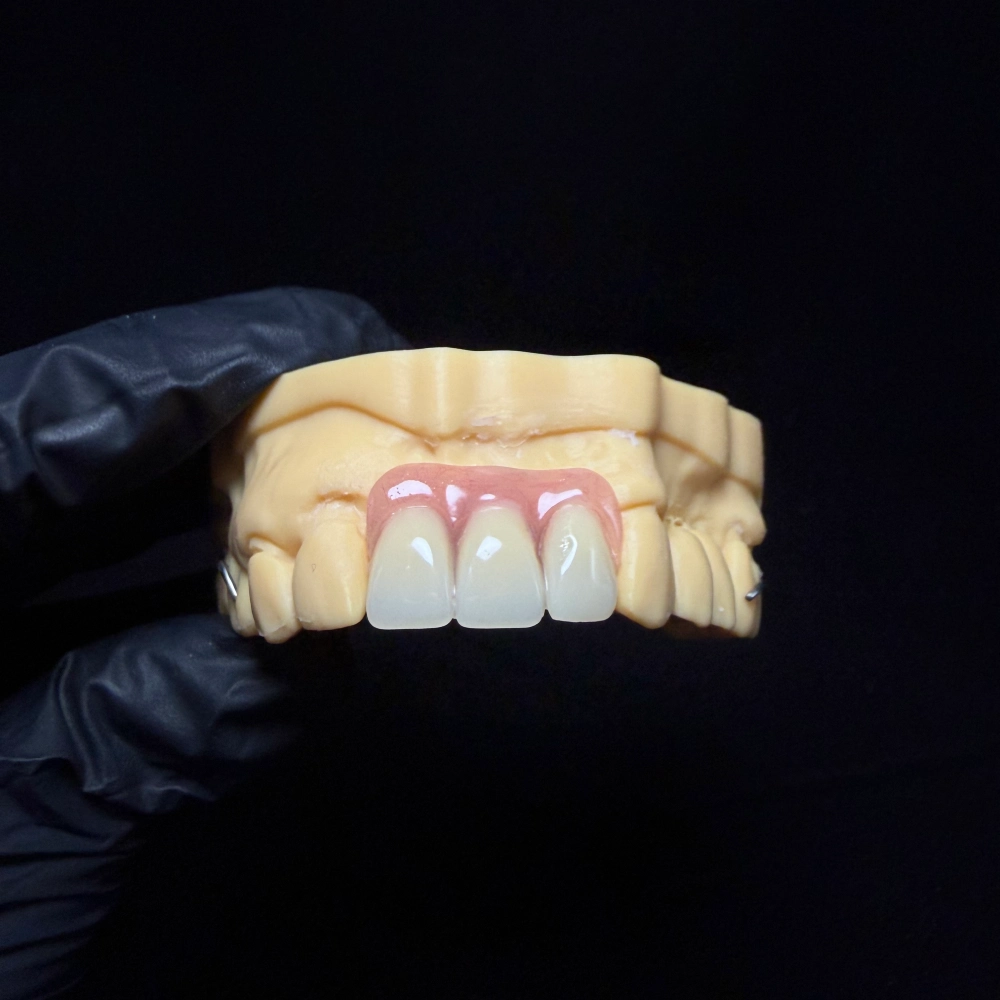
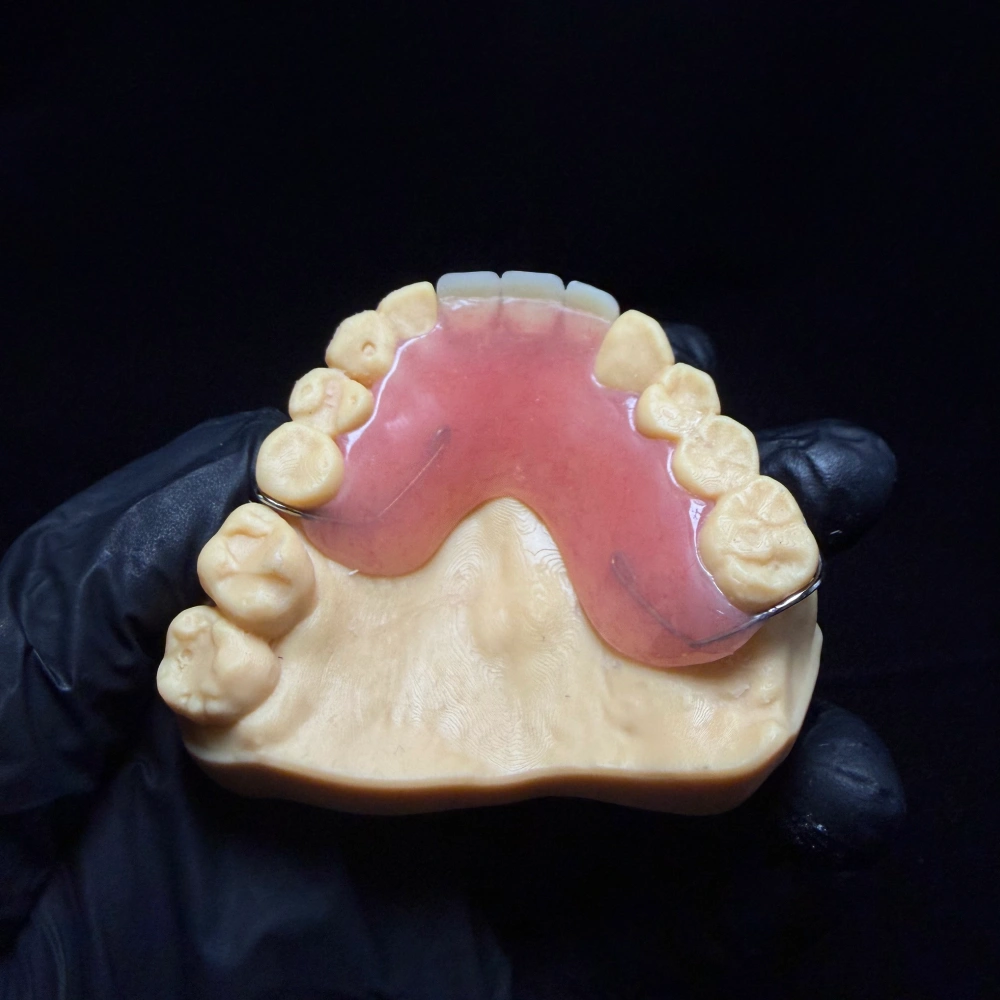
부분 틀니 for front teeth are not a smaller version of a posterior case. The esthetic demand sits where the appliance is seen, the load sits where there are no teeth, and the two forces pull in opposite directions. This page walks a prescribing dentist through one case we handled — the brief we received, the design calls we made, the lab slip values that went onto the work order, and the handover documents we shipped with the box.
ASD 치과 연구소 is a full-service manufacturing lab established in 2012, running its own CAD, milling, printing, metal, ceramic and removable departments in Shenzhen and Huizhou without outsourcing. Everything in the “What the lab did” section below is from our own workflow logs.
Case snapshot: who sent the case and why they sent it to a lab
The prescribing dentist was planning a two- to four-year interim restoration for a patient missing four upper anterior teeth, with partial posterior support loss on one side. Implants were the preferred end point, but gated on budget and a family timeline — not on suitability. Two earlier acrylic appliances had already failed, both on wear-and-tear and on esthetics; the second one had loaded the gum margin and the patient blamed it for gum changes over the previous year.
What the prescribing dentist wanted from a lab was not a flipper. They wanted an interim that would behave like a definitive partial denture for front teeth for two to four years, convert cleanly into an implant-supported restoration later, and never show metal in function.
Patient situation at a glance
| Field | What the prescribing dentist told us |
| 누락된 치아 | Four maxillary anteriors; partial posterior loss on one side |
| Previous appliance history | Two acrylic failures, one with gum-margin loading |
| Esthetic concern | Clasp visibility in speech, laugh and open-mouth smile |
| Functional concern | Anterior load share with reduced posterior support |
| 타임라인 | 24–48 months interim; implants planned afterwards |
| Non-negotiables | No visible metal; rests must sit on prepared seats, not on tissue; add-tooth path on day one |
Why a removable partial, and why not the obvious alternatives
A case comes in with a short list of options. We don’t choose between them — the prescribing dentist does. What we can do is write down what the slip told us and what we did about it:
| Option that was discussed | What the slip said about it |
| Fixed bridge | Anterior abutments were already load-compromised; preparing them further was ruled out |
| 치과 임플란트 | Clinical end point; postponed on budget and timeline, not on suitability |
| Flipper (acrylic interim) | Two earlier acrylic failures ruled out another thin acrylic |
| Hybrid design partial | Chosen — rigid support behind the esthetic zone, soft/tooth-shaded clasping in front |
What went on the lab slip
The prescribing dentist’s requirements translate into lab-slip fields that we hold as non-negotiable. For this case:
- Rest seats on sound tooth structure, prepared by the practice, with rest-seat dimensions confirmed at the design stage before fabrication starts. The principle — rests must direct force toward the long axis of the abutment, never into tissue — follows the Dalhousie RPD teaching manual published by Dalhousie Faculty of Dentistry.
- Clasp display rule: nothing metal visible in the display zone when the patient speaks or laughs. Clasp path to be re-routed to the lingual or posterior if the display zone cannot be cleared otherwise.
- Rest-seat values that we used on this case (anterior maxillary): a round cingulum rest around 0.75 mm deep with a 0.5 mm distal depression, placed about 1 mm above the gingival margin and 1 mm lingual to the proximal contact; clasp arm length around 10 mm. These are the values described in a peer-reviewed clinical review of the same clasp design, which followed its three index patients for 19 years, 16 years, and more than 12 years across more than 500 clasp assemblies — see the Decisions in Dentistry clinical review.
- Load-sharing requirement: the design must transmit force posteriorly through prepared occlusal rests, not through the anterior saddles alone.
- Add-tooth path: the appliance must accept added teeth later without a full remake. This written path accompanies the case at delivery, not after the first failure.
- Delivery window: fixed up front, with the try-in scheduled early enough for one adjustment inside the agreed window.
What the lab did
The whole production chain for this case ran inside our own facilities — nothing was sent out to a third-party sub-lab. For a removable case the chain is: case data receiving, CAD design, 3D-printed working model, framework design and fabrication, tooth selection and setup, wax try-in, processing, finishing, three independent QC stations, final release, and packing. Final release is signed off by a QC technician who did not fabricate the appliance — the roles are separate.
Design stage. The framework was planned as a hybrid: rigid cast structure behind the esthetic zone, with tooth-shaded clasping and a cingulum-rest retention arm at the lateral incisor. We ran one free design pass and we price in two further design revisions at no extra charge; after that, revisions are billed per the slip.
Materials. Metal components were specified against ANSI/ADA Standard No. 134 (2018) / ISO 22674:2016 — the consensus standard for metals used in fixed and removable restorations — as summarised on the ADA’s materials page. For a maxillary anterior framework we hold beryllium content below the ADA’s 0.02% by mass ceiling under that standard. The base-polymer side is specified against ISO 20795-1:2013 for denture base polymers, with the matching US document being ANSI/ADA Standard No. 139. Biological evaluation sits under ISO 10993-1 — the risk-management framework described by the FDA guidance on biological evaluation of medical devices. Each case is bound to a case ID that tracks the technician, equipment, material lot and QC results through the whole chain, so a question about any component is answerable from the paper record.
Fabrication. CAD and CAM covered scanning, virtual design, framework milling and model printing. Technicians handled framework finishing, setup, denture-tooth bonding and polishing by hand. The hybrid logic — rigid behind, flexible-tooth-shaded in front — only works if the two parts seat together without strain, so the fit between framework and clasp housing was verified against the printed model before the acrylic went in.
QC stations. Three QC stations with an independent final release. We publish our first-pass QC pass rate (95%) as the share of cases that pass final inspection without any rework; cases that go back for rework and later pass are not counted in that number. For a non-passing case the default is automatic remake, not a hold-and-ask.
Shipping. DHL, FedEx and UPS; we offer our own carrier accounts and consolidated rates. Case status is pushed at design-done, production-done and shipment, and the shipment notification carries the tracking number.
Design values used on this case
| Design element | Value on this case |
| Rest type (lateral incisor) | Round cingulum rest, ~0.75 mm deep |
| Distal depression | ~0.5 mm |
| Position of rest seat | ~1 mm above gingival margin, ~1 mm lingual to contact |
| Clasp arm length | ~10 mm |
| Framework | Hybrid: cast rigid support + tooth-shaded anterior clasping |
| Metal standard applied | ANSI/ADA No. 134 / ISO 22674 |
| Beryllium limit | ≤ 0.02% (ADA 134) |
| Base polymer standard | ISO 20795-1 / ANSI/ADA 139 |
| Biological evaluation | ISO 10993-1 framework |
A set of values on a page is not a case; it is a checklist. The reason they matter here is that one of them was the patient’s first objection (clasp visibility in function) and one of them was the dentist’s first requirement (rest on prepared seat, not on tissue). The design is where those two columns meet.
Try-in, delivery and handover
A try-in on a model cannot tell you where a high smile line falls. The patient was asked to speak, smile and laugh during try-in; clasp display was judged in function, and the clasp routing was adjusted — not the shade — until the display zone was clean in open-mouth speech.
At delivery the practice received the appliance plus a one-page written handover: what can be added, what can be relined, what is a remake rather than a repair, and the path to convert to implant-supported work later. The patient was shown by the practice how to seat and remove without loading the clasps. Patient care notes — brushing with a non-abrasive denture cleanser, daily soak, continuous wear generally avoided unless the clinician directs otherwise — are sourced from the ADA position on dentures 그리고 the American College of Prosthodontists denture care guidelines, and we ship them in the case box as a reference the practice can hand to the patient.
Add, reline and repair: the honest version
Repair paths exist, and they are not the same for every material. For this hybrid design:
- Add a tooth — we can add a tooth to the acrylic saddle without full remake, provided the saddle supports it and the opposing arch has not changed enough to require a new occlusal reference.
- Reline the tissue surface — we handle chair-side and lab reline with a bite registration and the opposing cast; whether a reline is enough depends on how much ridge has resorbed and whether the framework still seats.
- Repair a clasp or minor fracture — we do this on acrylic and on hybrids. Framework fracture on the metal side generally means a new framework.
- Flexible-polyamide repairs — material- and manufacturer-dependent and often less predictable per the PubMed review on flexible partial dentures; we are up front with the practice when a new appliance is the safer answer.
Fee separation and how to brief us on budget
A detail that reads easy and matters a lot: the laboratory charge is not the patient fee. The lab charge covers what we fabricate; the practice-side fee covers everything else — examination, periodontal work, preparations, impression or scan, try-in, insertion, adjustments and the clinician’s professional time. We quote the lab-side only, and we quote it per case, with the cost drivers on the slip (framework, denture teeth, shade characterisation, hybrid clasp housing, rush processing). A national average lab fee for anterior partials does not exist in a form that would survive a procurement review, so we do not publish one.
What to send with a case
의 경우 front partial dentures case the lab slip we work from carries, at minimum:
- Tooth numbers and Kennedy classification where applicable.
- Opposing cast or STL (we accept 3Shape TRIOS, Medit, iTero, CEREC/Sirona, Shining3D Aoralscan, Planmeca and any open-format scanner that exports STL, PLY or OBJ).
- Bite registration.
- Shade match plus a smile photograph for anterior setup.
- Abutment status, including any planned endodontic or restorative work before fabrication.
- Clasp preference and the practice’s position on visible metal.
- The patient’s objections, if any — the paragraph that explains 왜 a design was chosen often changes the design more than the shade does.
Digital submissions ship a working day faster than physical impressions because they skip the model-casting and the cross-border shipping leg. On a digital case we validate the scan within one working day of upload and come back to the practice with any flags; on a physical impression case the clock starts the day we receive the box. Standard turnaround for a removable case is 5–7 working days of lab time, excluding shipping and excluding any time waiting on design approval; weekends and Chinese public holidays are not counted. The practice is notified at design-done, production-done and shipment.
Rework, remake and the no-charge policy
Rework is at our cost in the common cases — framework fracture during fabrication, visible porosity, polish defects, miscounted teeth from our side, or a shade miss against the submitted reference. Rework attributable to the submitting side — a scan too incomplete to design against, a change of design brief after approval, or a material specification changed after fabrication started — is quoted up front before we proceed and before anything is remade. We publish this up front rather than negotiate it after the fact.
About ASD Dental Lab
ASD is a direct manufacturing lab, not a trade intermediary. Founded in 2012 with manufacturing in Shenzhen and Huizhou, we run around 460 staff across CAD design, milling, implant work, ceramic and metal, removable dentures, QC, customer service and case coordination. Our removable denture department carries normal-season capacity around 4,000 cases per month and peak-season capacity around 6,500 cases per month, and we hold around 50 trained backup technicians to protect delivery windows in peak. We maintain ISO 13485 registration at the lab level with material-side certifications aligned to ISO 10993, and we are registered with the FDA, UK MHRA and EU MDR for the device categories we ship into those markets. Verification details are available by request through the account manager. We do not place these registrations on the page as marketing; we place them because a sourcing manager will ask.
Account managers are the single point of contact for a practice. Technical replies inside working hours typically land within an hour; outside the practice’s working window the delay is time-zone dependent and does not exceed 12 hours.
Open a case
If you are a practice, DSO, or partner lab planning an anterior partial, you can open a case through your account manager. New accounts can request a starter kit that includes return postage shipping labels, lab slip forms, mailing containers and a product-and-service list for reference.
최첨단 기술로 더 빠른 처리 시간을 경험하세요.
추천