A Complete Guide to Dental Plaster and Stone for Perfect Models
Table of Contents
What Are Dental Gypsum Products and Why Do We Need Them?
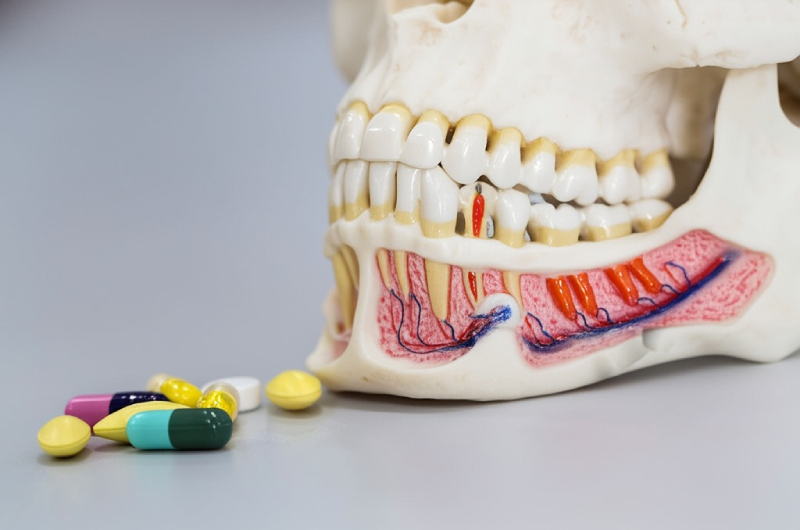
After years working in dental labs and clinics, I can tell you one thing for sure: nothing in fixing teeth really gets moving without a good model. And guess what that model’s made from? Most often, it’s gypsum—either as dental plaster or stone.
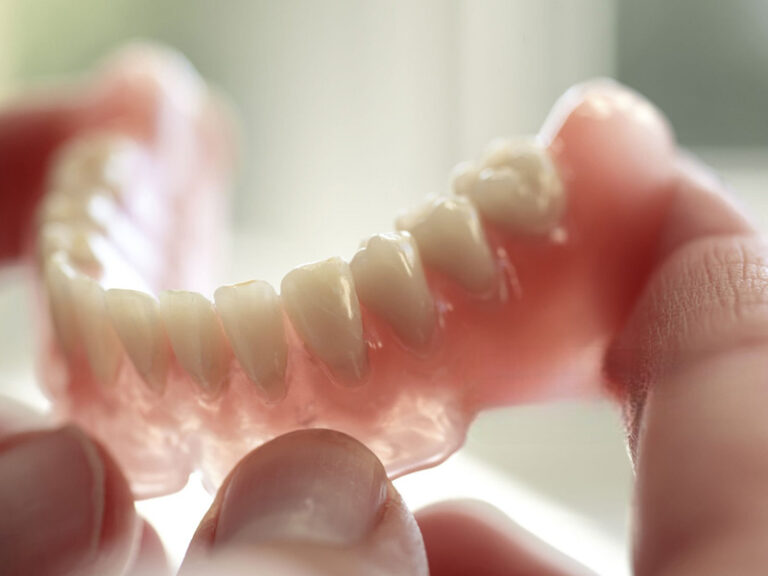
When a patient bites into an impression material (like alginate or PVS), you get a negative mold of their mouth. But that’s just a step. To really see and use it, you need a replica you can hold, trim, and work with. That’s where gypsum comes in.
Dental gypsum—just special crushed rock—gets poured into the impression and hardens into a “stone” or “plaster” copy. Dentists and helpers use these to plan, check, build crowns or bridges, or make whole dentures. If you don’t have dental stone, you can’t really do most jobs right. I’m not kidding about how many treatment plans have been saved by having a trusty, bubble-free model ready to go.
The Science Made Easy: From Gypsum Rock to Dental Model
I’ll admit, when someone first explained gypsum chemistry to me my mind wandered fast. But stay with me. It’s not that tricky once you see the basics.
So here’s what’s going on:
Gypsum is really just calcium sulfate with water locked in it (CaSO₄·2H₂O). It’s dug up from the ground. They then heat it (called “calcination”) to drive off some water and change it into calcium sulfate with only half the water (CaSO₄·½H₂O). This “hemihydrate” is the stuff you find in your bag of dental plaster or dental stone.
How is plaster different from stone? It’s all about the way the bits look:
- Plaster of Paris (model plaster) comes from fast, simple heating, so its particles are wonky and fluffy.
- Dental stone and die stone are made differently, so their crystals are much tighter and neater—giving them more strength and better detail.
Here’s something cool: when you mix it with water, this hemihydrate soaks it back up and changes right back to the original form—it hardens up (and gets warm because of a tiny chemical reaction). The way you add the water, and how the powder is made, changes how much time you get to use it, how strong it is, how much it grows, and how nice your model ends up.
In real life, even tiny changes in the water/powder ratio can mess things up. Too much water? You get a weak, powdery mess. Not enough? The mix dries out fast, so you lose the fine lines.
ADA Classification: Getting to Know the 5 Types of Dental Stone
One of the first things I learned—and later had to teach others—was when to grab which gypsum product for different jobs. The American Dental Association (ADA) and ISO 6873 have clear types. Knowing these saved me a lot of money and headaches.
Type I – Impression Plaster
Honestly, this is pretty old school. Unless you’re working on certain jobs with no teeth or just playing around, you won’t see it much. It sets fast and is pretty soft—used for impressions, not for pouring models. It barely grows when it sets, but it’s weak, so most folks don’t use it nowadays.
Type II – Model Plaster (“Plaster of Paris”)
If you’ve ever mounted study models or needed a cheap base, this is your go-to. Model plaster is white, fluffy, sets in no time—but it breaks easily. I found out early it chips and wears down fast. The water/powder ratio is pretty high (45-50 mL water per 100 g plaster), and it sets in about 9-15 minutes.
- Best for: First casts, models to show the patient, or for mounting stuff.
- Avoid for: Anything that has to be strong or exact, like dies or casts you’ll keep using.
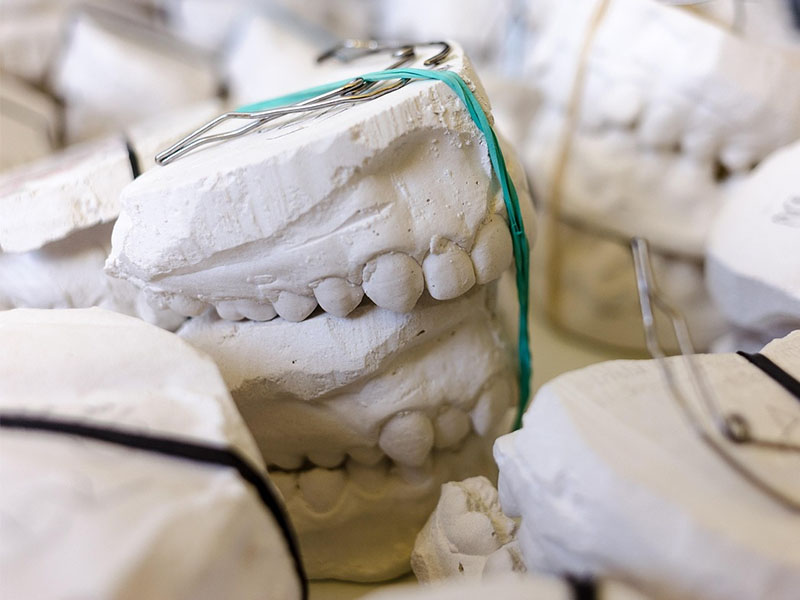
Type III – Dental Stone (“Lab Stone”)
This is the main worker in the lab. Type III stone (usually yellow or pink) is what I grab for most models, making dentures, or even for orthodontics. The powder mixes smoother and is creamier because the crystals are packed more tightly (alpha-hemihydrate). It’s much tougher (about 20 MPa after an hour, over 40 MPa dry) and barely grows (0.08–0.2%) compared to plaster.
- Best for: Full and partial denture models, work casts, or any models you need to be sturdy.
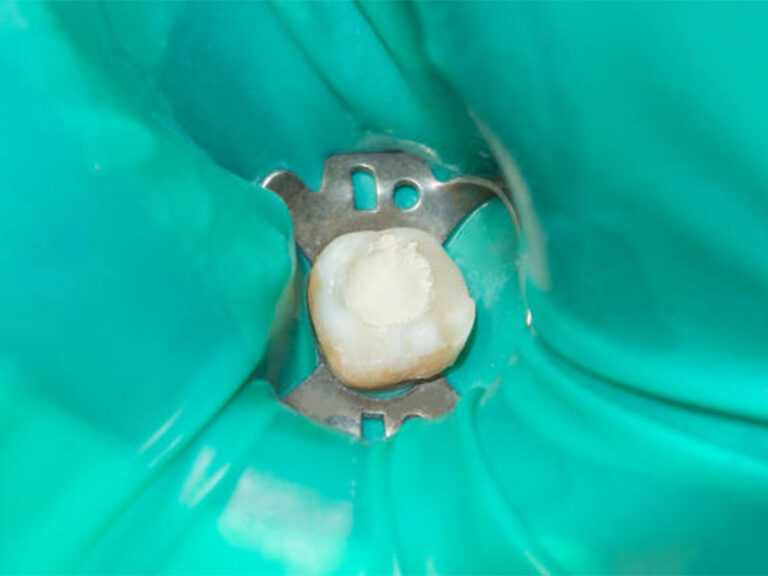
Type IV – Die Stone (Very Strong, Little Growth)
When you need things to fit just right—crowns, bridges, or anything tricky—I don’t mess around: only Type IV. This stuff is super tough, heavy, and barely grows when it sets (usually less than 0.1%). Companies like GC America and Whip Mix make good ones. It’s really good at putting up with cutting without changing shape, and it’s strong—sometimes over 70 MPa dry.
- Best for: Dies for crowns, bridges, inlays—anything that has to fit perfectly.
- Pro tip: Check that what you paint or spray on the die won’t mess up the stone!
Type V – Die Stone (Very Strong, More Growth)
This is a newer thing. Type V is made for new metals. When I had to use base metal alloys (which shrink more than gold when they cool), I needed a die material that grew a bit more—so the fit came out right. Type V is super strong and expands more, which balances out the shrinking metal.
- Best for: Dies for base metal castings.
- Heads up: Don’t use it where you want tiny growth only—the fit will be off.
Here’s a fast comparison I’ve gone back to a lot:
| Property | Type I | Type II | Type III | Type IV | Type V |
|---|---|---|---|---|---|
| Name | Impression | Plaster | Lab Stone | Die Stone | High-Exp Die |
| Water/Powder Ratio (mL/g) | 60/100 | 45-50/100 | 28-30/100 | 19-24/100 | 18-22/100 |
| 1hr Strength (MPa) | 4 | 9 | 20 | 35 | 48 |
| Dry Strength (MPa) | ~8 | ~18 | ~40 | ~70 | ~80 |
| Growth (%) | <0.15 | <0.30 | <0.20 | <0.10 | 0.10–0.30 |

Step-by-Step: How to Mix and Pour Dental Stone
This is where it really matters. Doesn’t matter if you’re using the fanciest dental stone ever—mess up the mixing, you’ll get bubbles, cracks, or a model that should be thrown away. Here’s my step-by-step, learned from a lot of goofy mistakes.
Getting Ready: What You’ll Need
- Dental stone (or whichever gypsum you’re using)
- Distilled water at room temp (don’t use tap if you can help it—it can mess things up)
- Soft rubber mixing bowl
- Spatula (steel if you have stone, plastic works with plaster)
- Dental vibrator
- A clean, ready impression
Vacuum mixer (if you want the smoothest batch).
The All-Important Water/Powder Ratio
Look at the directions on the bag—it’ll tell you the right water-to-powder mix. For example, Type III might need 30 mL water per 100 g powder, while Type IV could go as low as 19 mL.
Why does this matter? Every extra drop of water means more holes on the inside and a weaker model. You’ll lose detail, and the model’s not as strong. But too little water makes it way too thick to fill all the cracks and lines.
Quick tip: Weigh your powder and use a measuring cup for the water. Guessing is the best way to waste a whole afternoon.
How to Mix (Stirring It Up Right)
- Step 1: Pour the water in first, then slowly sprinkle powder over the top. Dumping all the powder in at once creates dry pockets.
- Step 2: Let the powder soak for 20–30 seconds.
- Step 3: Mix with your spatula, scraping the sides and bottom. Go at it pretty well, for about one minute (three if you’re mixing die stone by hand).
- Step 4: Vacuum mixing (if you’ve got it) will suck out air, making a smoother, almost bubble-free cast. I use it anytime I want my dies to be perfect.
No lumps or streaks—what you want is a smooth, creamy mix.
Pouring the Model: The Vibration Trick
Now’s the time not to rush. Even a tiny air bubble means a hole on a tooth or a margin—the worst spot.
- Put your impression on a level surface.
- Set your bowl on the vibrator (just a little shake, not too much, or you’ll mess up your impression).
- Take a bit of stone and place it at the very back end of the impression.
- Push it in slow, letting it flow to the front. Let the vibration help it move into every little line and dip first before filling up the rest.
- Don’t pour it all in at once. Take your time.
- When the first thin layer is settled and the bubbles have floated out, add the rest (as a single-pour or in two stages, depending on your base).
Two Ways I Keep Going Back To:
- Single Pour: For quick models. Fill the impression, then add more stone to make the base, all in one go.
- Two-Stage Pour: To make a tougher base. First, fill the impression to the edge. When it’s set, add more stone for the bottom. If you do it right, you can barely see where they meet.
Don’t rush. Let the stone find its way—don’t jam it or hit it hard.
Solving Common Problems with Dental Models
Honestly, my first models looked like Swiss cheese or were chalky more times than I’d want to admit. Most of the time, the problem is in how you mix, pour, or let it set.
Problem: Air Bubbles or Empty Spots
What you see: Little (or not so little) holes where they shouldn’t be, even on biting surfaces.
Why it happens: You trapped air by pouring fast, didn’t mix long enough, or didn’t let the bubbles out.
How to fix:
- Always add powder to water, never the other way.
- Mix a little longer, especially for tough stones.
- Use a dental vibrator (low setting).
- Let the mix spill ahead of itself, not pushed in.
I skipped vibration once to speed things up—wasted a whole batch. Won’t do that again!
Problem: Chalky or Weak Model Surface
What you see: The stone looks kinda powdery, rubs away, or breaks easy.
Why it happens: Too much water, taking the model out too soon, or a soaking wet impression that adds too much water to the first layer.
How to fix:
- Use the right water/powder mix.
- Wait an hour (or until it’s all set) before taking out the model.
- If you can, gently dry the impression before pouring.
Problem: Wonky or Bent Models
What you see: Teeth look twisted, overlapped, or just don’t fit; crowns won’t go on right.
Why it happens: The impression got bent before pouring, you pulled the model out when soft, or picked the wrong stone (grew too much).
How to fix:
- Pour as soon as you can (especially for alginates—they wait for no one).
- Don’t yank—gently work the model out after it’s hard.
- Use the right stone for the job: tough, slow-growing for crowns; regular for checking bites.
Fixing these feels like detective work. My best advice? Take notes each time you spot a problem. You’ll catch patterns, and the answer’s usually in your process, not the powder.
Main Uses in Modern Dentistry
Nearly every job in a dental office—whether it’s fixing teeth, braces, or making full dentures—needs good stone models. Here are the main ways I see folks using them:
- Models for Checking: These let you see how teeth come together, plan the fixes, make trays, or show things to your patient. Accuracy’s important, but toughness matters for models you’ll pick up and use over and over.
- Working Models: For crowns, bridges, or partials, you have to have a strong, exact model. Type III is good for lots, but for super close jobs (like dies), I always go with Type IV or V.
- Dentures and Braces: Retainers, partial dentures, and aligners all start by making a good model. There’s nothing better than seeing something fit right the first time.
Quick note on digital models: Today, computers and 3D printers are starting to show up. I’ve tried digital too, and they’re great for some things, but real-world stone model skills are still needed—especially for fixes and when you want the tiny details perfect.
Frequently Asked Questions (FAQ)
What’s really the difference between dental plaster and stone?
- Dental plaster (Type II) is weaker, softer, more full of holes, and grows more when it sets. Dental stone (Types III–V) is a lot harder, denser, and gives better copies. I’ll only use plaster for quick mounts or models to just look at; for anything important, I stick to stone.
How long does dental stone take to set?
- Depends on type and temperature. Basic rule: 10–20 minutes for Type III, up to 45 minutes for Type IV or V. Don’t take the model out before the final set—unless you want things to break.
Can I add more water if my mix is too thick?
- Don’t! More water means a weaker model, takes longer to set, and details go missing. Always weigh and measure before you start, not in the middle.
How do I store my dental gypsum powder?
- Keep it somewhere cool and dry, sealed up tight. Any water in the air starts the setting, making weak, slow stone. I double-seal mine, away from sinks or wet places.
Final Thoughts: What I’ve Learned
I’ll finish with this: mixing dental gypsum looks easy, but, like anything in dentistry, you have to pay attention and practice. The way you mix is just as important as what you’re mixing. Read the label every time. Sometimes a small change is all it takes to go from “OK” to “wow.”
If you’re new, write down mistakes so you see what goes wrong. Let things set before you rush. Try different ways. And never forget how important a good model is—because everything else depends on it.
No matter how much technology changes, the basics are still the same. So next time you pull out a perfect die from an impression, know you nailed it. That’s what real skill feels like.