Occlusal Reduction for PFM Crowns: What to Verify Before the Case Leaves the Chair
When a PFM crown comes back and does not seat, or chips within months, the issue often traces back to one thing: occlusal clearance. You reduced what felt like enough. The temporary fit. The final crown still comes back high, or the porcelain fractures at first loading.
The target range for occlusal reduction for a PFM crown is 1.5–2.0 mm on the posterior occlusal surface. Hitting that number is the easy part. The harder part is confirming the clearance survives after the preparation is finished and the mandible settles — and getting that clearance information onto the Rx so the lab can build to it the first time.
Inhaltsübersicht
Why 1.5–2.0 mm Matters (and Why That Number Alone Is Not Enough)
Posterior occlusal clearance for a metal-ceramic crown targets 1.5–2.0 mm. That range is the working standard in PFM preparation guidelines und university teaching protocols. The number alone, however, assumes you are measuring in the right position and at the right moment.
A PFM has three layers that have to fit in that space:
| Layer | Dicke | Role |
| Metal framework | 0.3–0.5 mm | Structural support |
| Opaque porcelain | 0.2–0.3 mm | Masks the metal |
| Body / enamel porcelain | 0.8–1.2 mm | Esthetics and contour |
Total minimum: 1.5 mm. Safer target: 1.8–2.0 mm, especially on functional cusps where porcelain contacts the opposing tooth directly. These layer thicknesses align with standard metal-ceramic references und framework design chapters.
Measuring in maximum intercuspation (MIP) can mislead you if the mandible shifts posteriorly into centric relation (CR) after the preparation is finished. When the jaw retrudes even 0.5–1.0 mm, clearance you thought you had can disappear, and you will not know until the crown comes back.
Before you commit to the reduction depth: have the patient close, then gently guide them into CR. If the tooth you are preparing was not a holding contact before but becomes one in CR, you will need more reduction than the depth-cut bur alone suggests.
What Has to Fit in That 1.5–2.0 mm Space
The lab cannot add material outward without consequences. When occlusal space is tight, three things break down.
1. Porcelain Gets Thin and Unsupported
Less than 0.8 mm of porcelain over metal leaves it prone to fracture, especially on functional cusps (the lingual cusps of upper molars, the buccal cusps of lower molars). Non-functional cusps can tolerate thinner porcelain (around 1.0 mm), but functional cusps need the full thickness or they are at risk of chipping.
2. The Crown Gets Overcontoured
If there is no room to build inward, the lab has to build outward. The result is a bulky crown that:
- crowds the contact
- traps food
- irritates the gingiva
- feels to the patient like something is in the way
3. The Framework Can Perforate or Distort
When the design has to squeeze into narrow grooves or a flat preparation with poor anatomy, the metal gets too thin in spots. This can lead to framework perforation or distortion during finishing, or flex under load that fractures the porcelain later.
None of these show up the day you seat the crown. They show up three months later when the patient comes back with a fractured cusp or food packing.
The Real Reason You Reduced 2.0 mm and Still Do Not Have Clearance
If you are confident you reduced a full 2.0 mm, used depth-cut burs, and the crown still comes back high, the most commonly overlooked variable is centric relation versus maximum intercuspation.
Here is the sequence that catches people out:
- You check occlusion in MIP (where the patient naturally closes). Clearance looks fine.
- You prep to 1.5–2.0 mm based on that position.
- The patient’s jaw sits slightly protruded in MIP because of habit, a prior restoration, or muscle memory.
- After the preparation is done and anesthesia wears off, the mandible settles back into CR, sometimes 0.5–1.0 mm posterior to where you measured.
- Clearance you thought you had is now gone.
Was ist zu tun? check occlusion before you start the preparation. If the tooth you are working on is not a contact in MIP but becomes a contact when you guide the patient into CR, that is the signal that the preparation will need the upper end of the reduction range (closer to 2.0 mm), or you will need to adjust the opposing tooth with the patient’s informed consent.
The same logic applies if the tooth currently has no occlusal contact at all (an open bite on that unit). Depth-cut burs alone will not tell you this; a CR check will.
How to Verify Reduction Before You Scan
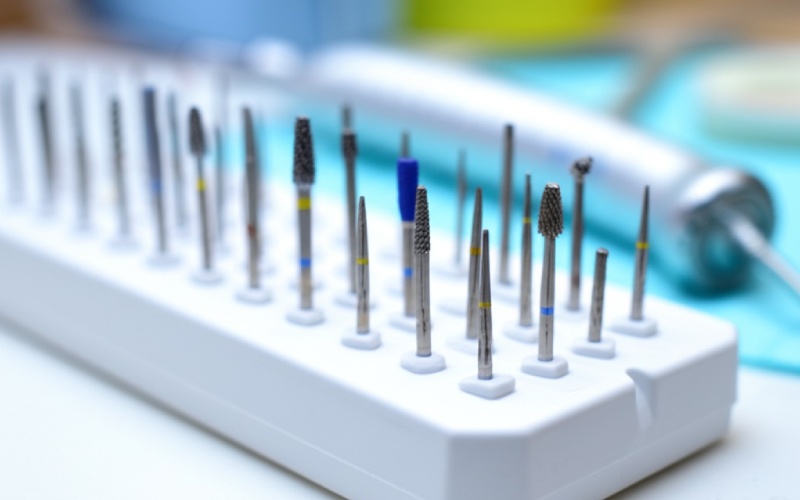
Depth-cut burs give you a reference, but they do not confirm uniform clearance or catch high spots. Here are four checks that do.
1. Provisional Thickness Check
Make the temporary. If it is too thin in any spot (less than 1.0 mm), or has a hole, you have not reduced enough in that area. This is the fastest no-cost verification.
2. Articulating Paper and Excursive Movements
Have the patient close on articulating paper and grind side to side. Heavy marks after lateral movements show where clearance is still inadequate. Check both centric and excursive. Lateral interferences can fracture porcelain after delivery even if centric clearance was acceptable.
3. Ball Burnisher Pass-Through
Run the small end of a ball burnisher through the occluding surfaces. If it catches anywhere, that spot does not have clearance. This check is most reliable after you have made the provisional.
4. Digital Verification (If You Scan)
Modern intraoral scanners can display a distance map to the opposing arch. Review areas with less than 1.2 mm clearance and mark them before you send the scan. This is one way to close the digital evaluation gap between intended and actual reduction.
In a predoctoral setting, one analysis of crown preparations found that more than 47% of preps had inadequate occlusal clearance, even when the operator intended to meet the guideline. Depth-cut burs set the starting point; the four checks confirm the result.
What to Do When You Do Not Have Enough Space
You have four options. The decision should be made before the case goes to the lab, not after the crown comes back.
| Option | When It Works | What to Communicate |
| Adjust opposing | Minor interference (0.2–0.5 mm), patient consents, opposing is natural tooth or a restoration you placed | Document consent. Note on the Rx which opposing surface was adjusted and by how much |
| Add 0.5 mm more reduction | Adequate tooth structure remains, no pulp risk | Re-verify with provisional, articulating paper, or a scanner distance map |
| Metal occlusal surface | 1.0–1.5 mm space, under the threshold for full porcelain | Write on the Rx: “Metal occlusal due to limited clearance” or “Leave metal occlusal, porcelain contacts not acceptable.” Do not leave the choice to the lab |
| Change material | Very limited space or heavy bruxism | Switch to full-cast gold or monolithic zirconia |
If you want porcelain occlusion, you need at least 1.5 mm of space, ideally 1.8–2.0 mm. If you want metal occlusion, you can work with 1.0–1.5 mm (metal can be as thin as 0.5 mm in some areas, though 1.0 mm is safer). A lab cannot thin down porcelain after the framework is fabricated to compensate for insufficient clearance; that produces an unsupported, fracture-prone restoration.
Guidance on how these decisions should be captured in writing is consistent with what dental laboratory communication protocols describe.
Functional Cusps vs Non-Functional Cusps
Not every area of the occlusal surface needs the same thickness.
- Functional cusps (contact the opposing tooth): need 1.5–2.0 mm reduction for porcelain, or metal occlusion if space is limited.
- Non-functional cusps (no opposing contact): can tolerate 1.0–1.5 mm reduction. These rarely chip because they do not bear load.
In practical terms:
- Upper molars: the lingual cusps are functional (they contact the lower buccal cusps). That is where you need the most clearance.
- Lower molars: the buccal cusps are functional.
- If space is tight, prioritize clearance on functional cusps and accept slightly less on non-functional cusps.
This is also why a PFM may chip on one cusp but not the others; it is usually the loaded cusp that did not have enough room for supported porcelain. Sequencing recommendations for functional cusp reduction are described in detail by the University of Toronto PFM preparation module.
What the Lab Needs on the Rx
A preparation that is correct at the chair can still produce a problematic crown if the lab does not have complete information. Most remakes trace back to missing details on the work authorization.
Items that should be on every PFM Rx:
| Information | Warum es wichtig ist |
| Tooth number and prep type | Obvious, but worth confirming |
| Porcelain or metal occlusal surface | If porcelain occlusion is requested but clearance limitations are not noted, the lab may build it and it comes back high. If metal occlusion is wanted but not specified, the lab may default to porcelain |
| Opposing arch material | Natural tooth, composite, PFM, zirconia, or gold affects how contacts are designed. Porcelain-on-porcelain is more aggressive than porcelain-on-enamel |
| Bruxism, clenching, or heavy bite | Changes framework reinforcement and where the lab avoids thin porcelain |
| Acceptable contact locations | “Porcelain contacts OK” or “Avoid porcelain contacts in centric” tells the lab whether porcelain occlusion is viable or metal needs to be left |
| Space limitations | “Limited clearance mesial groove – metal preferred” flags problem areas before fabrication starts |
If the Rx just says “PFM crown #19,” the lab has to make assumptions. When those assumptions do not match what the dentist intended, the crown comes back and does not work. Not because the preparation was wrong, but because the design brief was incomplete.
A one-line example that works:
“PFM crown #19, metal occlusal surface, moderate bruxism, opposing natural #30, porcelain contacts not acceptable in excursions, chamfer margin 0.5 mm subgingival.”
Regulatory surveys of U.S. jurisdictions have found that a dentist-written work authorization is required for cases sent to a laboratory. Field discussions among clinicians and technicians echo the same point: the more specific the Rx, the fewer remakes.
The Trickiest Tooth to Prep: Second Molars
Second molars are harder than first molars for three reasons:
- They are shorter (less clinical crown height after the preparation).
- Access is limited (harder to see the distal margin and the uniformity of the reduction).
- They often have plunging cusps: steep, pointed anatomy that makes uniform reduction difficult.
If you are struggling with a second molar prep:
- Spend extra time on the distal occlusal reduction. That is the area most often left under-reduced.
- Use a tapered diamond rather than a football bur on steep cusps; it is easier to control on steep slopes.
- Verify with a provisional. Second molar provisionals reveal under-reduction faster than any other method because the crown height is already compromised.
What to Avoid
1. Do Not Over-Reduce
Excessive occlusal reduction carries its own risk profile:
- shortens the clinical crown and reduces retention
- increases taper and reduces retention further
- can approach or injure the pulp in a vital tooth
Clinical evaluations of crown preparations suggest that loss of retention is more directly associated with over-reduction, excessive taper, or inadequate axial wall height than with under-reduction of the occlusal surface.
2. Do Not Prep a Flat Occlusal Surface
A flat, featureless preparation makes it hard for the lab to shape functional anatomy in metal without leaving the framework dangerously thin in the grooves. Preserve cuspal inclines und developmental grooves even after reduction. The framework follows the preparation form; if the prep is flat, the framework will be weak.
3. Do Not Make the Margin Deeper Than Needed
Subgingival margins are sometimes required (for esthetics on anterior teeth, or to reach sound tooth structure after caries removal), but going more than 0.5 mm subgingival on posterior teeth makes impressions harder, raises the risk of gingival inflammation, and does not improve the prognosis. Equigingival or slightly subgingival is enough for most posterior PFM margins. See complete cast crown preparation references for standard margin placement guidance.
4. Do Not Skip the Excursive Check
A crown can have acceptable clearance in centric and still fracture in the first week because of a lateral interference. Verify clearance in left lateral, right lateral, and protrusive movements before you finalize the prep.
Is There an Upper Limit on Porcelain Thickness?
Yes. Porcelain thicker than about 2.0 mm without metal support is at higher risk of fracture. This can happen when:
- the preparation is over-reduced (giving the lab excess space), and
- the lab builds thick porcelain to restore contour.
The porcelain looks good, but under load it can fracture internally because there is no supporting metal beneath. The dimension guidance for PFM preparations is consistent on this point.
Ideal porcelain thickness over metal: 0.8–1.2 mm. If you need more bulk than that to restore anatomy, you are either:
- over-reducing (cut back on reduction), or
- using the wrong material (consider full-contour zirconia if you need thick bulk and cannot reduce further).
The target is not “reduce as much as possible.” It is reduce just enough to fit the restoration (1.5–2.0 mm for a PFM) and no more.
When PFM Is (and Is Not) a Good Fit
PFM crowns remain a durable option for posterior teeth. They work well when:
- esthetics matter, but not at the level of an anterior central incisor
- the patient has a moderate bite force
- the opposing dentition is natural tooth or another metal-ceramic restoration
- cost is a consideration
iStar Dental Lab makes PFMs across the full range of common prescriptions. If you want porcelain occlusion, metal occlusion, a metal island, or a specific framework alloy, write it on the Rx and we will build to that spec. If clearance is marginal, flag it on the Rx and we will contact you before fabrication rather than guess.
PFM is less suitable when:
- the patient is a heavy bruxer or clencher. Porcelain is at risk of fracture over time; full-cast gold or monolithic zirconia may be a better long-term fit.
- occlusal space is severely limited (less than 1.0 mm). Either reduce further or choose a thinner material.
- the tooth is highly visible and esthetic demands are high; all-ceramic may be preferable.
- the opposing arch is zirconia or another very hard material. PFM porcelain can wear the opposing restoration or chip under load.
Material selection depends on the case. When PFM is the right fit, the preparation and communication have to be right or the case will not last. For a more patient-facing overview of crown materials, Cleveland Clinic maintains a lay-language reference that pairs well with chairside case acceptance conversations.
A Real-World Benchmark
A U.S. practice-based study of 1,777 crown preparations found that when operators were asked to aim for 2.0 mm occlusal reduction:
- 66% chose 2.0 mm
- 25% chose 1.5 mm
- 9% chose more than 2.0 mm
But post-prep measurements showed that more than 47% of preparations had inadequate occlusal clearance, even when the operator intended to meet the guideline.
That gap between intention and result is why verification matters. Depth-cut burs give you a starting point. The provisional, articulating paper, and ball-burnisher check give you confirmation. Without verification, nearly half the cases fall short of the target the operator believed they had reached.
Related clinical commentary on preparation form and finishing can be found in Dentistry Today’s paradigm review of tooth preparation, and more process-level walkthroughs appear in step-by-step PFM preparation descriptions und PFM preparation requirement references.
All-Metal Occlusion for Heavy Grinders
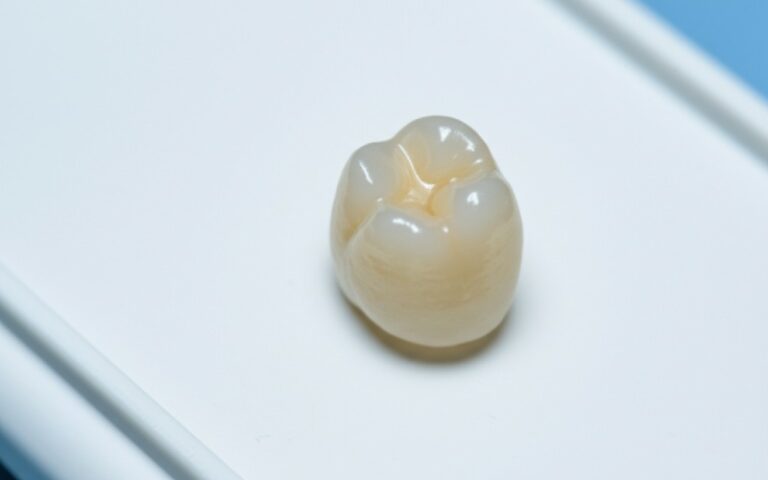
If a patient is a known bruxer or clencher, or if you are restoring a second molar with limited clearance, you can specify an all-metal occlusal surface (sometimes called a metal island or metal bite stop). The buccal, lingual, and proximal surfaces get porcelain for esthetics; the occlusal surface stays polished metal.
Advantages:
- metal can be thinner (1.0–1.5 mm vs 1.5–2.0 mm for porcelain)
- no risk of porcelain fracture on the loaded surface
- metal wears the opposing tooth more slowly than porcelain does
On the Rx: “Metal occlusal, heavy bruxism” or “Leave metal occlusal surface, limited clearance.” Do not assume the lab will know from the model alone.
Some patients object to seeing metal when they open wide, but most accept it on second molars, where visibility is low and durability is the priority.
The layered construction of a metal-ceramic restoration is described in Pocket Dentistry: Metal–ceramic crowns.
FAQ about Occlusal Reduction for PFM Crowns
Can I use a PFM if the prep margin is equigingival?
Yes. Equigingival margins are acceptable for PFM crowns as long as the margin is on sound tooth structure. Subgingival placement is preferred for esthetics on visible teeth, but it is not required for posterior restorations.
What is the difference between a “facing” and a full PFM?
A facing (or window PFM) has porcelain on the visible (typically buccal) surface. Lingual, occlusal, and proximal surfaces are metal. This was more common decades ago. A standard full PFM has porcelain on all five surfaces (buccal, lingual, mesial, distal, occlusal), or in the case of metal occlusion, four porcelain surfaces with the occlusal left as metal.
How much clearance do I need if the opposing tooth is zirconia?
Still 1.5–2.0 mm for the PFM. However, porcelain-on-zirconia is an aggressive contact; the zirconia is harder than enamel and can accelerate wear or chipping of the PFM porcelain. Consider an all-metal occlusal surface or choose a different material (such as zirconia-on-zirconia).
What if I realize I did not reduce enough after I have already taken the impression?
If you catch it before you send the case, the safest option is to re-prep at the next appointment. If the case is already at the lab and insufficient clearance is flagged, the lab will typically contact the clinician to discuss options (adjust opposing, accept metal occlusion, or re-prep). Trying to “make it work” with thin porcelain often ends in a remake later.
Can I place a PFM on a tooth with a post and core?
Yes, as long as there is adequate ferrule (at least 1.5–2.0 mm of sound tooth structure coronal to the finish line). The PFM preparation does not change, but retention and resistance become more critical when the tooth is non-vital. Make sure the axial walls are tall enough and the taper is controlled.
How does the clinical target differ from a licensure exam rubric (ADEX/CDCA)?
Licensure exam rubrics tend to allow a wider acceptable range for reduction depth and margin placement. The ranges on an exam are designed to pass competent candidates, not to describe an ideal clinical outcome. In day-to-day practice, aim for the tighter end of the range (closer to 2.0 mm occlusal reduction, not 1.5 mm) to give the lab and the restoration the fullest chance of success.
What should the written prescription actually say if space is tight?
A format drawn from standard occlusal reduction guidance und general crown preparation overviews that works for both us and the clinician: “PFM crown, porcelain occlusion; minimum 1.5–2.0 mm clearance required in centric and excursions. Metal occlusal island acceptable if space is inadequate. Do not reduce antagonist without authorization; contact doctor if clearance is insufficient.”
Summary
Occlusal reduction for a PFM is not just about hitting 1.5–2.0 mm with a depth-cut bur. It is about:
- checking occlusion before you start (MIP vs CR)
- verifying uniform clearance before you scan or impress (provisional, articulating paper, ball burnisher, or digital distance map)
- knowing what to do when clearance is limited (adjust opposing, add reduction, metal occlusal, or change material) and deciding before the case goes to the lab
- writing a complete Rx (metal vs porcelain occlusion, opposing material, bruxism, contact preferences, space limits)
- prioritizing functional cusps (where fractures actually happen) over non-functional cusps
The number, 1.5 to 2.0 mm, is a starting point. What makes the case succeed is verifying that number in the right position, at the right moment, and communicating what you found (and what you need) to the lab.
When a PFM comes back and works the first time, it is not luck. It is the result of a preparation that had the space it needed, a check that confirmed it, and an Rx that told the lab what to build.
Haftungsausschluss: The content provided is general information on crown preparation techniques and lab-side workflow. It is not a substitute for professional clinical judgment or formal training. All clinical decisions, including material selection, reduction depths, and patient-specific modifications, remain the sole responsibility of the attending dentist. iStar Dental Lab accepts no responsibility for clinical outcomes arising from the information provided.